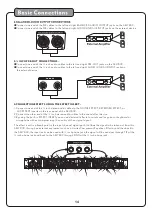
Microphone/instrument input connections
After completing your main system connections, it is time to get your microphones and instruments connected
and ready for performing. Before you get started with your connections we recommend that you take the
following tips into consideration:
●
When connecting instruments, refrain from using low quality or worn cables as they can cause significant
noise and loud pops, posing a threat to the system's speakers.
●
Use caution when connecting a chain of multiple effects pedals, as the output voltage may change and
possibly overload the
C input channel.
AKJ780
The
C has one guitar (¼
), one keyboard (¼
) and two microphone (¼
/XLR) inputs.
AKJ780
inch
inch
inch
1.
To connect MICROPHONES via ¼
mic cables, connect the XLR-end of the cable into the MICROPHONE
inch
until it locks into place and connect the ¼
plug into either the MIC 1 or 2 jack on the
C.
inch
AKJ780
2.
To connect MICROPHONES via XLR mic cables, attach the XLR “female” end of the cable into the
“male” three prong jack located at the base of your handheld MICROPHONE until it locks into place.
Then connect the XLR “male” jack at the other end of the cable into either of the BALANCED MIC 1 or 2
inputs on the
rear panel. It should be obvious which sides of your XLR cable are male and
AKJ780C
female as there is only one possible connection.
3.
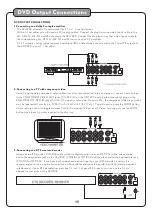
To connect a GUITAR, connect a ¼
instrument cable from the GUITAR's ¼
output to the
¼
inch
inch
inch
AKJ780C
GUITAR input.
4.
To connect a KEYBOARD, connect a ¼
instrument cable from the KEYBOARD's ¼
output to the
inch
inch
¼
KEYBOARD input.
AKJ780C
inch
Headphones connections
What you will need
Headphones with a ¼ inch connector at the
other end of the cable (not included).
.Connect the connector of the headphones
to the ¼ inch HEADPHONES output on
the front panel of the AKJ780C.
1
●
16
VCD
L R
To KEYBOARD
To GUITAR
VCD
L R
AKJ780C Recordable & Wireless All-in-one Karaoke/ PA System
A
/
B
/
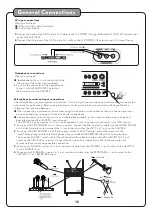
AV input connections
1.
2.
What you will need
3 RCA-style A/V cable (included)
2 A/V output Device
Connect one end of the 3 RCA-style A/V cable to the A/V VIDEO/L/R input labeled AV1/AV2/AV3 on the front
panel of the
.
Connect the other end of the 3 RCA-style A/V cable to the A/V VIDEO/L/R output on an A/V output Device.
●
●
AKJ780C


