ENGLISH
5
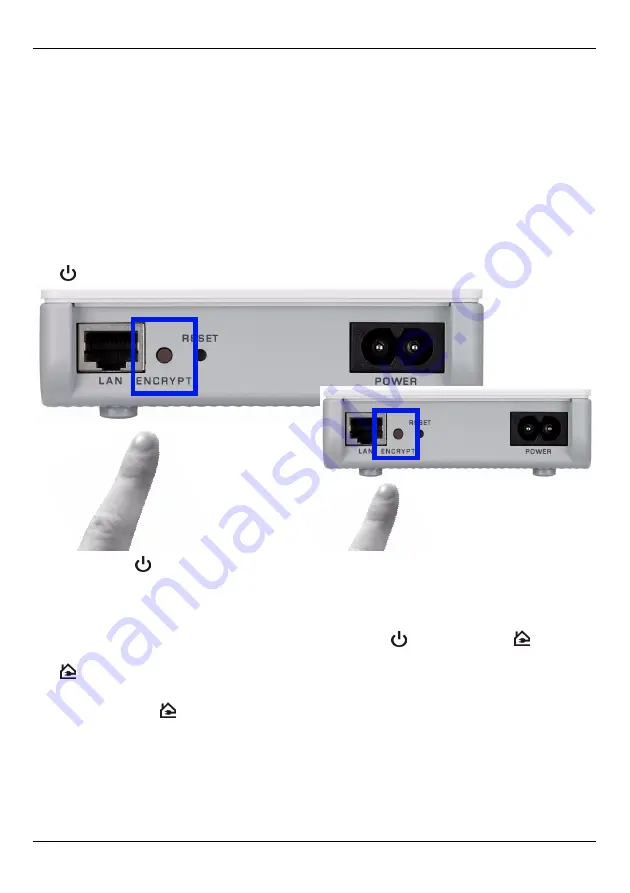
3 Set Up a HomePlug AV Network with ENCRYPT
After connecting your HomePlug AV adapters, use the
ENCRYPT
button to set up a secure
connection between your PLA-400 v2s.
1
Place the PLA-400 v2s close to each other, so you have time to set up each one. After
you set up the first PLA-400 v2, you have 120 seconds to set up the second PLA-400
v2.
• You can disconnect them from the computer or modem (or other networking product) if you
need to, but the PLA-400 v2s need to be plugged into power outlets.
2
Press the
ENCRYPT
button at the rear of your PLA-400 v2 for 1-2 seconds. The power
(
) light will blink as the PLA-400 v2 tries to set up a connection.
• If the power (
) light does not blink, you have probably pressed the
ENCRYPT
button for
too long. Try again, pressing the
ENCRYPT
button for 1-2 seconds.
3
Repeat step 2 in this section for the other PLA-400 v2 you wish to connect. This must
be done within 120 seconds of pressing the
ENCRYPT
button on the first PLA-400 v2.
4
Check the lights on the two PLA-400 v2s. The power (
) and HomePlug (
) lights
should be blinking. Occasionally all lights may blink at the same time and the HomePlug
(
) light may also show red. Wait for roughly one minute while your PLA-400 v2s
connect.
• If the HomePlug (
) lights on both PLA-400 v2s do not light up, the PLA-400 v2s are not
connected. Repeat steps 2 and 3 in this section. If that doesn’t work, use the PLA-4xx
Series Configuration Utility. See the User’s Guide for more information.
5
To add more PLA-400 v2s to your network, repeat steps 2 and 3 in this section using a
PLA-400 v2 connected to your HomePlug AV network and the PLA-400 v2 you want to
add to the network.
1...2
1...2
Содержание PLA-400 v2
Страница 7: ...ENGLISH 7...
Страница 13: ...DEUTSCH 13...
Страница 19: ...ESPA OL 19...
Страница 25: ...FRAN AIS 25...
Страница 31: ...ITALIANO 31...
Страница 33: ...33 1 PLA 400 v2 1 Ethernet LAN A PLA 400 v2 Ethernet B 2 PLA 400 v2 3 Ethernet V A B...
Страница 37: ...37...
Страница 43: ...SVENSKA 43...


