


9
Connecting the cables
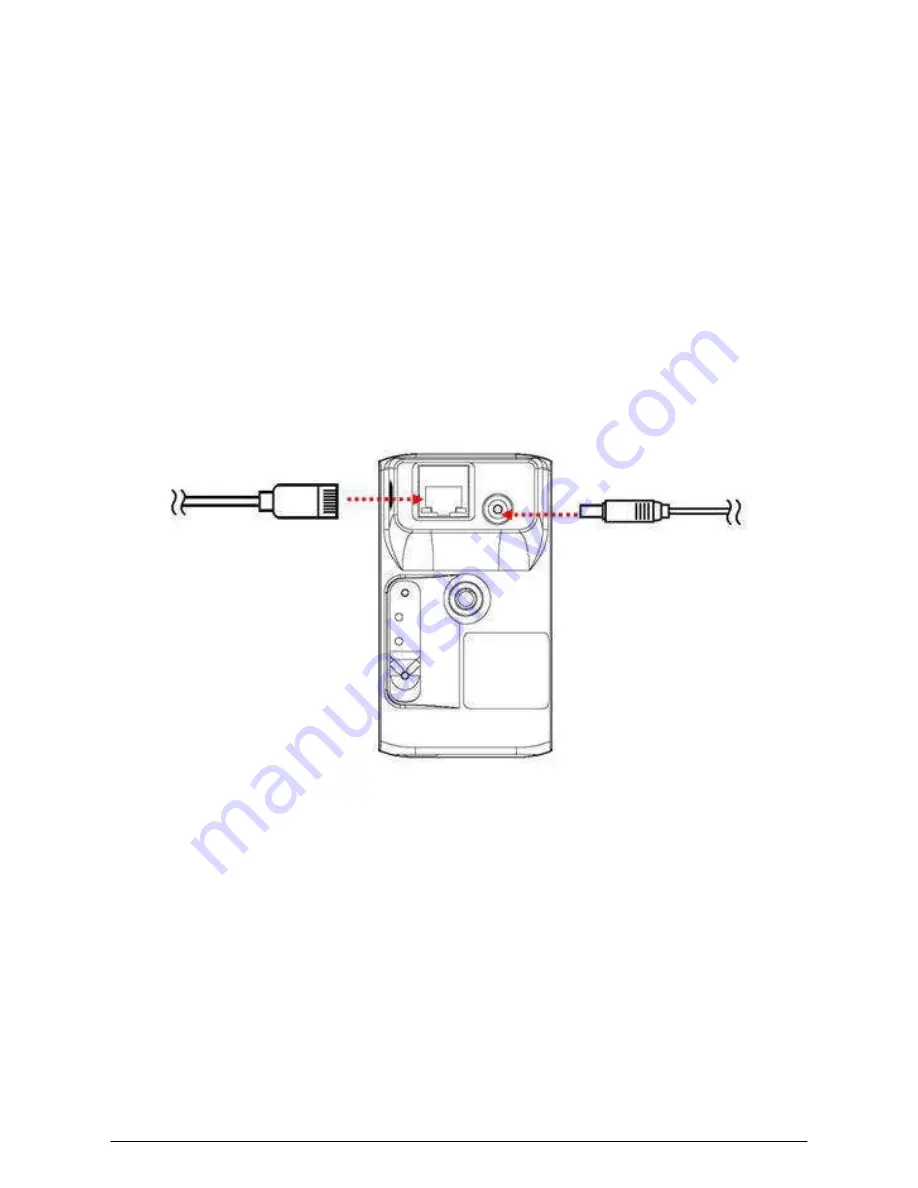
Connecting the Ethernet cable
Use the RJ-45 type Ethernet cable to connect the camera to your local area
network (LAN).
Plug one end of the Ethernet cable to the Ethernet port on the bottom panel of the
camera and the other end to an active port on the switch/router of the network.
Connecting the DC power adapter*
Plug the AC power adapter cable to the DC power input on the bottom panel of the
camera and the power plug to the wall socket.
The camera will be powered on automatically when you connect the AC power
adapter. The power status can be indicated from the LED on the back panel of the
camera.
Connecting the
Ethernet cable
Connecting the power
adapter
WPS Setup
Connect the DC power adapter to camera to power on. The power status can be
indicated from the LED indicator
1. After the WPS LED indicator unlighted, press the WPS button on your wireless
router or access point.
2. Press WPS button on the back of the camera. The camera will automatically
create a wireless connection to your router (around 30 seconds). While
connecting, the WPS LED indicator will blink quickly every 0.3 sec. If link
success, the LED will present steady red, otherwise slower blink every 1 sec.
3.
You can find camera listed in the camera table from SearchUtility tool installed
and
launched in your computer


