Zycoo UC510 Скачать руководство пользователя страница 5

2.4 LED Definitions

Indication     Function                              Status                        Explaination

Power Status

On
Off
On
Off
200ms Blink
100ms Blink

Power On
Power Off
WSC Succeeded(Off after 300s )
WPS Ready or Disabled
WSC Running
WSC Failed
Data Transport

Blink
Off

Wireless Status

FXO

FXS


3G/4G Status

(UC520 support)

Blink
Off
On
Off
On
Off
On
Off

Wi-Fi

1

2

3G/4G

On

Blink

Off

Disconnected
Data Transport
Disconnected
Wi-Fi enabled
Wi-Fi disabled

Module Works

Module Loading Succeeded 
or Data Transport
No Module, or No SIM card, 
or Not Working

LAN(

1..2..3..4) 

Data Status


3   Basic System Configuration

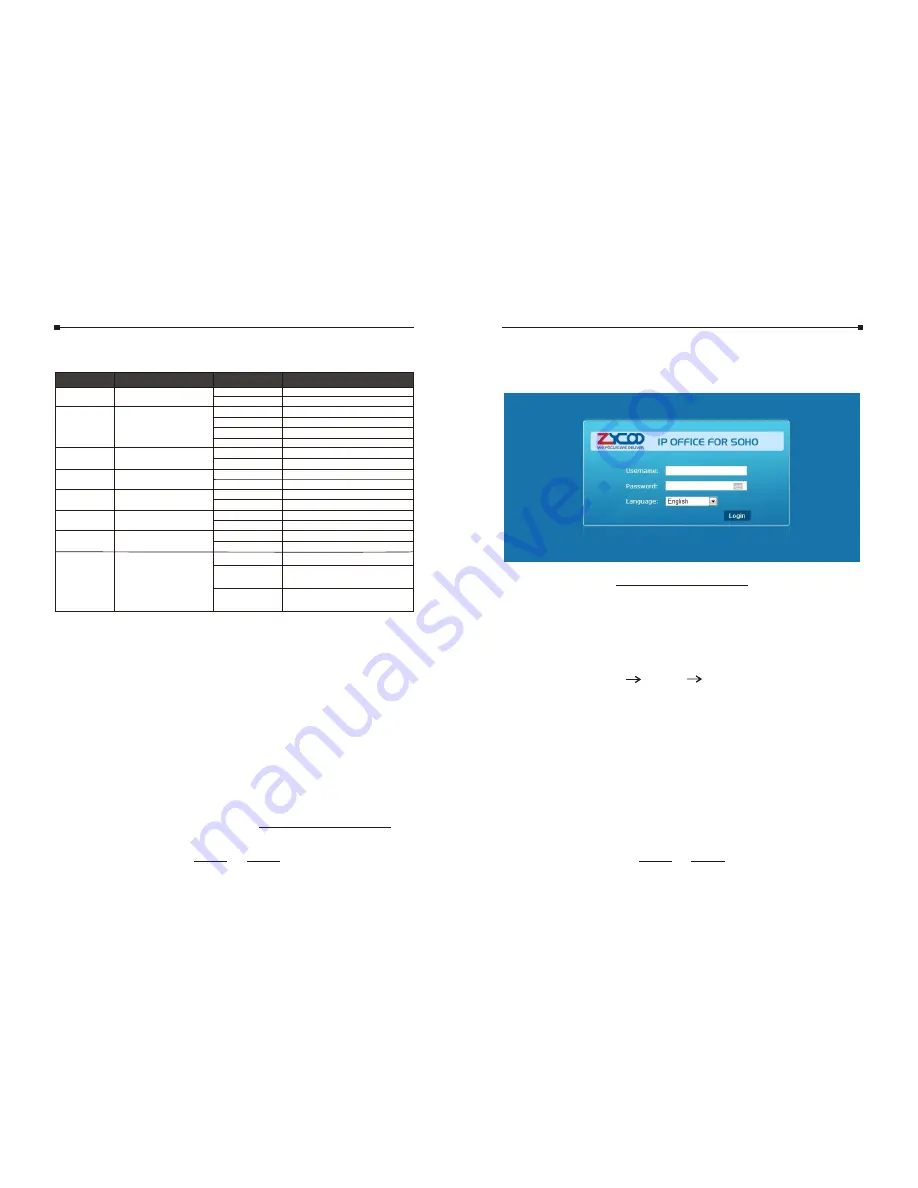
Step 4.  Enter  the  default  address  “http://192.168.1.1:9999”  of 

the UC510 into the browser.

Step 1.  Connect  the  network  cable  to  the  UC510  WAN  port. 

Network connection mode of WAN port is DHCP by default.

Step 3.  Start  a  web  browser:  Internet  Explorer  (version  7.0  or 

higher), Firefox or Chrome.

Step 2.  Connect a computer and the UC510 LAN port in the same 

network.  Ensure  IP  address  of  computer  is  in  the 
192.168.1.X segment. Default IP of UC510 is 192.168.1.1.

3.1 Web Login

Step 5. 

Enter  the  default  username(admin)  and  password 
(admin).  Then  click  “Login”  to  enter  the  graphic  user 
interface to set.

Default URL address: http://192.168.1.1:9999
Default Username: admin
Default Password: admin

Channel Loading Succeeded
ChannelLoading Failed
Channel Loading Succeeded
Channel Loading Failed

PWR

WPS

WAN

LAN

WPS Status

WAN Data Status

3.2 Network Configuration

Go to 

Router Gateway       Internet     WAN

It supports several modes for internet connection: PPPoE(ADSL)/ 
DHCP(Auto config) /STATIC(fixed IP)/ LTE(for UC520 only).

3.2.1 PPPoE(ADSL):

WAN Connection Type: Select “PPPoE(ADSL)”

09

08

Содержание UC510

Страница 1: ...IP Office for SOHO UC510 UC520 www zycoo com Quick Installation Guide Quick Installation Guide e 1 2 3 4 IP Office for SOHO ...

Страница 2: ...iguration 3 3 PBX Configuration 3 4 Reset to factory 4 Further Configuration Table of Contents 03 1 Package Contents WarrantyCard Power Cord IP Office for SOHO Thank you for purchasing ZYCOO IP Office for SOHO These are the items included with your IP Office for SOHO purchase QuickInstallation Guide 03 04 04 07 07 08 08 08 09 12 15 15 e 1 2 3 4 IP Office for SOHO 3G LTE Antenna for UC520 Only ...

Страница 3: ...rmal operation and long service life of the device please install it in an environment that meets the requirements described in the following subsection Please keep a proper temperature and humidity in the equipment room Too high low humidity may lead to bad insulation electricity leakage mechanical property changes and corrosions Too high temperature may accelerate aging of the insulation materia...

Страница 4: ...odily injury caused by improper use please obey the following requirements for installation and maintenance 2 2 Product Installation Module Installation This IP Office for SOHO can support two analog ports whose combinations are as follows 2FXO 1FXS 1FXO e 1 2 3 4 IP Office for SOHO PHONE LINE LAN4 LAN3 LAN2 LAN1 WAN USB2 USB1 Turbo The module is default installed in the device before releasing fr...

Страница 5: ... Network connection mode of WAN port is DHCP by default Step 3 Start a web browser Internet Explorer version 7 0 or higher Firefox or Chrome Step 2 Connect a computer and the UC510 LAN port in the same network Ensure IP address of computer is in the 192 168 1 X segment Default IP of UC510 is 192 168 1 1 3 1 Web Login Step 5 Enter the default username admin and password admin Then click Login to en...

Страница 6: ...automatically no need to configure anything 3 2 3 STATIC fixed IP WAN Connection Type Select STATIC fixed IP You need to input the fixed IP address subnet mask gateway and DNS Server 3 2 4 LTE LTE is default supported by UC520 only WAN Connection Type Select LTE You need to input the username and passport provided by the ISP Internet Service Provider Then dial up to the internet by the equipment I...

Страница 7: ...n Settings Extension The certified number for registration Password The password for registration Step 2 Go to PBX Extensions Trunk Trunk Settings Create FXO trunks to connect to PSTN network Step 3 Go to PBX Extensions Outbound Routes DialRules Configure DialRule 13 12 ...

Страница 8: ...OO Co Ltd 2014 All Rights Reserved 3 4 Reset to factory Recovery configuration files When a system failure occurs you can reset the system to factory default by pressing the turbo button for 5 seconds only Recovery whole system Press the turbo button for 5 seconds when the device is power on the system will be in recovery mode to be restored Step 4 Go to PBX Extensions Outbound Route DialPlans Con...

Отзывы: