background image


LCT-1631A Manual V1.0 

17 

Encoder Setup Menu


LCN

-

Use the Scroll Up/Down button to set LCN. Press the OK button to enter The LCN menu. 

Use the Scroll Up/Down to set the LCN, ranging from 1 to 999. Press OK to set. Factory default: 
101.


Channel Name


– 

Use the Scroll Up/Down button to select Channel Name. Press the OK button 

to enter the Channel Name menu. Use the Scroll Up/Down menu to select the first character of 
the desired Channel Name then press the OK button to set. Repeat the process until the Channel 
Name  is  completed.  Factory  Default:  CHANNEL-1.  A  Channel  Name  can  consist  up  to  16 
characters.


Provider Name


– 

Use the Scroll Up/Down button to select Provider Name. Press the OK button 

to enter the Provider Name menu. Use the Scroll Up/Down menu to select the first character of 
the desired Provider Name then press the OK button to set. Repeat the process until the Provider 
Name is completed. A Provider Name can consist up to 16 characters.


Video Input


– 

U

se the Scroll Up/Down button to select Video Input. Press the OK button to enter 

the  Video  Input  menu.  Use  the  Scroll  Up/Down  button  to  select  the  Video  Input  option:  Auto 
Detect,  HDMI,  Component,  or  Composite.  Press  the  OK  button  to  set.  Factory  default:  Auto 
Detect.


HD Bitrate


– 

Use the Scroll Up/Down button to select HD Bitrate. Press the OK button to enter 

the  HD  Bitrate  setup  menu.  Use  the  Scroll  Up/Down  button  to  select  the  desire  HD  Bitrate 
ranging from 12.0~24.0 Mbps. Press the OK button to set. Factory default: 24.0 Mbps.


SD Bitrate


– 

Use the Scroll Up/Down button to select SD Bitrate. Press the OK button to enter 

the SD Bitrate Input menu. Use the Scroll Up/Down button to select the desire SD Bitrate ranging 
from 1.0~9.0 Mbps. Press the OK button to set. Factory default: 4.0 Mbps.


Program Number


– U

se the Scroll Up/Down button to select Program Number. Press the OK 

button to enter the Program Number menu. Use the Scroll Up/Down button to select the desired 
Program  Number  ranging  from  1  to  65534  then  press  the  OK  button  to  set.  Factory  default  is 
00001.


HDCP (Test Mode)


– 

Use the Scroll Up/Down button to select the HDCP menu. Press the OK 

button to enter the HDCP menu. Select Enable / Disable and press OK to set.


NOTE:


It is the installers / property owner / integrator's responsibility to contract with the service 

provider regarding content authorization and the use of HDCP.


Closed Caption


– 

Use the Scroll Up/Down button to select the Closed Caption menu. Press the 

OK button to enter the Closed Caption menu. Select Enable / Disable and press OK to set.


Audio  Input


–  Use the  Scroll  Up/Down  button to  select  Audio  Input.  Press the  OK  button  to 

enter  the  Audio  Input  menu.  Use  the  Scroll  Up/Down  button  to  select  the  Audio  Input  option: 
Auto Detect or Analog. Press the OK button to set. Factory default: Auto Detect.


Audio Output


– Use the Scroll Up/Down button to select Audio Output. Press the OK button to 

enter the Audio Output menu. Use the Scroll Up/Down button to select the Audio Output option: 
MPEG1 Layer2, MPEG4 AAC, AC-3. Factory default: MPEG1 Layer2. Press the OK button to 
set.


EXIT 

– Select EXIT to escape the Encoder Setup Menu.


Содержание LCT-1631A

Страница 1: ...igital Modulator User Guide and Installation Manual ZyCast Technology Inc No 33 Lane 181 Chung Hwa Road Section 4 Hsin Chu Taiwan 30060 Tel 886 3 5400 949 Fax 886 3 5400 413 Australia NZ contact 61448100429 www zycast com tw ...

Страница 2: ...8 1 9 7 Encoder Programming and Setup via GUI Interface 8 Step 1 Enter Device s IP address in web browser 8 Step 2 Enter User Name Password 8 Step 3 Encoder Setup 9 Step 4 RF Output Setup 11 Step 5 Network Configuration 12 Step 6 Administration 13 Front Panel Control 15 LCD Password 15 LCD Setup Menu Map 15 Modulator Configuration via Front Panel LCD 16 RF Setup Menu 16 Encoder Setup Menu 17 Netwo...

Страница 3: ...e the manufacturer s warranty DO NOT connect the power cord to the device if the power cord is damaged DO NOT cut the power cord DO NOT plug the power cord into an AC outlet until all cables and connections to the device have been properly connected The device should be installed in an environment consistent with its operating temperature specifications Placement next to heating devices and ducts ...

Страница 4: ... Modulator is perfect for multi video distribution solutions in the commercial and institutional market hotels motels sports bars restaurants hospitals casinos business and university campuses digital signage etc as well as home entertainment systems Features HDMI Component Composite Inputs RF Output Gain Control 20dB Manual Attenuation RJ 45 port for Web Management Video resolution Up to 1080i 10...

Страница 5: ...DVB T HD 12 0 to 24 0Mbps SD 4 0 to 9 0Mbps Resolution Output Same as Input Accepting Resolution as Follows 1080p30 1080p25 1080i60 1080i50 720p60 720p50 576p 480p 576i 480i Audio Audio Codecs MPEG1 Layer II MPEG4 AAC AC 3 Encode Optional Output Standard DVB T Connector 1x F Female Output Level 95 dBµV Typical With 20dB Range Manually Adjustable Flatness Across Full Band 2 dB Typical MER 38 dB Typ...

Страница 6: ...66 Mbps FEC 7 8 LCN Mode AU NZ OFDM Mode 2k 8k Guard Interval 1 32 General Local Monitoring LCD Web GUI Supported Firefox Chrome Password Protected GUI User Settable Power Supply 12VDC 1 5A Consumption 5W Operation Temperature 0 C to 55 C Storage Temperature 20 C to 70 C Dimension Housing 236 L x 145 W x 34 H mm Weight TBD Language English Specifications subject to change without notification Dolb...

Страница 7: ...e video inputs The modulator is intelligently designed to detect the video input from the video source HDMI Connection Connect the HDMI cable from the video source into the HDMI input If using a Component Video Cable connect the Y Green Pb Blue and Pr Red video source cable to the unit s Component input port If using a Composite Video source use RCA connectors to connect the video source e g CATV ...

Страница 8: ...Device s IP address in web browser Overview page shown the encoder s status and information as above Step 2 Enter Username Password Select Encoder Setup After selecting the Encoder Setup Tab the user will be prompted to enter the username and password for device GUI Login Password Default Username admin Default Password Admin123 Note To change the Password for the GUI go to the Administration Tab ...

Страница 9: ...omponent or Composite Factory default Auto Detect HD Bitrate HD Bitrate range 12 0 24 0 Mbps Factory default 24 0 Mbps SD Bitrate SD Bitrate range 4 0 9 0 Mbps Factory default 4 0 Mbps Program Number Program Number range 1 to 65534 Factory default is 1 HDCP Test Mode Select to Enable Disable NOTE It is the installers property owner integrator s responsibility to contract with the service provider ...

Страница 10: ...anges made will be show in the applet window see below example Select Submit Note To reset all changes made or saved go to the Administration Page and select Reset to Default Leaving the encoder page without saving changes will cause the previous settings to be used If the unit is outputting video to the system there will be a brief delay in the video while the parameters are saved ...

Страница 11: ...fault ZyCast RF Output RF output option Normal or Inverted Factory default is Normal Channel Frequency Factory default is 39 606 5000MHz Constellation The Constellation is default 64 QAM FEC The FEC is default 7 8 Guard Interval The Guard Interval is default 1 32 OFDM Mode OFDM Mode option 2k or 8k Factory default is 8k CELL ID The CELL ID is default 0 Save and Confirm all changes settings on RF O...

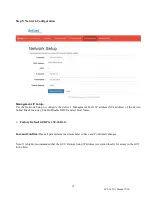
Страница 12: ... IP address GUI address of the device Subnet Mask Gateway Enable Disable DHCP and set Host Name Factory Default GUI IP is 192 168 1 9 Save and Confirm Once all parameters are set remember to Save and Confirm all changes Note It is highly recommended that the GUI Remote Setup IP address is recorded locally for access to the GUI in the field ...

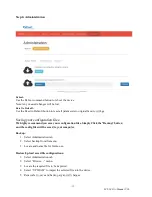
Страница 13: ...e highly recommend you save your configuration files Simply Click the Backup button and the config files will be saved to your computer Backup 1 Select Administration tab 2 Select backup from the menu 3 Locate and name file for future use Restore Upload saved file configurations 1 Select Administration tab 2 Select Browse menu 3 Locate the required file to be imported 4 Select UPLOAD to import the...

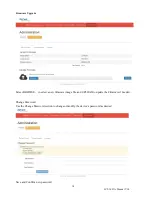
Страница 14: ...e Upgrade Select BROWSE to select a new firmware image file and UPLOAD to update the Firmware if needed Change Password Use the Change Password section to change or modify the device s password as desired Save and Confirm new password ...

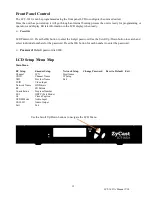
Страница 15: ...sword Use the Scroll Up Down button to search and select individual numbers for the password Press the OK button for each number to enter the password Password Default password is 0000 LCD Setup Menu Map Main Menu RF Setup Encoder Setup Network Setup Change Password Reset to Default Exit Channel LCN Host Name ONID Channel Name IP Setup NID Provider Name Exit TSID Video Input Network Name HD Bitrat...

Страница 16: ...ess the OK button to enter the NID menu Use the Scroll Up Down button to select the desired NID ranging from 1 to 65535 then press the OK button to set Factory default is 12801 TSID Use the Scroll Up Down button to select TSID Press the OK button to enter the TSID menu Use the Scroll Up Down button to select the desired TSID ranging from 1 to 65535 then press the OK button to set Factory default i...

Страница 17: ...K button to set Factory default 24 0 Mbps SD Bitrate Use the Scroll Up Down button to select SD Bitrate Press the OK button to enter the SD Bitrate Input menu Use the Scroll Up Down button to select the desire SD Bitrate ranging from 1 0 9 0 Mbps Press the OK button to set Factory default 4 0 Mbps Program Number Use the Scroll Up Down button to select Program Number Press the OK button to enter th...

Страница 18: ... then press the OK button to set Repeat the process until the IP Address is completed Press the OK button to set Subnet Mask Use the Scroll Up Down button to enter the Subnet Mask Use the Scroll Up Down menu to select the first number of the desired Subnet Mask then press the OK button to set Repeat the process until the Subnet Mask is completed Press the OK button to set Default Gateway Press the...

Страница 19: ...LCT 1631A Manual V1 0 19 Distributed by ...

Отзывы: