


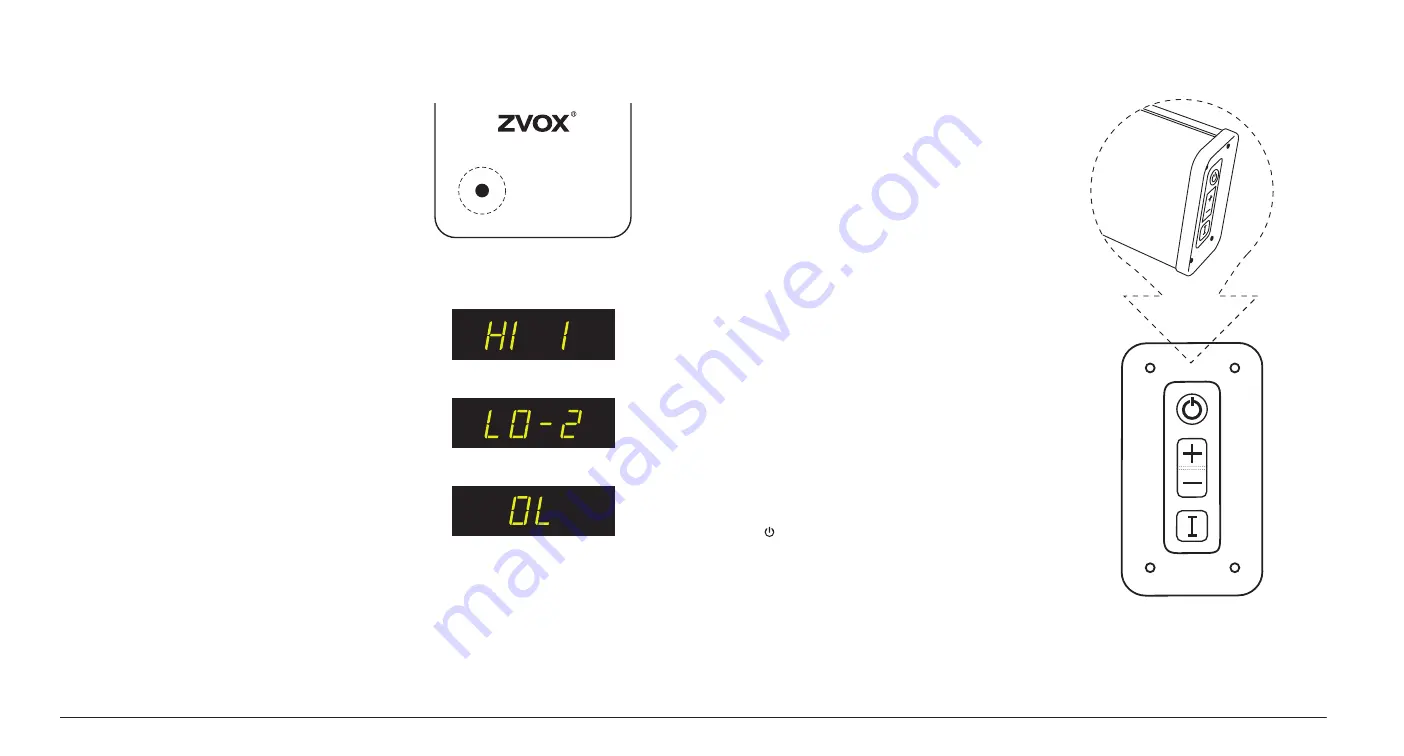
Other Settings Button
The
Other Settings
button allows Bass and Treble adjust-
ment and turns Output Leveling On and Off.
1) Bass Adjustment: The first press of the Other Settings but-
ton displays the current Bass setting. The range of bass ad-
justment goes from LO 4 to LO-6 (This display is shorthand
for Lows plus 4 and Lows minus 6). Use the volume buttons
to adjust the bass output across this range. Then wait for the
adjustment display to turn off.
2) Treble Adjustment: A second press of the Other Settings
button displays the current Treble setting. (The range of
treble adjustment is HI 4 to HI-4. That is shorthand for Highs
plus 4 and Highs minus 4). Use the volume buttons to adjust
the bass output across this range. Then wait for the adjust-
ment display to turn off.
3) Output Leveling: A third press of the Other Settings button
displays the Output Leveling feature. The display will be ei-
ther OL (Output Leveling engaged) or noOL (Output Leveling
off). Use the volume buttons to turn Output Leveling on or
off. Then wait for the adjustment display to turn off.
When engaged, Output Leveling prevents large swings in
volume. It also reduces volume differences between TV
channels on cable or satellite systems.
A fourth press of the Other Settings button returns you to the
current volume setting and exits Other Settings adjustment.
OTHER
SETTINGS (PS)
Bass set at -2
Treble set at 1
Output Leveling On
Mute
MUTE
VOLUME
INPUT
MUTE
VOLUME
INPUT
MUTE
VOLUME
INPUT
A
B
C
End Panel Controls on the Soundbar
On the viewer’s right end of the soundbar are four buttons.
A) POWER button:
This button turns the soundbar “ON” if it is in Standby. If this
button pressed briefly while the soundbar is “ON”, it will mute
and unmute the soundbar. To turn off the soundbar, press and
hold down this button for about five seconds.
B)
Volume Up/Down rocker button:
Adjusts volume up and down. Pressing either side of this but-
ton will “unmute” the speaker if it is muted.
C)
Input button:
A brief press and release of the INPUT button selects the next
input in sequence.
Tonal Profile Setting
The soundbar has three settings to better match the acoustics
of its room position.
Face Front......... PS16 - on a flat surface, facing front.
Face Up............. PS17 - on a flat surface, facing up.
Wall mount........ PS18 - on a vertical surface, facing into the
room.
The default setting for the soundbar is Face Front.
If your soundbar’s position is Face Up or Wall mount, you
should select PS17 or PS18 from the PS menu.
PS Menu operation:
You bring up the PS menu by pressing
down on two buttons on the end panel of the soundbar:
Power ( ) and Volume Up (+). After about five to seven sec-
onds, you should see
PS
start flashing. The first time you bring
up the PS menu, it should show “
PS 0
”.
Once you see the PS display, release the buttons. Then press
and release the Volume Up button to increase the PS number.
Continue pressing and releasing the Volume Up button until
you reach the setting you want: PS16, PS17 or PS18.
For further information about the options provided by the PS
menu, see the separate information sheet
Soundbar Adjust-
ment Options
, available online at ZVOX Audio’s website.
8
Remote Control and End Panel - SB380 Soundbar


