background image


Содержание ML-OM-TM14-IN

Страница 1: ......

Страница 2: ... Please attention If you find that there s any problem with our product please contact us without any hesitation before you use it We will answer your questions and resolve your problems within 24 hours ...

Страница 3: ...II ...

Страница 4: ...not use indoors 9 Do not bounce on the trampoline for extended periods of time because fatigue can increase your chances of injury 10 Do not wear hard soled shoes such as tennis shoes on the trampoline as this will cause excessive wear on the mat material 11 Do not smoke eat or drink when using the trampoline 12 Do not consume any alcohol or drugs when using this trampoline 13 Do not have chewing ...

Страница 5: ...asks for at least 1 meter 4 In terms of horizontal clearance please ensure that no hazardous objects are near the trampoline such as tree parts other recreational objects i e swing sets swimming pools electrical power wiring walls fences etc Put Your Trampoline On A Level Surface 1 The trampoline should put on the level ground to make sure the user s safety 2 On level ground the user could get the...

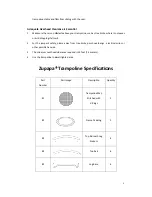
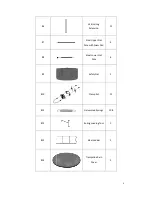
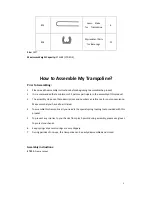
Страница 6: ...user learance Is Essential Make sure there is no obstacle above your trampoline such as tree limbs where is no leaves or bird droppings fall on it please away from tree limbs porch overhangs el The minimum overhead clearance required is 24 feet 7 3 meters Use the trampoline in a well lighted area Zupapa Trampoline Specifications Part image Description Quantity Trampoline Mat Stitched with V Rings ...

Страница 7: ...0 11 12 13 14 Vertical Leg Extension Steel Upper Net Pole with Foam Pad Steel Lower Net Pole Safety Net Clamp Set Galvanized Springs Spring Loading Tool Steel Ladder Trampoline Rain Cover 4 12 6 6 1 12 108 1 1 1 ...

Страница 8: ...is product 3 The assembly steps use these descriptions and numbers as reference for your convenience Make sure that you have all parts listed 4 To assemble this trampoline all you need is the special spring loading tool provided with this product 5 To prevent any injuries to your hands from pinch points during assembly please use gloves to protect your hands 6 Keep springs dry as wet springs are v...

Страница 9: ...djacent section female that has a larger opening These joints are called connector points Slide all Vertical Leg Extensions 6 onto Leg Base 5 as shown resistant parts 16 onto the two sides of the Leg Base 5 All parts with the same part number are interchangeable and have no right or 6 To connect the parts simply slide a section male tubing that is smaller on one end adjacent section female that ha...

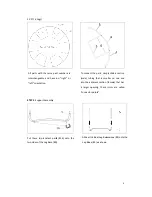
Страница 10: ...n portion of the Support Assembly The other person holds the other end and inserts that portion into the other Support Assembly as shown You should now have 2 Support Assemblies held together Now install the top rails 4 into the gaps between the vertical leg extensions 6 by inserting them into the slots as shown Spring Loading Instruction Attaching the Jumping Mat to the frame to follow instructio...

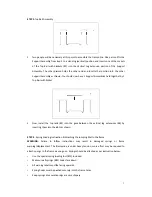
Страница 11: ...ly distributed Use the spring loading tool 12 to attach a spring 11 with spring hooks face down to the v ring of the mat and to the aligned hole of the main frame Lay the jumping mat 1 inside the frame with warning labels facing up Attach a spring into one of the triangle rings on the mat then attach spring Drop hook into frame hole until it latches on completely and tap it down if hook is not com...

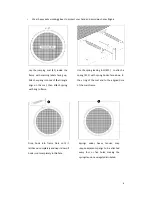
Страница 12: ...padding before each use Do not use trampoline even if one spring or v ring is damaged or If you notice that you have skipped a hole ring connection recount and remove or attach any spring required to maintain the count of springs Lay the Frame Padding over the trampoline so that the springs and the steel frame are covered Please ensure that the Frame Padding covers all metal Tie the strap located ...

Страница 13: ...ave spacer between the trampoline vertical tube and enclosure tube to allow some gap between two tubes for the pad flap If there is no spacer no gap between two tubes of your trampoline to avoid tearing the pad place the pad on the trampoline and keep the flap up around the poles Tie all black webbings which sewn on the inner arc of padding to steel V rings ...

Страница 14: ...tion are required for the following assembly Fold the small gap section to make sure that it won t be jammed between the two tubes Cut a small gap section on pad s flap Starting from the foam tube slide foam tube over pole assembly as shown Repeat We ve done this step Slide upper pole onto lower pole with remaining poles 11 condition are required for the following assembly Fold the small gap secti...

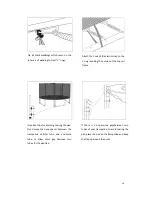
Страница 15: ...with foam into safety enclosure mesh pole jacket in turn Carry gathered mesh poles 7 8 to chosen entrance site on trampoline Assign at least one person to hold gathered mesh poles Bring entrance pole to one leg and hold in place Firmly clamp the lower pole 8 to the upper and the end of the trampoline leg 6 Then fasten the quick clamp by wrenching on the bolt ...

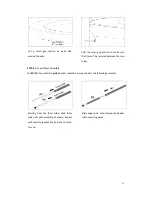
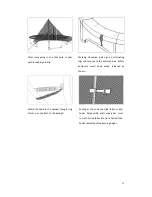
Страница 16: ...ooks Responsible adult supervisor must re zip the slide fastener and re hooks securely before jumping begins Attach the hook to the nearest triangle ring do not attach to the springs After succeeding in the first pole repeat 13 Working clockwise poles go on alternating legs until you reach the entrance area Safety enclosure mesh hook when released as Ending at the entrance slide fastener and hooks...

Страница 17: ...e over to the side of the trampoline and place your hand onto the frame as a support and step from the mat to the ground Smaller children should be assisted when mounting and dismounting the trampoline 5 Initially you should get accustomed to the feel and bounce of the trampoline The focus must be on the fundamentals of your body position and you should practice each bounce the basic bounces until...

Страница 18: ...r other accessories as these will cause excessive wear on the mat material 14 Only one user at a time If you have multiple jumpers more than one person on the trampoline at any one time you increase the chance of getting injured Injuries could occur when you fly off the trampoline lose control collide with the other jumper s or land on the springs 15 When playing on the trampoline stay in the cent...

Страница 19: ...y placard is placed on the trampoline and that jumpers are informed of these warnings and instructions Lesson Plan The following lessons are suggested in order to learn basic steps and bounces before moving onto more difficult complicated bounces Before actually getting on and using the trampoline you should read and understand all safety instructions A complete discussion and demonstration of bod...

Страница 20: ... shoulders in same direction 4 During turn be sure to keep back parallel to mat and head up 5 After completing turn land in front drop position After completing this lesson the student now has a basic foundation of trampoline bounces Jumpers should be encouraged to try and develop their own routines with the emphasis on control and form Player one starts with a maneuver Player two has to do Player...

Страница 21: ...n to erect position by pushing with hands 1 Start with front bounce position 2 Land in prone face down position and keep hand and arms extended forward on mat 3 Push off the mat with arms to return to standing position 1 Start with front bounce position 2 Push off with left or right hands and arms depending on which way you wish to turn 3 Maintain head and shoulders in the same direction and keep ...

Страница 22: ...n cover on it to prolong your trampoline s life when you not going to use it 2 Replace it under a tree can help you to protect your trampoline from UV damage and remember to put the rain cover first to avoid cleaning the leaves or bird droppings 3 If you need to move the trampoline two people should be used All connector points should be wrapped secured with weather resistant tape such as duct tap...

Страница 23: ...or during the winter 3 If you want to use it in winter keep it clean regularly The rain cover also recommended when you don t use it Be Aware Of The Conditions Below Always inspect the trampoline before each use for worn abused or missing parts A number of conditions could arise your chances of getting injured Please be aware of 1 Punctures holes or tears in the trampoline mat 2 Sagging trampoline...

Страница 24: ...ted damages damages due to improper assembly misuse excessive weight and improper maintenance and storage This Warranty Is Valid Only In The United States Contact Us If you have any question want to contact us you could send us email directly official zupapa us Attention We usually reply you in 36 hours If there is no reply from us that might be assigned to Spam because of your mail box setting Pl...

Страница 25: ...s again to you We ve been focusing solely on offering top quality products As you know all Zupapa trampolines get TÜV certified Take Zupapa trampoline home take safe entertainment for your family TÜV is German organization that work to validate the safety of products of all kinds to protect humans and the environment against hazards As independent consultants they examine products which require mo...

Отзывы: