


SET CLOCK
Press
2
3
to select and set the date and time.
Press
1
when finished.
SLIDE SHOW
Press
2
3
to select the interval time between each
slide. There are 11 options ranging from Off, 1 sec,
3 secs, 5 secs, 10 secs, 15 secs, 20 secs, 30 secs,
1 mins, 5 mins, 15 mins and 30 mins. Press
1
to
set and confirm.
When Off is selected, the DPO will display a still
photo without slide show. You have to press
2
3
manually to view the photos stored in DPO.
BRIGHTNESS
Press
2
3
to select the level of screen brightness
from 0 to 7. Then press
1
to confirm.
AUTO OFF
Press
2
3
to select the idle time for automatic
power-off feature. Then press
1
to confirm. When
OFF is selected, the DPO will always be on.
ON – OFF TIMER
Press
1
to cycle through the
ON TIMER and OFF TIMER
hours (00 - 24), minutes (00 -
59), and STATUS (Enable /
Disable) settings. Press
2
3
to adjust the values.
LANGUAGE
Press
2
3
to select the language. Then press
1
to confirm.
Select Exit to display the
CLOCK MODE
. Then
press
2
3
to display the
PHOTO MODE
.
BATTERY
The DPO can operate with USB power, or two AA
batteries. Change batteries when the battery
indicator becomes low or the screen flashes
continuously.
WARNING
Please avoid pulling out the USB cable while
downloading pictures, doing so may destroy
some information on the frame
After unplugging the DPO from the PC's USB
port, please wait for 10 seconds before re-
plugging.
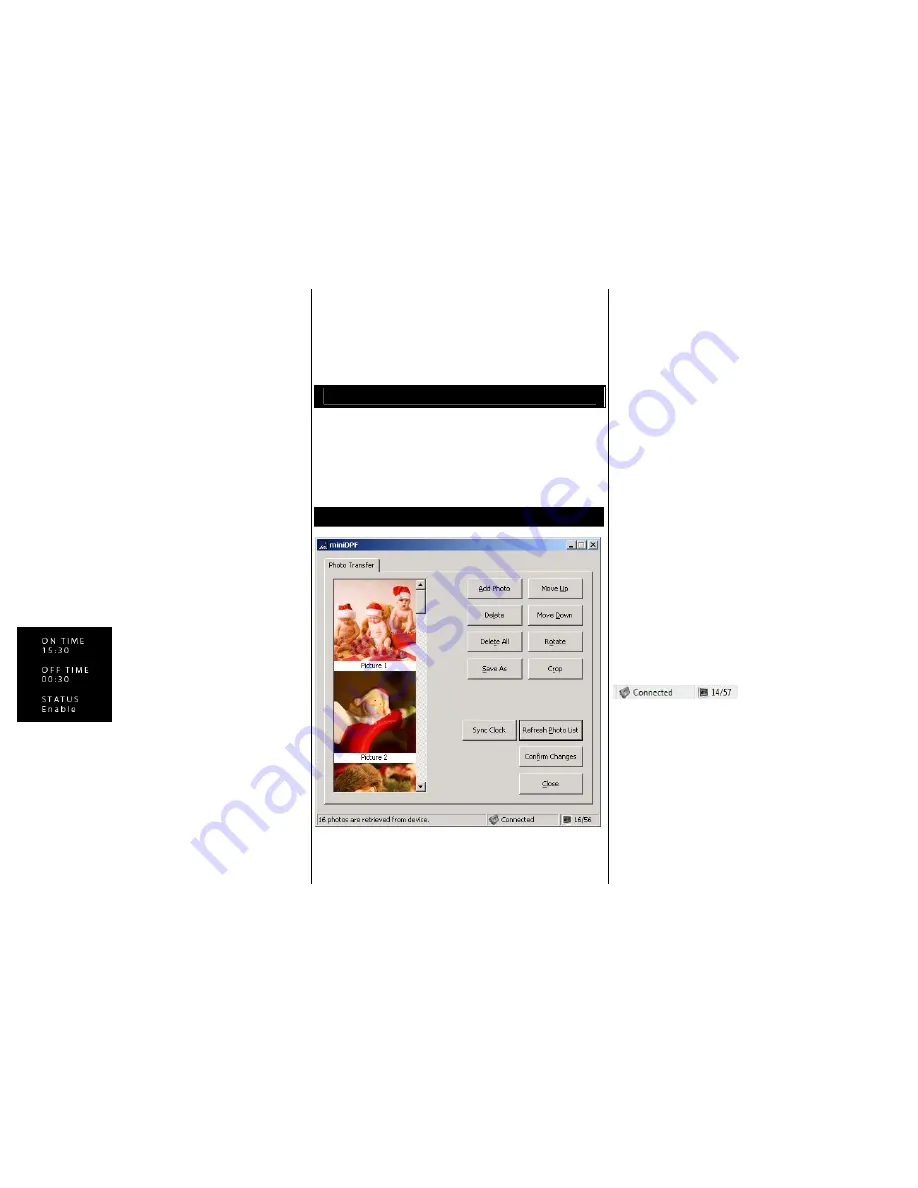
PHOTO MANAGER
ADD PHOTOS / DELETE / DELETE ALL / SAVE
AS
Use the bundled USB cable to connect the DPO to
your Windows PC. The PhotoManager software will
pop up upon plug-in. If PhotoManager does not pop
up automatically (due to the Autorun setting of the
PC), go to My Computer, double click miniDPF CD
icon and run the miniDPF program manually.
In the PhotoManager window, click “Refresh Photo
List” to show all photos stored in the DPO. After
refreshing the list, it is ready to modify the photo list
and to upload new photos to the DPO.
Supported
photo formats are PNG, TIFF, JPEG, GIF and BMP.
IMPORTANT:
When finished modifying the photo
list, click “
CONFIRM CHANGES
”.
MOVE UP / MOVE DOWN / ROTATE / CROP
You can arrange the photos priority by the “Move Up
/ Move Down” button. “Rotate” the photos for the
correct orientation. “Crop” the photos to best fit the
screen size.
SYNC CLOCK
You may also use the “Sync. Clock” function
provided in the PhotoManager software to
synchronize the DPO clock with the computer clock.
STATUS BAR
When the DPO is successfully connected to the PC
by the USB cable, the status bar will show
"Connected". The right hand side icon shows the
numbers of photos loaded into the DPO and the
maximum photo storage.
You can change the factory default setting via the
PhotoManager software. Click “
REFRESH
SETTING
” to download the current default setting
from the DPO.
Rev. DPO-RXB-14/06 10 GT-21649-1 P.6
Rev. DPO-RXB-14/06 10 GT-21649-1 P.4
Rev. DPO-RXB-14/06 10 GT-21649-1 P.5


