background image

Cable/DSL  Broadband  Router  w/4-Port  Switch 

35 

4.8 MISC Configuration 
 
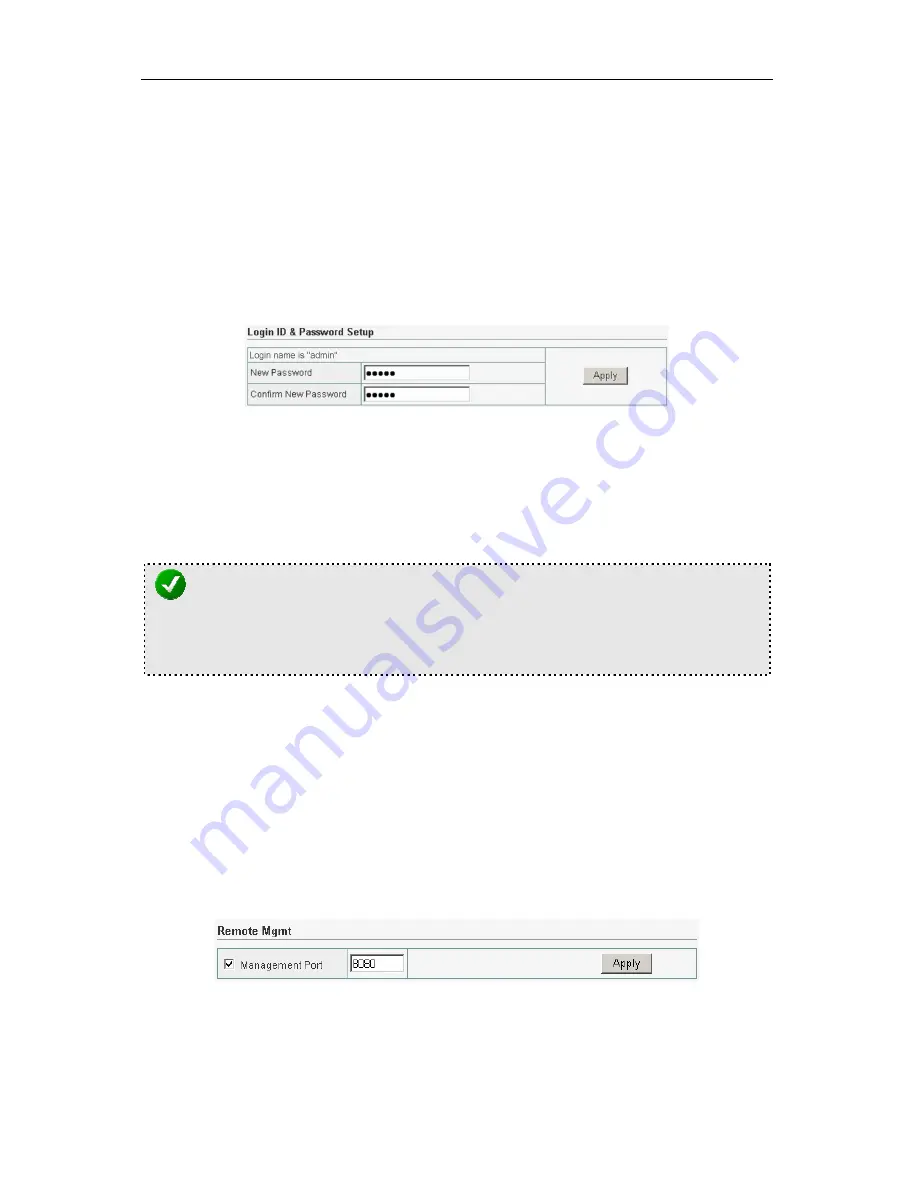
4.8.1 Login ID & Password Setup 

 
In factory setting, the default password is admin, and that for user is also 
password. You can change the default password to ensure that someone 
cannot adjust your settings without your permission. Every time you 
change your password, please record the password and keep it at a safe 
place.   


Figure 4-20 


New Password.

 Enter your new password. 


Confirmed New Password

 Enter your new password again for 

verification purposes. 


NOTE: 

If you forget your password, you’ll have to reset the router to the factory 
default (Password is “admin”) with the reset button (see router’s front 
panel). 

 
Click "Apply" button to finish the setting 
When finished making your changes on this screen, click the Save button 
to save these changes. 
 

4.8.2 Remote Management   

 
This feature allows you to manage the Router from a remote location, via 
the Internet. To enable this feature, check the “Management Port” 
checkbox, and click the Apply button. 


Figure 4-21 


Management Port,

 Enter the port number. 

Содержание ZSR0104CP

Страница 1: ......

Страница 2: ...7 15 4 Configuring the Router 19 4 1 Status 20 4 1 1 Statistics 21 4 2 WAN Setup 21 4 2 1 For Dynamic IP Setting 22 4 2 2 For PPPoE Setting 22 4 2 3 For Static IP Setting 23 4 2 4 For PPTP Setting 24...

Страница 3: ...Router w 4 Port Switch 2 4 8 3 UPnP Setup 36 4 8 4 System Time Setup 36 4 8 5 WAN Link Status Setup 37 4 8 6 Restore Default Restart System 37 4 8 7 Firmware Upgrade 38 5 Troubleshooting 39 6 Technica...

Страница 4: ...plies with the IEEE802 3 and IEEE802 3u standards One 10M 100M auto negotiation WAN port allows you to connect the Router with Cable DSL modem or other Ethernet devices such as router switch hub etc B...

Страница 5: ...SL Broadband Router 1pc User Manual 1pc Power Adapter 1pc RJ 45 Cable 1pc NOTE 1 If any of the above items are missing please contact your reseller 2 Please check the voltage of your power supply befo...

Страница 6: ...on 2 1 Panel 2 1 1 Front Panel Figure 2 1 2 1 2 Rear Panel Figure 2 2 2 2 Illustration Figure No Name on Router Description Remark 1 8 PWR Power Status Indicator 9V 0 5A Power Connector 2 WAN WAN Inte...

Страница 7: ...onnect to Cable DSL modem or other Ethernet devices 6 1x 2x 3x 4x LAN Ports Connect to LAN computers and devices 7 STATUS System Ready Indicator 2 3 Illustration of router Indicators Indicator Off Sol...

Страница 8: ...directly In addition users can expand their network by connecting other Ethernet devices such as Hub Switch etc with the Router In this way users can connect as many as 50 computers with router This...

Страница 9: ...computer according to the operating system in your computer In this chapter we only introduce how to setup your computer for Windows 98 Me Windows 2000 and Windows XP We recommend customers to setup...

Страница 10: ...entries from the DNS Server Search Order box by selecting them and clicking Remove Remove all entries from the Domain Suffix Search Order box by selecting them and clicking Remove Click Disable DNS 1...

Страница 11: ...Cable DSL Broadband Router w 4 Port Switch 10 Figure 3 2 4 Highlight Internet Protocol TCP IP and then press Properties button Figure 3 3...

Страница 12: ...Choose Obtain an IP address automatically and Obtain DNS server address automatically and then press OK to close the Internet Protocol TCP IP Properties window Figure 3 4 6 Press OK to close the Loca...

Страница 13: ...outer w 4 Port Switch 12 3 4 Windows XP Please follow the steps below to setup your computer 1 Go to Start Settings Control Panel 2 Click Network and Internet Connections Figure 3 6 3 Click Network Co...

Страница 14: ...Broadband Router w 4 Port Switch 13 4 Highlight the icon Local Area Connection right click your mouse click Properties Figure 3 8 5 Highlight Internet Protocol TCP IP and then press Properties button...

Страница 15: ...Choose Obtain an IP address automatically and Obtain DNS server address automatically and then press OK to close the Internet Protocol TCP IP Properties window Figure 3 10 7 Press OK to close the Loca...

Страница 16: ...d Router w 4 Port Switch 15 3 5 Windows Vista 7 Please follow the steps below to setup your computer 1 Go to Start Settings Control Panel Figure 3 12 2 Click Network and Internet Network and Sharing C...

Страница 17: ...Cable DSL Broadband Router w 4 Port Switch 16 3 Click Change adapter settings Figure 3 14 4 Highlight the icon Local Area Connection right click your mouse click Properties Figure 3 15...

Страница 18: ...net Protocol Version 4 TCP IPv4 and then press Properties button Figure 3 16 6 Choose Obtain an IP address automatically and Obtain DNS server address automatically and then press OK to close the Inte...

Страница 19: ...window highlight Internet Protocol Version 6 TCP IPv6 and then press Properties button Figure 3 18 8 Choose Obtain an IPv6 address automatically and Obtain DNS server address automatically and then p...

Страница 20: ...is a number between 2 and 254 and the default subnet mask is 255 255 255 0 1 Open an Internet Explorer or other web browser type 192 168 10 1 in the address bar and then press Enter 2 Input admin for...

Страница 21: ...be shown at the right hand side When encountering difficulties in configuring please click Help on the current page Figure 4 2 4 1 Status When finish configuring the WAN LAN Setup the Status screen w...

Страница 22: ...l area network on this page Router provides four types of connection modes Dynamic IP obtain an IP automatically PPPoE Static IP and PPTP These types are listed in the screen for the Internet Connecti...

Страница 23: ...ou to register the MAC address of your card adapter So It is recommended that the PC registered with the ISP is used to setup the MAC Address Clone When finished making your changes on this screen cli...

Страница 24: ...inish of setting Figure 4 7 When finished making your changes on this screen click the Save button to save these changes 4 2 3 For Static IP Setting Input the IP Address sub mask Primary DNS Secondary...

Страница 25: ...u to obtain an IP address by DHCP before connecting to the PPTP server IP Address This is the IP address that your ISP has given you to establish a PPTP connection Subnet Mask Enter the Subnet Mask pr...

Страница 26: ...n finished making your changes on this screen click the Save button to save these changes 4 3 LAN Setup The LAN Setup screen below allows you to specify a private IP address for your router s LAN port...

Страница 27: ...have a static fixed IP address then you ll have to choose an IP address outside this IP address Pool DHCP IP Address Reserving Reserve some IPs to specific computer You need to enter the MAC address o...

Страница 28: ...n the all of the setting to be added and then click Add Then this Special Application setting will be added into the Current Routing Table below If you want to remove some Special Application settings...

Страница 29: ...Port FTP private port enables user to setup FTP server which is not using the standard port 21 Figure 4 13 Check port number and enter the number and then press the Apply button to setup Private FTP...

Страница 30: ...e above Private IP address host in your LAN Click Add button after enter the all fields to add the rule Current Virtual Server Table This display shows the valid virtual Servers in Broadband Router Us...

Страница 31: ...on Name Trigger Protocol Select whether the outbound port protocol is TCP UDP Trigger Port This is the out going Outbound range of port numbers for this particular application NOTE Individual port num...

Страница 32: ...ers to limit the risk of hacker attack and defending against a wide array of common hacker attacks The Broadband Router provides packet filtering rules by restricting service ports IP address or MAC a...

Страница 33: ...table and then click Delete When finished making your changes on this screen click the Save button to save these changes 4 6 2 Connection Filtering Configuration To control a certain client PCs acces...

Страница 34: ...ccess Control Table This display shows the valid Current Access Control rules in Broadband Router User can view the information about Current Access Control Table Fill in the all of the setting to be...

Страница 35: ...re hosting your own website FTP server or other server behind the Router You must get an account password and your static domain name from the DDNS service providers Figure 4 19 DynDNS Operation Befor...

Страница 36: ...ew password Confirmed New Password Enter your new password again for verification purposes NOTE If you forget your password you ll have to reset the router to the factory default Password is admin wit...

Страница 37: ...d can access the Internet through this router easily Figure 4 23 Check the Enable UPnP Server checkbox and click the Apply button When finished making your changes on this screen click the Save button...

Страница 38: ...this screen click the Save button to save these changes 4 8 6 Restore Default Restart System Figure 4 26 4 8 6 1 Restore Default Restore the Router s configuration to its factory default settings Rest...

Страница 39: ...outer s system firmware To upgrade the firmware of your Broadband router you need to download the firmware file to your local hard disk and enter that file name and path in the appropriate field on th...

Страница 40: ...hts on the modem users can check whether the signal is ok or the modem works well from those lights If not please contact the ISP 2 Check the front panel of the Router there are also 7 indicator light...

Страница 41: ...DSL Broadband Router w 4 Port Switch 40 Figure 5 1 5 Click LAN Setup at the left hand side check DHCP Server on at the right hand side and then press Apply Figure 5 2 6 Close the Internet Explorer wi...

Страница 42: ...l connection is correct the Power light and the CPU light should be solid the WAN light should be blinking If you use your computer the corresponding LAN port light should be blinking too If not pleas...

Страница 43: ...Cable DSL Broadband Router w 4 Port Switch 42 3 Click Network Connections Figure 5 4 4 Highlight the icon Local Area Connection right click your mouse click Properties Figure 5 5...

Страница 44: ...button Figure 5 6 6 Choose Use the following IP address and Use the following DNS server addresses and then IP address 192 168 10 XXX the XXX shown here is a number between 2 and 253 Subnet mask 255...

Страница 45: ...Cable DSL Broadband Router w 4 Port Switch 44 Figure 5 7 7 Press OK to close the Local Area Connection Properties window Figure 5 8...

Страница 46: ...d Maximum Users 50 Computers NAT Table Entries 4096 Average Latency 300 s Interface Speed WAN 10 100Mbps auto negotiation LAN 10 100Mbps auto negotiation LED Indicators Power CPU Link Activity Tempera...

Отзывы: