8
© Copyright 2020 Zoeller
®
Co. All rights reserved.
•
2.4 Ghz network is required. If you only see 5 Ghz networks, you may need to log into your dual band router to choose to broadcast the
networks separately.
•
Band steering may need to be temporarily turned off during setup.
•
The 2.4Ghz network must use WPA or WPA2 security. WEP and Open networks are not compatible with the Fit.
•
Any VPNs or other network controls may need to be temporarily turned off during setup.
•
Locate the Fit’s Device ID and data matrix on the top sticker.
•
Like most internet connected devices, the Fit’s WiFi connectivity should be used behind a secure firewall. Most routers have a firewall
built into them. Consult a networking professional for specific questions about firewalls.
•
The above list also helps to troubleshoot connectivity issues.
These basic instructions will not detail every step, but provide an overview of what the app will do.
1. Open the app, sign in to your account, or create an account using the link at the bottom. Open your profile to set up any additional phone
numbers or email addresses where you would like to receive notifications.
2. Once you're logged in to your account, create locations by touching the "+ " from the Locations screen. When ready to add a device,
choose the desired location name and then touch the "+" to start adding a device. Allow access to the camera so you can scan the data
matrix.
3. Now the app will provide several instruction screens about scanning the data matrix, joining the Fit’s network, and then LEAVING the app
and how to come back.
Rather than scan the data matrix, the user may instead enter the Fit’s Device ID to get started. Ignore warnings your mobile device may give you
about “unsecure network” or “no internet connection”. The app is connecting directly with the Z Control
®
equipment, and therefore no security or
internet connection is necessary.
4. When the captive screen opens (see Figure C in next section), use the Wifi Scan button to find the Wifi network you want the Fit to use,
select it from the list provided at the bottom of the screen (you may need to scroll), and type the Passphrase in the field. The Z Control
®
LED should be solid within a minute indicating successful connection to the router and the Z Control
®
Cloud. Upon first connecting to the
cloud, the Fit controller may immediately update its firmware over the air (OTA), if an update is available. If an update is taking place, the
Z Control
®
LED will flicker for up to 1 minute while the update is downloaded. The Z Control
®
LED will be solid and all other LEDs will turn
off while the update is being installed. After up to 1 minute, the Fit will restart and return to normal operation. The Fit’s alert history on the
Z Control
®
Cloud will also be updated with the firmware update information, and notification to email accounts will occur.
5. You now should go back to the Z Control
®
app to find your new device set up in the location you previously selected. You can always
change a device to a different location in your account.
6. Open the Fit and explore current status, configuration settings, and commands available, such as Pump Test, Buzzer Test, Silence, etc.
Perform these test to be sure everything works as expected. Reset all alarms when you are finished.
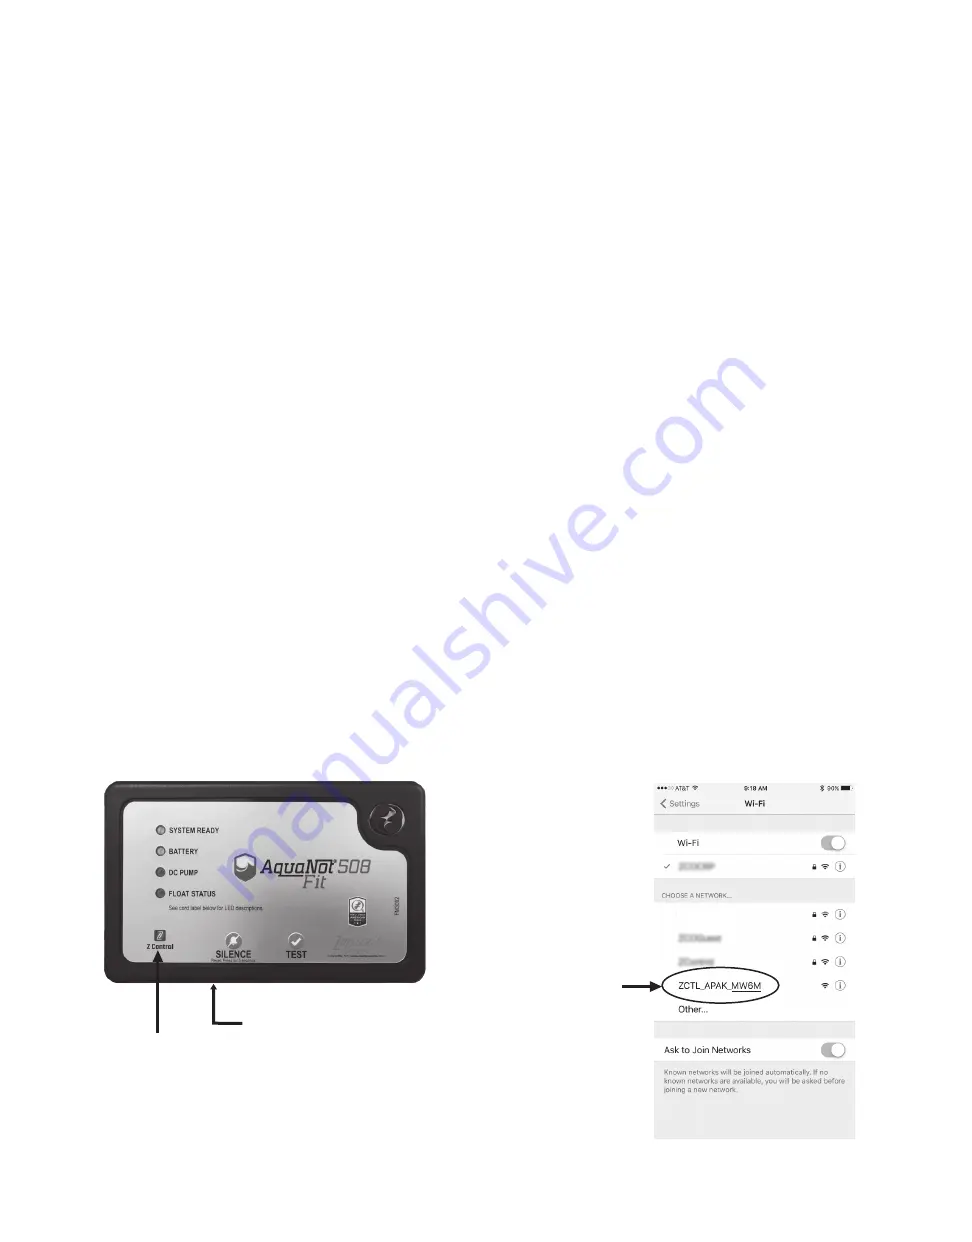
Use your mobile device or computer to connect directly to the Fit controller
Instead of using a mobile device and the Z Control
®
app, you can also use your mobile device or computer to directly connect to the Fit.
Figure A, FIT Controller
This LED should be off when
Fit is in AP mode.
When user is connected to
Fit to set up WiFi, LED will
blink.
When Fit is connected to
router and Z Control
®
Cloud,
this LED will be solid.
Z Control button is underneath
thru small hole.
Figure B, Your Mobile Device Wifi Settings
Select the Fit’s SSID
The last 4 digits
(underlined) will match
the first 4 digits of your
Fit controller’s
Device ID.
Fit


