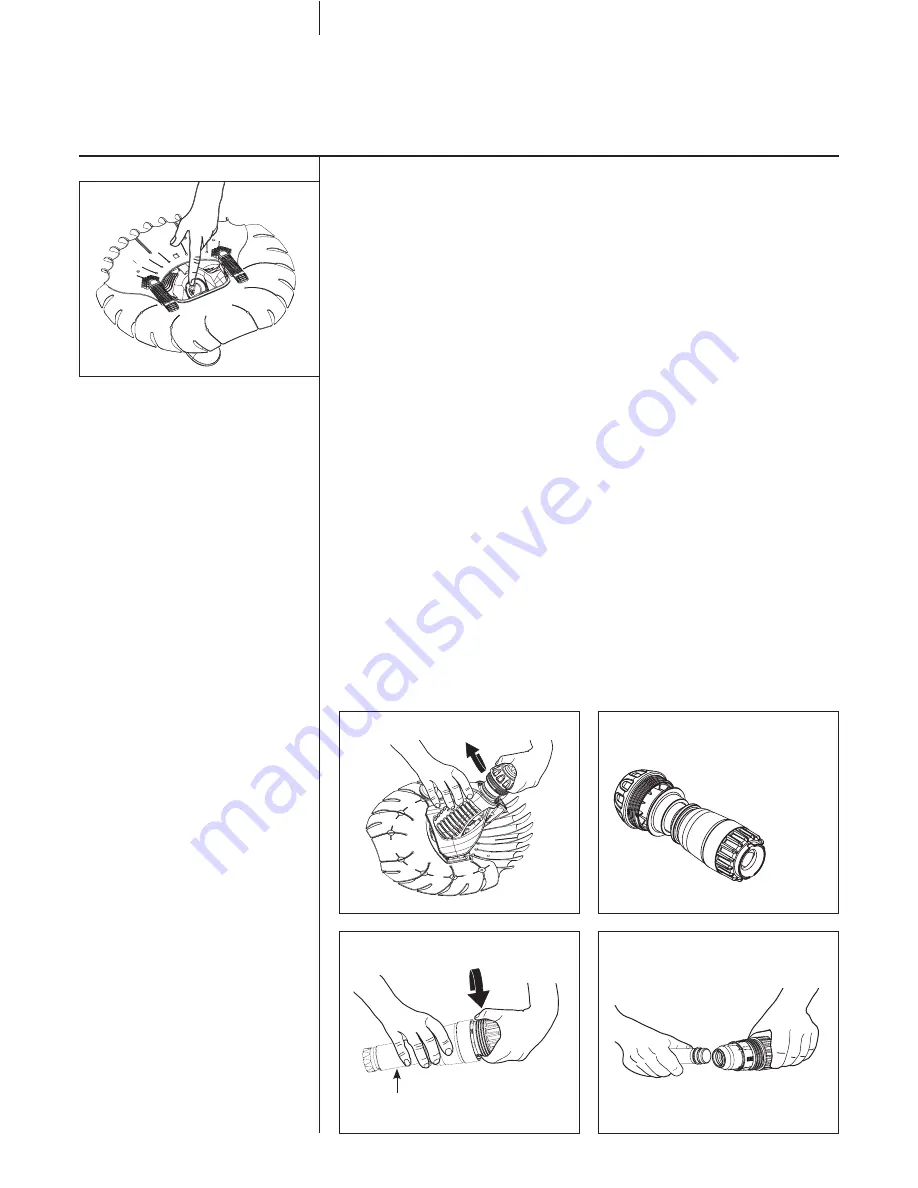
Cleaning the Diaphragm
If the cleaner stops, check the diaphragm for blockage.
•
Turn cleaner over
(Figure 16)
.
•
Inspect diaphragm and push through debris or obstacles
to clear.
If not blocked, check the diaphragm for wear or damage.
Removing the Diaphragm
•
Unscrew the casing
(Figures 17 and 18)
.
•
Unscrew the handle
(Figure 19)
, release the inner tube then
remove the diaphragm
(Figure 20)
.
•
Check the diaphragm for possible traces of wear and rinse profusely
with water. If necessary replace with a new diaphragm.
7 / Cleaning, replacing the Diaphragm
2 2
Figure 16
Figure 17
Figure 18
Figure 19
Figure 20
Casing
Handle


