background image

8151718

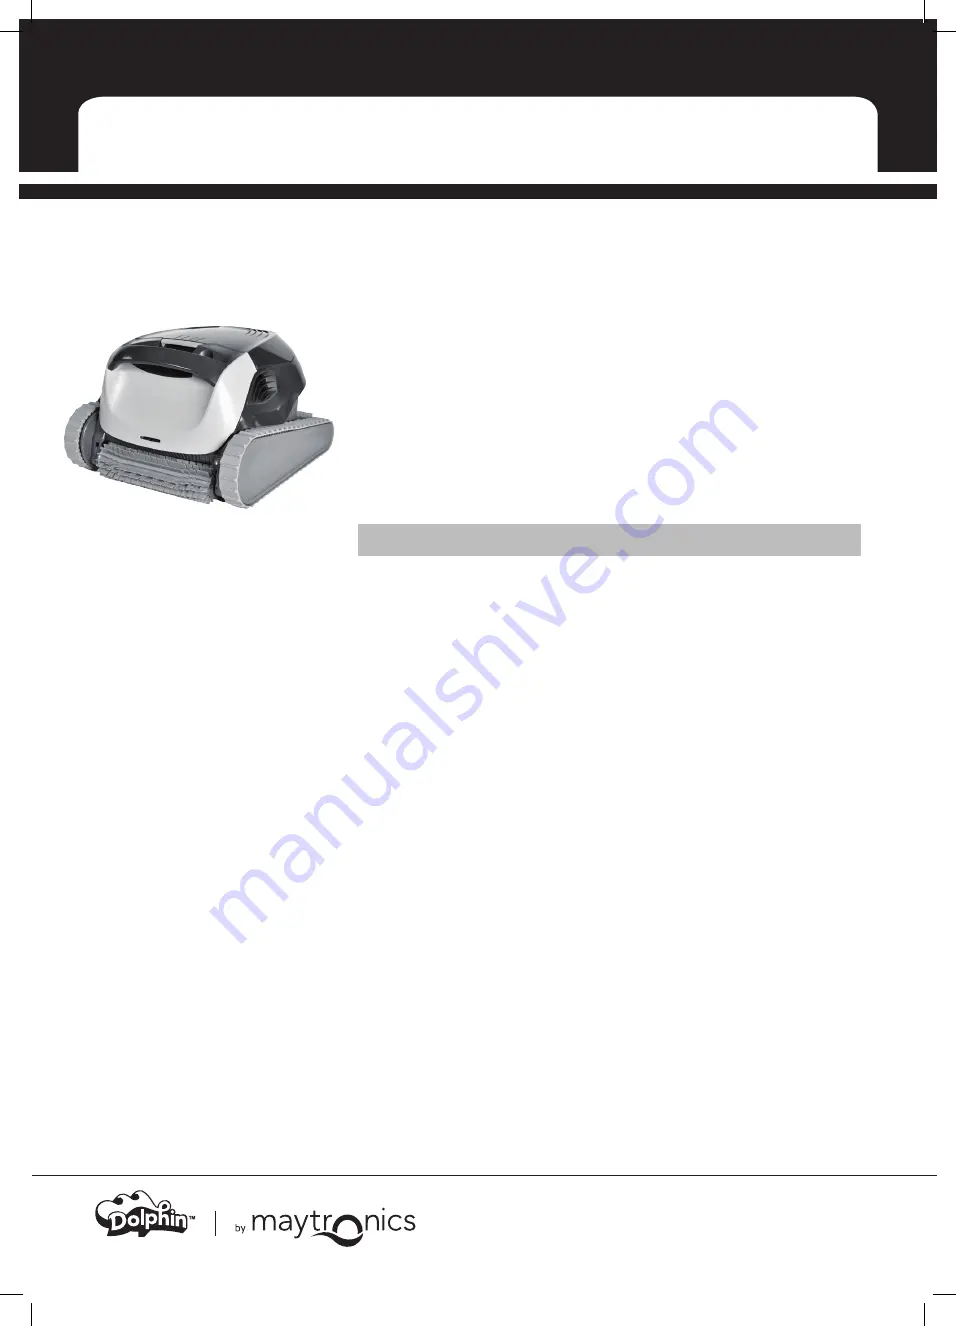
Robotic Pool Cleaner Basic 13 / Classic 13 / Classic 13+

Robotic Pool Cleaner

Ro

Basic 13 / Classic 13 / Classic 13+

User Instructions

 Contents

1.  INTRODUCTION ...................................................................... 2

2.  SPECIFICATIONS ...................................................................... 2

3.  WARNINGS AND CAUTIONS .................................................. 2

3.1  Warnings ............................................................................ 2

3.2  Cautions ............................................................................. 2

4.  POOL CLEANER PARTS ........................................................... 3

5.  USING THE POOL CLEANER ................................................... 4

5.1  Setup .................................................................................. 4

5.2  Putting the Pool Cleaner into the pool .............................. 5

5.3  Indicator Lights - Model Classic 13+ only .......................... 5 

5.4  Removing the Pool Cleaner from the pool ........................ 6

6.  CLEANING THE DUAL FILTER BASKET ................................... 7

6.1  Cleaning after use .............................................................. 7

6.2  Periodic filter cleaning ....................................................... 8

7.  CLEANING THE IMPELLER....................................................... 9

8.  OFF-SEASON STORAGE .......................................................... 10

9.  TROUBLESHOOTING ............................................................... 11

Содержание Dolphin Explorer E30

Страница 1: ...TIONS 2 3 1 Warnings 2 3 2 Cautions 2 4 POOL CLEANER PARTS 3 5 USING THE POOL CLEANER 4 5 1 Setup 4 5 2 Putting the Pool Cleaner into the pool 5 5 3 Indicator Lights Model Classic 13 only 5 5 4 Removing the Pool Cleaner from the pool 6 6 CLEANING THE DUAL FILTER BASKET 7 6 1 Cleaning after use 7 6 2 Periodic filter cleaning 8 7 CLEANING THE IMPELLER 9 8 OFF SEASON STORAGE 10 9 TROUBLESHOOTING 11 ...

Страница 2: ... full confidence that your pool is completely clean 2 SPECIFICATIONS Motor protection IP 68 Minimum depth 0 80m 2 6ft Maximum depth 5m 16 4ft 3 WARNINGS AND CAUTIONS 3 1 Warnings Use the originally supplied power supply only Ensure the electrical outlet is protected by a ground fault interrupter GFI or an earth leakage interrupter ELI Keep the power supply out of standing water Position the power ...

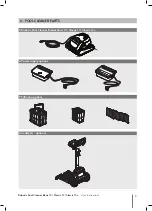
Страница 3: ...botic Pool Cleaner Basic 13 Classic 13 Classic 13 User Instructions 4 POOL CLEANER PARTS Caddy kit optional Power supply options Robotic Pool Cleaner Model Basic 13 Classic 13 Classic 13 Filtration options ...

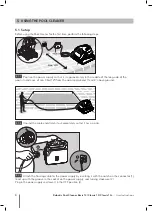
Страница 4: ... middle of the long side of the pool at a distance of min 3 5m 12ft from the pool and placed 11cm 4 above ground Unwind the cable and stretch it out completely so that it has no kinks Attach the floating cable to the power supply by inserting it with the notch on the connector 1 lined up with the groove in the socket on the power supply and turning clockwise 2 Plug in the power supply and leave it...

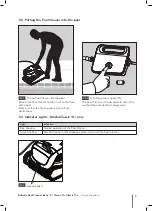
Страница 5: ... the pool Make sure that the floating cable is free of any obstructions 5 2 1 Turn the power supply ON The Pool Cleaner will now operate until it has reached the end of the cleaning cycle 5 2 2 Light Indication Blue blinking Normal operation of the Pool Cleaner Green blinking Remote Control or Smartphone communicate with the Pool Cleaner 5 3 Indicator Lights Model Classic 13 only 5 3 1 ON Indicato...

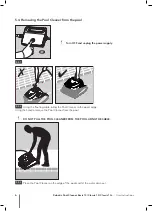
Страница 6: ...OL USING THE CABLE Using the floating cable bring the Pool Cleaner to the pool s edge Using the handle remove the Pool Cleaner from the pool Place the Pool Cleaner on the edge of the pool and let the water drain out 5 4 3 5 4 2 5 4 Removing the Pool Cleaner from the pool CAUTION Turn OFF and unplug the power supply 5 4 1 ...

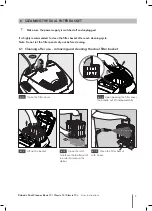
Страница 7: ...ilter basket after each cleaning cycle Note Do not let the filter panels dry out before cleaning 6 1 Cleaning after use removing and cleaning the dual filter basket Open the filter cover Upon opening the filter cover the handle will lift independently 6 1 1 6 1 2 Lift up the basket Open the latch to release the bottom lid in order to remove the debris 1 2 6 1 3 6 1 4 Clean the filter basket with a...

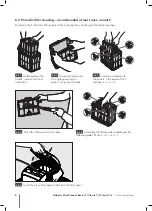
Страница 8: ...e following steps Holding down the handle remove the inner net basket Dismantle the panels starting by pressing on panel 1 using your thumbs Continue to dismantle the panels in the order of their numbers 2 3 4 Clean the filter panels with a hose Assemble the filter panels according to the following order Panel 4 3 2 1 6 2 1 6 2 2 6 2 4 6 2 3 6 2 5 Insert the clean filter basket and close the filte...

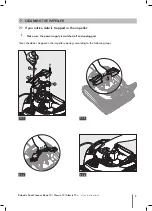
Страница 9: ...nstructions 7 CLEANING THE IMPELLER CAUTION Make sure the power supply is switched off and unplugged Clean the debris trapped in the impeller opening according to the following steps 7 1 If you notice debris trapped in the impeller 2 1 3 7 1 1 7 1 2 7 1 3 7 1 4 ...

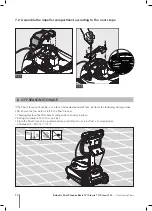
Страница 10: ...following storage steps Make sure that no water is left in the Pool Cleaner Thoroughly clean the filter basket and panels and insert in place Roll up the cable so that it has no kinks Store the Pool Cleaner in a protected area out of direct sun rain frost at a temperature of between 5 45 C 41 113 F 7 2 Assemble the impeller compartment according to the next steps 7 2 1 7 2 2 ...

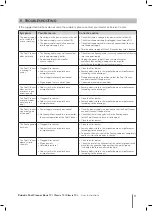
Страница 11: ...ely reach all the pool area Correct pool and water conditions The Pool Cleaner does not turn or moves in one direction only Debris stuck in the impeller house or impeller cover Remove debris stuck in the impeller house or impeller cover according to the drawings The Pool Cleaner moves but does not clean the pool Clogged filter basket Debris stuck in the impeller house or impeller cover Clean the f...

Отзывы: