background image

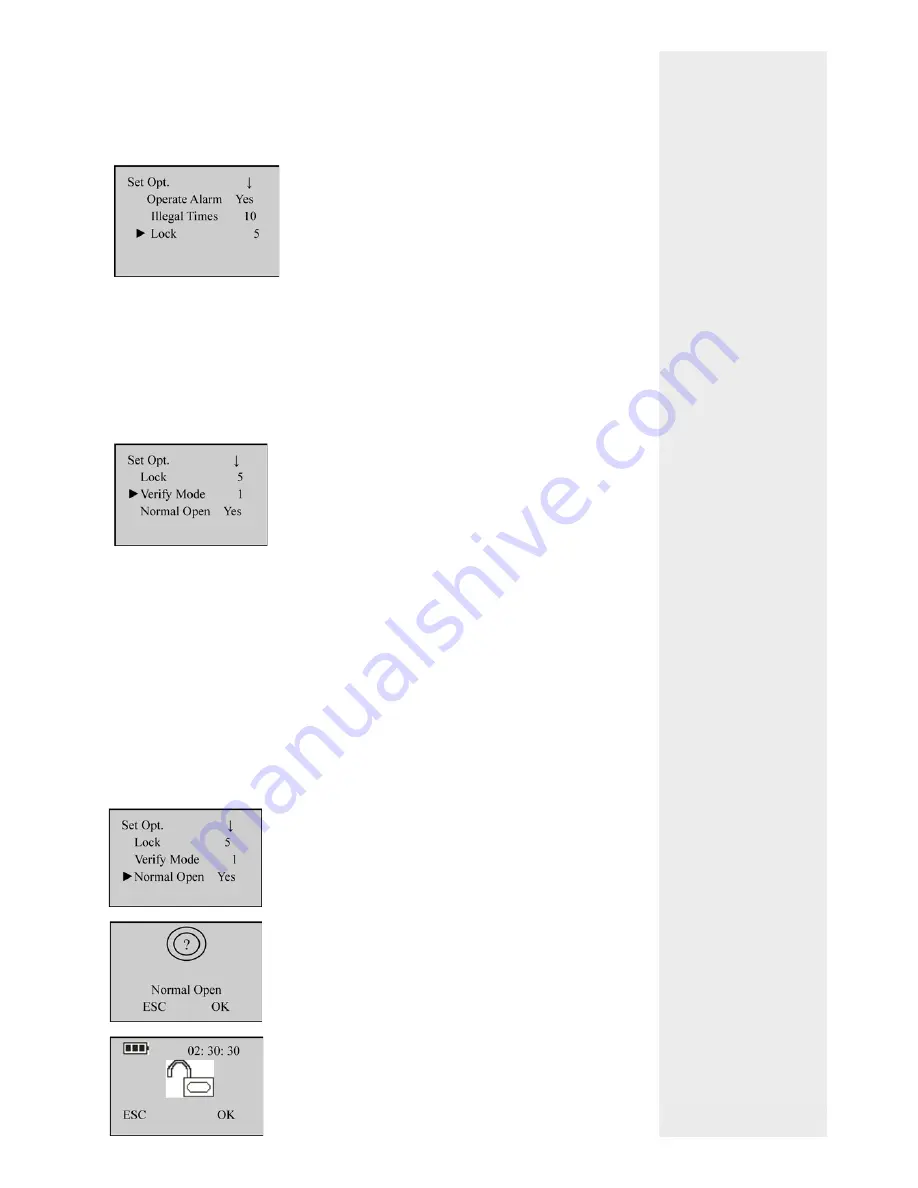
3.1.3 Lock Settings

This parameter is used to set the duration from successful matching to unlocking.

Note

: The unit of quantity and the maximum value of this parameter here are standard 

con

fi

 gurations. If you need larger parameter values, please consult our commercial 

representatives or pre-sales technical support engineers.

3.1.4 Verify Mode Setting

This parameter is used to set the duration from successful matching to unlocking.

Note

: The unit of quantity and the maximum value of this parameter here are standard 

con

fi

 gurations. If you need larger parameter values, please consult our commercial 

representatives or pre-sales technical support engineers.

•  Verify Mode 0

: Only the administrator can open the lock, while the unlocking func-

tion is disabled for ordinary users.

•  Verify Mode 1

: This is a default matching mode. Users can open the lock by success-

fully matching their 

fi

 ngerprints only once.

•  Verify Mode 2

: This is a dual veri

fi

 cation mode. The administrator can open the lock 

by successfully matching his/her 

fi

 ngerprint only once, but an ordinary user has to 

pass the veri

fi

 cation in any two matching modes by using the same ID.

3.1.5 Normal Open Setting

This parameter is used to set the duration from successful matching t

Summary

15

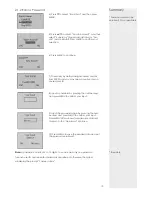
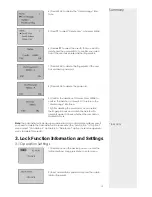
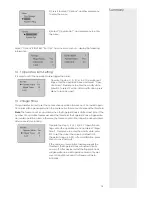
Operate the step 1), 2), 3), 4) in 3.1 Operation set-
tings, enter the operation menu and select “Lock”. 
Press Menu to enter the modify state, press 2/3 to 
set the value (the value by default is 5, the permit 
range is 3~15), after modi

fi

 cation, press Menu to 

save and quit.

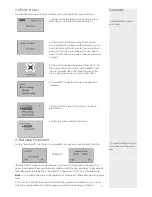
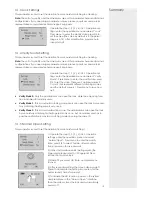
Operate the step 1), 2), 3), 4) in 3.1 Operation set-
tings, enter the operation menu and select “Verify 
Mode”. Press Menu to enter the modify state, press 
2/3 to set the value. There are 3 optional values 0, 
1, and 2 that represent different matching modes, 
and the default value is 1. Press Menu to save and 
quit.

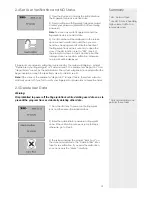
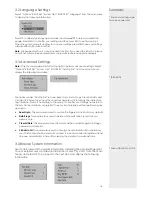
1) Operate the step 1), 2), 3), 4) in 3.1 Operation 
settings, enter the operation menu and select 
“Normal Open”. Press Menu to enter the modify 
state, press 2/3 to select Yes/No, after modi

fi

 ca-

tion, press Menu to save and quit

2) In the start interface verify the 

fi

 ngerprint (the 

fi

 nger press please refer to 1.3 Fingerprint Press 

Introduction) and unlock.

3) Prompt if you select NO state, and press Menu 
to save.

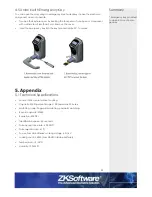
4) After successful setting, the screen display as left 

fi

 gure. That indicate the setting is success, and the 

buzzer sound 3 times for prompt.

5) To disable the NO function, power on the system 
and press Menu in the “Normal Open” interface. 
Then the system closes the lock and automatically 
powers off.

Содержание L7000-U

Страница 1: ...User Manual Version 1 1 Date June 2012 ...

Страница 2: ...tatus 12 2 5 Delete User Data 12 3 Lock Function Information and Settings 13 3 1 Operation Settings 13 3 1 1 Operate Alram Setting 14 3 1 2 Illegal Times 14 3 1 3 Lock Settings 15 3 1 4 Verify Mode Setting 15 3 1 5 Normal Open Setting 15 3 2 Language Settings 16 3 3 Advanced Settings 16 3 4 Browse System Information 16 3 5 Browse Logs 17 3 6 Using USB 17 4 Other Functions 18 4 1 Routine Operation ...

Страница 3: ...gistration data Support firmware upgrade and uploading downloading of user information and locking records through a USB pen drive Support offline view of locking records Support accurate display of time and date with annual deviation less than two minutes Support a temporary connection with back up batteries You can set the fingerprint locks to be in the Normally Open NO state in special cases Su...

Страница 4: ... or remarks for fingerprint locks to be installed on doors in excess of 70 mm in thickness before placing an order Before ordering or installation of single latch lock please confirm the corresponding accessories Single latch lock Unlock Directional Switch Follow these steps for changing unlock direction Ensure environment be fore ordering units 4 ...

Страница 5: ...ed the following tools while following the instructions to install fingerprint locks A ruler A marker pen A drilling tool A cross screwdriver 1 4 Battery Backup The fingerprint lock supports temporary use of external DC power for fingerprint or password matching and unlocking but when connected with an external battery the fingerprint lock cannot provide such special functions as enrollment deleti...

Страница 6: ...s key also doubles as the confirmation OK key The green LED indicator blinks when the fingerprint lock operates properly and the red LED indicator is on for three seconds if an error occurs The green LED indicator is on for three seconds when an operation succeeds Band switch If you cannot access the menu options due to the loss of administra tors for some reason proceed as follows Press and hold ...

Страница 7: ...not in working state It is recommended to replace the fingerprint lock batteries at least once every six months to avoid damaging the circuit due to the battery leakage Do not use bat teries with poor quality When installing a fingerprint lock connect the plug to the socket properly Improper connection may lead to fingerprint lock failure 1 7 User Privileges The user privileges are classified into...

Страница 8: ...OWN to select Options and press MENU to display the setting interface 3 Press DOWN to select System Opt and then press MENU 4 Press MENU to select Date Time 5 To modify date or time press UP DOWN to move the cursor to the desired option and then press UP DOWN again to enter correct date or time Press MENU to save your settings 1 Power on the fingerprint lock by pressing the Start key to open up th...

Страница 9: ...s from 00001 and you may also manually enter an unused user ID 8 Press the same finger on the fingerprint sensor three consecutive times by adopting the proper finger placement mode The system will prompt you to save the enrollment information after you enroll the fingerprint successfully If enrollment fails the system will prompt you to re enroll your finger print 9 The system will prompt to save...

Страница 10: ...hen select Supervisor Super administrator or Ad min Administrator Press MENU to confirm your selection 6 Press MENU to continue 7 The system by default assigns unused user IDs from 00001 and you may also manually enter an unused user ID 8 Input a password by pressing the number keys and press MENU to confirm your input 9 Input the password again by pressing the num ber keys and press MENU to confi...

Страница 11: ...al password with the password entered in backup enrollment Summary Administrators need to enrol users It is recomended to enrol more than one finger per user 11 1 Power on the fingerprint lock by pressing the MENU key to open up the initial interface 2 Press and hold the Menu key to access the menu options The system will then prompt you for administrator confirmation Enter the administrator passw...

Страница 12: ... Press the Start key to display the initial interface The fingerprint sensor is in active state 2 Press your finger with fingerprint already enrolled or enter your password press MENU after entering password Note You can only match fingerprints when the fingerprint lock is in non NO state 3 Your ID number will be displayed on the screen upon successful verification and then you can hear the unlock...

Страница 13: ... that you want to delete and then press MENU to confirm your selec tion If the user has enrolled his her fingerprints 7 Press MENU to delete the fingerprints If the user has enrolled a password 8 Press MENU to delete the password 9 Confirm the deletion of this user Press MENU to confirm the deletion or press ESC to return to the User Manage interface 10 After deleting the user data you can restart...

Страница 14: ...mmary 14 Operate the step 1 2 3 4 in 3 1 Operation set tings enter the operation menu and select Illegal Times Press Menu to enter the modify state press 2 3 to set the value the value by default is 10 the permit range is 3 99 after modification press Menu to save and quit If the number of cumulative failures exceeds the threshold the fingerprint lock will automatically power off After device rest...

Страница 15: ...rmal Open Setting This parameter is used to set the duration from successful matching t Summary 15 Operate the step 1 2 3 4 in 3 1 Operation set tings enter the operation menu and select Lock Press Menu to enter the modify state press 2 3 to set the value the value by default is 5 the permit range is 3 15 after modification press Menu to save and quit Operate the step 1 2 3 4 in 3 1 Operation set ...

Страница 16: ...ions and press OK to display the related set ting interface Press OK according to the prompt to confirm your settings and return to the Adv Option interface or press ESC to exit current interface without performing any operation Reset Opts This parameter is used to restore the fingerprint lock to factory defaults DelAll Logs This parameter is used to delete all the verification records from a memo...

Страница 17: ... check whether there is any exceptional unlocking in time Select Browse Logs from the main menu to display the following information Press to select a registered number that you want to browse logs and then press OK to confirm the log date and time 3 6 Using USB Summary Free space need to be monitored if you have great number of users Ensure to test the USB device on the unit 17 1 Insert a USB pen...

Страница 18: ...ata otherwise the new user data will be directly added 4 Upgrade Firmware You can select Upd Firmware to upgrade the firmware of a fingerprint lock through the upgrade files in the USB pen drive Note If you need firmware upgrade files please contact our technical support engi neers Generally it is not recommended to upgrade the firmware Tip Please do not perform invalid operations for example inse...

Страница 19: ... during use of external power so as to prevent data loss caused by power instability When the battery meter stays less than one bar the battery shuts itself off automatically 4 4 Auto Program Exit Power Off The fingerprint lock powers off automatically upon successful matching and unlocking The fingerprint lock powers off automatically when you set Yes for the Normal Open option upon unlocking The...

Страница 20: ...e 90 to unlock 5 Appendix 5 1 Technical Specifications Sensor Optics sensor without coating Capacity 500 fingerprint images 100 passwords 500 users Matching mode Fingerprint matching password matching Record capacity 30000 Resolution 500 DPI Identification speed 2 seconds False acceptance rate 0 0001 False rejection rate 1 Power Four AA batteries working voltage 4 2V 6V Locking count 4000 Four NAN...

Отзывы: