background image

WWW.

ZIPPITY

-OUTDOOR.COM

4

ASSEMBLY 

INSTRUCTIONS

ZP19002

Ground

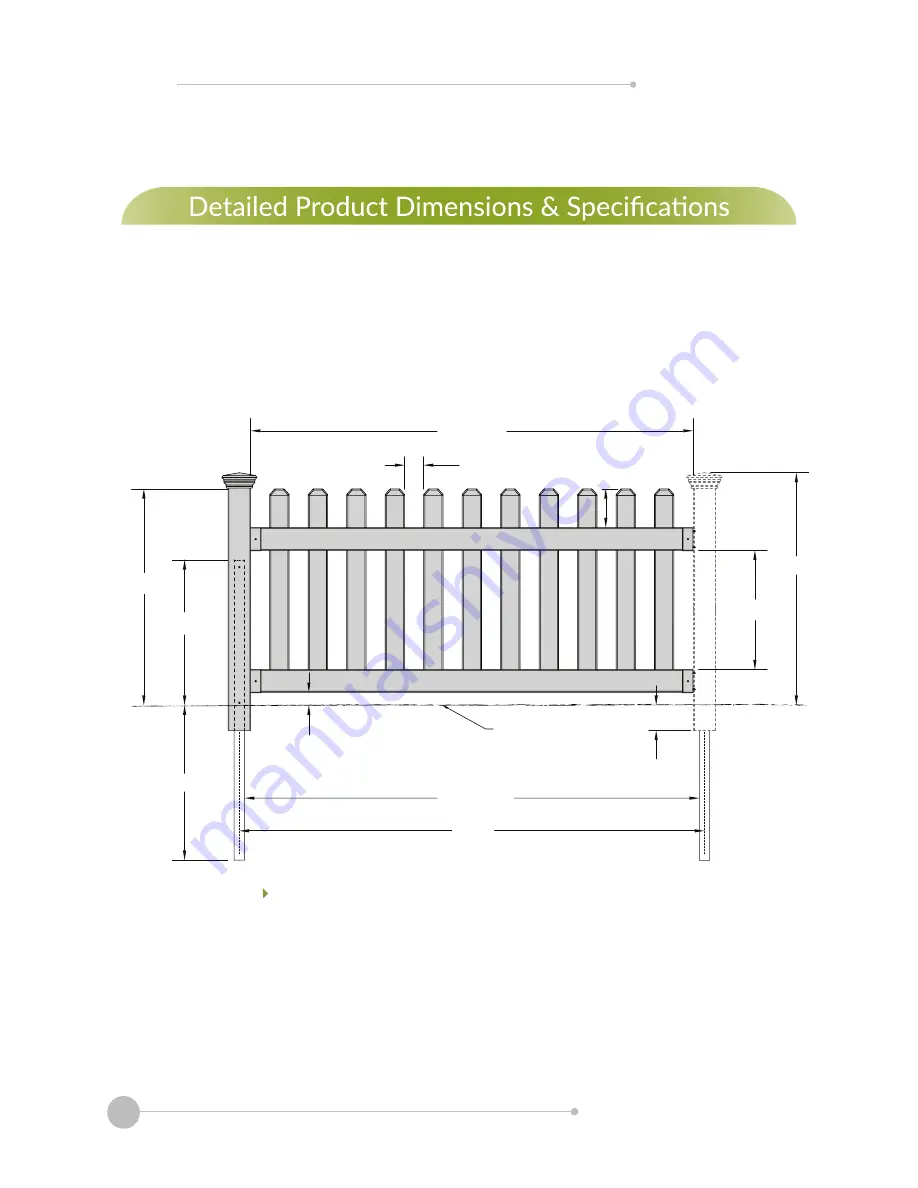
70 3/8 in

72 in

2 in

2 15/16 in

68 1/2 in

6 in

18 1/2 in

24 in

4 in

36 in

33 1/2 in

22 7/8 in

3 in


This fence can easily be trimmed down horizontally to fit your 

custom space. Use fine-toothed circular saw or hack saw.

20 3/4 in

Содержание ZP19002

Страница 1: ...R COM VER 042921 ZP19002 ASSEMBLY INSTRUCTIONS 60 MIN Approximate assembly time Want to see a video on how to assemble this product Scan the QR code NEWPORT VINYL PICKET FENCE WITH POST AND NO DIG STE...

Страница 2: ...vice department parts nychbrands com support zippity outdoor com 704 892 5222 877 234 6196 Customer service agents are available to take calls weekdays from 8am 5pm EST If you call outside of business...

Страница 3: ...ish to cut down your fence use a fine toothed metal or wood blade 4 Optionally for easier spacing of pipe anchors you can use a piece of 1x4 wood lumber cut 70 for step 2 3 on page 7 5 If your yard is...

Страница 4: ...NS ZP19002 Ground 70 3 8 in 72 in 2 in 2 15 16 in 68 1 2 in 6 in 18 1 2 in 24 in 4 in 36 in 33 1 2 in 22 7 8 in 3 in This fence can easily be trimmed down horizontally to fit your custom space Use fin...

Страница 5: ...19002 STEP 1 LAY OUT MATERIALS A B E D G H F C Note Top rail has picket holes on both sides Picket 11 x 3 x 29 Post 1 2 x 3 x 38 Top Rail 1 1 x 3 x 68 1 1 x 3 x 68 Pipe Anchor 1 1 x 44 Self Drilling S...

Страница 6: ...ly established and you cannot manually pull the pipe back to make it level BEST anchor into the ground GOOD BETTER Hammer DO NOT USE STEP 2 INSTALL PIPE ANCHORS STEP 2 1 After establishing the placeme...

Страница 7: ...pipe anchor and into the ground Using a wood block or something to protect the top of the post pound the post down another 2 to 4 below the ground to prevent it from twisting on the pipe anchor Repea...

Страница 8: ...the post and screw 3 Slowly drive the screw with force into the pipe anchor 1 Use a level to straighten the post 2 Drive a second hex head tek screw into the top of the post using the same process sh...

Страница 9: ...end of the Bottom Rail F and slide the bottom rail down into the rail bracket installed in step 5 1 F Install one Rail Bracket D on the post using 4 Self Drilling Stainless Steel Screws H The rail br...

Страница 10: ...using 4 self drilling stainless steel screws Insert the bottom rail into the rail brackets Measure 18 from the top of the bottom rail bracket as illustrated below and install the top rail brackets Ma...

Страница 11: ...2 Install the Post Caps A Push down on the post cap to lock it onto the post Note The tops of the posts can be trimmed down as necessary Use PVC glue NOT INCLUDED to permanently install the post caps...

Страница 12: ...be completed if you wish to install your next fence panel at a 90 angle Place the rail bracket on the post and mark the locations of the four holes on the post STEP 7 2 Using a 1 8 drill bit for stee...

Страница 13: ...WWW ZIPPITY OUTDOOR COM 13 ASSEMBLY INSTRUCTIONS ZP19002 WWW ZIPPITY OUTDOOR COM 704 892 5222 877 234 6196 support zippity outdoor com 6935 Reames Rd Ste K Charlotte NC 28216...

Отзывы: