background image


MONTAGGIO 

ZIPPER MASCHINEN GmbH     www.Zipper-Maschinen.at



46   

ZI-RMM94H

46


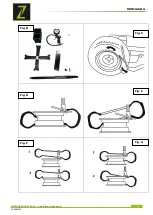
Posizionare lo pneumatico in modo tale che il tallone si trovi sopra il lato sinistro (Fig. F 1) e 

sotto il lato destro (Fig. F 2) della testa di montaggio. 


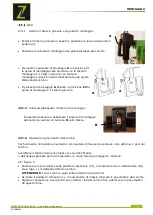
Mediante il braccio di montaggio (15) è possibile con il regolatore di pressione (16) o il cilindro 

di pressione (22) premere il tallone dello pneumatico all’interno del canale del cerchio per 

sollevare il tallone presente sulla testa di montaggio più facilmente sul suddetto canale. 


Azionare il pedale di comando (4), il tallone interno dello pneumatico sarà tirato sotto il bordo 

esterno del cerchio. 


Posizionare la camera d’aria dello pneumatico, se presente. Ciò non dovrebbe impedire il 

montaggio! 
 

Cfr. Figura G: 
Eseguire ora il montaggio del tallone dello pneumatico con lo stesso procedimento utilizzato per il 
tallone inferiore. 
 

NOTA

: Il 

cilindro di rilascio del tallone

 (22) o lo stallonatore (23) sono utilizzati per semplificare le 

operazioni di montaggio e smontaggio. Negli pneumatici standard è possibile e negli pneumatici 
Runflat e UHP (pneumatici a fianco basso) è necessario utilizzare il meccanismo di rilascio del tallone


Azionare il pedale di comando (4) per ruotare il tavolo rotante (5) e premere il cilindro di 

rilascio del tallone sullo pneumatico con l’ausilio del braccio di montaggio. 


Se restano ancora 10-15 cm, procedere con cautela per evitare eventuali danni al tallone dello 

pneumatico. Arrestare immediatamente il motore, qualora vi sia pericolo di danneggiare lo 

pneumatico e sollevare il pedale (4) con il piede per ruotare in direzione contraria il tavolo 

rotante. 
 

Ripetere l’operazione dopo che lo pneumatico è tornato nella sua forma originaria. 


Pompare lo pneumatico 

P E R I C O L O


Verificare e seguire le seguenti istruzioni! La mancata osservazione può provocare 
lesioni gravi o mortali! La società ZIPPER-Maschinen non può essere ritenuta 
responsabile d'incidenti in caso di mancata osservazione delle indicazioni di sicurezza! 
 
 
Controllare la dimensione precisa di pneumatico e cerchio e assicurarsi che 
corrispondano.  
 
Prima del pompaggio assicurarsi che non vi siano danni sia sullo pneumatico sia sul 
cerchio e che entrambi siano montati correttamente. 
 
MAI superare la pressione max. dello pneumatico consigliata dal produttore. 
 
Gonfiare lo pneumatico a intervalli brevi e controllare frequentemente la pressione 
dello stesso. Controllare regolarmente la presenza di eventuali anomalie alla forma 
dello pneumatico. 
 
Eseguire il pompaggio dello pneumatico con cautela. Tenere le mani e le altre parti 
del corpo lontane dallo pneumatico durante il pompaggio!


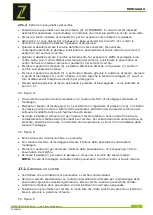
Collegare il tubo di riempimento compreso nella fornitura al manometro presente sull’adattatore 
ad aria compressa della camera d’aria. 
Collegare il tubo di riempimento alla valvola dello pneumatico. Azionando la leva di pressione sarà 
pompata aria all’interno dello pneumatico.  

Содержание ZI-RMM94H 230V

Страница 1: ...assung DE BETRIEBSANLEITUNG REIFENMONTAGEMASCHINE bersetzung Translation EN USER MANUAL TYRE CHANGER FR Manuel d utilisation CHANGER DE PNEUS IT Manuale d uso originale MACCHINA SMONTAGOMME ZI RMM94H_...

Страница 2: ...pr fen 12 Der Arbeitsplatz 12 Elektrischer Anschluss 13 Druckluftanschluss 13 Betriebspr fung 13 8 BETRIEB 13 Bedienung 15 8 1 1 Schwenk Arm und Montageschiene festklemmen 15 8 1 2 Montage Hilfsarm He...

Страница 3: ...mprim 33 Test de bon fonctionnement 33 21 FONCTIONNEMENT 33 Utilisation 35 21 1 1 Bras articul et ressort de retenue 35 21 1 2 Utilisation du bras auxiliaire monter descente 35 21 1 3 D coller le pneu...

Страница 4: ...cinghia di trazione 47 Stoccaggio 47 Smaltimento 48 29 RISOLUZIONE DELLE ANOMALIE 48 30 ELEKTRISCHE SCHALTUNGEN ELECTRIC DIAGRAM 49 31 ERSATZTEILE SPARE PARTS 50 Ersatzteilbestellung spare parts order...

Страница 5: ...EP FEET AND OTHER BODY PARTS AWAY FROM THE WHEEL PRESSING UNIT DURING OPERATION FR RISQUE D CRASEMENT GARDER LES PIEDS ET TOUTE AUTRE PARTIES DU CORP LOIGN DE L UNIT DE PRESSE DURANT LE FONCTIONNEMENT...

Страница 6: ...dispositivi di protezione dell udito DE Warnung vor elektrischer Spannung EN Warning of electrical voltage FR Avertissement de voltage lectrique IT Attenzione Corrente elettrica DE Explosionsgefahr b...

Страница 7: ...io 8 10 bar Abdr ckkraft forcing pressure Pressure de force Forza di pressione 10bar 2500 kg Felgenspannbereich aussen outside rim clamping range Mors de serrage ext rieur Area di serraggio cerchio es...

Страница 8: ...e Cilindri di serraggio 17 Abdr ckerhebel Door latch lever Levier de d talonneur Leva meccanismo di rilascio 6 Drehteller turntable Plateau tournant Tavolo rotante 18 Schmierfettbeh lter Grease contai...

Страница 9: ...en Abbildungen und Inhalte geringf gig abweichen Sollten Sie Fehler feststellen informieren Sie uns bitte Technische nderungen vorbehalten Kontrollieren Sie die Ware nach Erhalt unverz glich und verme...

Страница 10: ...Entfernen der an der Maschine angebrachten Sicherheitskennzeichnungen Ver ndern umgehen oder au er Kraft setzen der Sicherheitseinrichtungen der Maschine Die nicht bestimmungsgem e Verwendung bzw die...

Страница 11: ...oder verheddertes Kabel erh ht die Stromschlaggefahr Behandeln Sie das Kabel sorgf ltig Benutzen Sie das Kabel niemals zum Tragen Ziehen oder Abtrennen des Elektrowerkzeugs Halten Sie das Kabel vor Hi...

Страница 12: ...n auf F r einen ordnungsgem en Transport beachten Sie auch die Anweisungen und Angaben auf der Transportverpackung bez glich Schwerpunkt Anschlagstellen Gewicht einzusetzende Transportmittel sowie vor...

Страница 13: ...digtes Kabel ist umgehend zu erneuern Druckluftanschluss Schlie en Sie die Maschine beim Druckluftanschluss 24 an Ihre Druckluftvorrichtung an Bitte beachten Sie die ZI RMM94H darf nur an einen Druckl...

Страница 14: ...BETRIEB ZIPPER MASCHINEN GmbH www Zipper Maschinen at 14 ZI RMM94H14 Abb C Abb D Abb E Abb F Abb G...

Страница 15: ...ge Hilfsarm Heben Senken Durch Bet tigen des Steuerventil B am Montage Hilfsarm k nnes Sie diesen heben oder senken 8 1 3 Reifen von der Felge abdr cken Lassen Sie vorsichtig die Luft aus dem Reifen E...

Страница 16: ...des Verriegelungsknopf A wie in 7 1 1 beschrieben Siehe Abbildung D Ziehen Sie den u eren Reifenwulst mit Hilfe des Montiereisen ber den Montagekopf Mit dem Hilfsmontage Arm 15 k nnen Sie mit dem Pres...

Страница 17: ...lze dabei auf den Reifen Sind nur noch etwa 10 15cm brig fahren Sie vorsichtiger fort um etwaige Besch digungen der Reifenwulst zu vermeiden Stoppen Sie den Motor sofort falls Gefahr besteht den Reife...

Страница 18: ...en umgehend zu beseitigen Pr fen Sie vor jedem Betrieb den einwandfreien Zustand der Sicherheitseinrichtungen Kontrollieren Sie die Verbindungen zumindest w chentlich auf festen Sitz berpr fen Sie reg...

Страница 19: ...bzw Wartungsarbeiten immer von der Stromversorgung Viele m gliche Fehlerquellen k nnen bei ordnungsgem em Anschluss der Maschine an das Stromnetz bereits im Vorfeld ausgeschlossen werden Sollten sie s...

Страница 20: ...tly However if you discover any errors inform us please Technical specifications are subject to changes Please check the product contents immediately after receipt for any eventual transport damage or...

Страница 21: ...hine Operating the machine outdoors Operating the machine in a potentially explosive environment Operation of the machine without functioning or missing guards Remove the safety markings attached to t...

Страница 22: ...ine if you are tired not concentrated or under the influence of medication alcohol or drugs Do not use the machine in areas where vapours from paints solvents or flammable liquids represent a potentia...

Страница 23: ...dangerous situation which if not avoided may result in property damage Irrespective of all safety regulations their sound common sense and corresponding technical suitability training are and remain...

Страница 24: ...rounding conductor must not be connected to an under voltage can Check with a qualified electrician or service that the grounding instructions are understood and the machine is grounded A damaged cabl...

Страница 25: ...ASSEMBLY ZIPPER MASCHINEN GmbH www Zipper Maschinen at 25 ZI RMM94H25 Abb C Abb D Abb E Abb F Abb G...

Страница 26: ...r zone Activate the control pedal 1 the bead breaker pushes the tire from the rim from Repeat the last steps in several places on the rim until the tire has come off the rim 15 1 4 Remove tire from th...

Страница 27: ...rim flange with the press plate 16 or of the press roller 22 Activate the control pedal 4 the inner tire bead is pulled under the outer edge of the rim Insert the inner tube if available This should...

Страница 28: ...heck that the safety devices are in perfect condition Check the connections for tightness at least once a week Regularly check that the warning and safety labels on the machine are in perfect and legi...

Страница 29: ...o correct the problem Trouble Possible cause Solution Machine does not start Emergency stop switch to switch off switch or a phase is broken Overload protection is triggered Safety fuse is blown Open...

Страница 30: ...ilisateur En raison des progr s constants dans la conception des produits les photos et le contenu peuvent varier l g rement Cependant si vous constatez des erreurs merci de nous en informer Les sp ci...

Страница 31: ...ent toute garantie et r clamation de dommages Une diminution de la concentration par la fatigue l influence de l alcool ou de la drogue rend toute utilisation de la machine interdite La machine ne peu...

Страница 32: ...ns quent ne jamais sur d passer la pression de gonflage du pneu recommand Contr ler le bon tat du pneu et de la jante avant de proc der au gonflage de ce dernier Pendant le gonflage contr ler le bon d...

Страница 33: ...ucteur de terre est vert jaune En cas de r paration ou de remplacement du conducteur de mise la terre ne pas connecter lectroniquement la machine Consulter un lectricien ou un service qualifi afin que...

Страница 34: ...ASSEMBLAGE ZIPPER MASCHINEN GmbH www Zipper Maschinen at 34 ZI RMM94H34 Abb B Abb C Abb D Abb E Abb F Abb G...

Страница 35: ...monter descente du bras auxiliaire 21 1 3 D coller le pneu de la jante Enlever avec attention l air dans le pneu Retirer tous les objets trangers et les poids sur la jante Lubrifier le talon du pneu a...

Страница 36: ...nant soulever avec la barre de montage le talon inf rieur du pneu sur la t te de montage Actionner la p dale pour s parer le talon inf rieur du pneu et donc tout le pneu de la jante Actionner la p dal...

Страница 37: ...ier du gonflage l air le pneu se gonfle 22 ENTRETIEN ATTENTION Avant d effectuer les r parations et l entretien d branchez la machine de l alimentation lectrique et l alimentation d air comprim La mac...

Страница 38: ...st tenu de recycler votre vieille machine professionnellement 23 D PISTAGE DE PANNE Avant de commencer le travail sur l limination des d fauts d brancher la machine de l alimentation lectrique probl m...

Страница 39: ...re gravi lesioni A causa del costante sviluppo dei nostri prodotti possibile che le immagini e i contenuti siano leggermente differenti Qualora si riscontrino eventuali errori si prega di informare la...

Страница 40: ...Eventuali modifiche e manomissioni non autorizzate apportate alla macchina nonch l uso non conforme alle disposizioni invalidano immediatamente il diritto alla garanzia e al risarcimento danni Utilizz...

Страница 41: ...o rotante e dal meccanismo di rilascio Perlustrare l area di lavoro alla ricerca di corpi estranei che possono provocare lesioni Tenere i pantaloni all interno delle scarpe di sicurezza Non tenere i l...

Страница 42: ...o di riparazione o sostituzione il conduttore di terra non deve essere collegato a una presa sotto tensione Accertarsi che una eventuale prolunga sia in buono stato e idonea per il trasferimento di po...

Страница 43: ...MONTAGGIO ZIPPER MASCHINEN GmbH www Zipper Maschinen at 43 ZI RMM94H43 Fig B Fig C Fig D Fig E Fig F Fig G...

Страница 44: ...ccio di montaggio possibile sollevare o abbassare il braccio di montaggio azionando la valvola di manovra B sullo stesso 27 1 3 Rilasciare lo pneumatico dal cerchio Far fuoriuscire l aria dallo pneuma...

Страница 45: ...tsrato al punto 7 1 1 Cfr Figura D Tirare il tallone esterno dello pneumatico con l ausilio del ferro di montaggio sulla testa di montaggio Mediante il braccio di montaggio 15 possibile con il regolat...

Страница 46: ...0 15 cm procedere con cautela per evitare eventuali danni al tallone dello pneumatico Arrestare immediatamente il motore qualora vi sia pericolo di danneggiare lo pneumatico e sollevare il pedale 4 co...

Страница 47: ...enti a vite una volta al mese Controllo del serraggio della cinghia di trazione una volta al mese Pulizia Pulire il tavolo rotante regolarmente dopo l uso da impurit e residui NOTA L uso di solventi p...

Страница 48: ...a cinghia Far sostituire il commutatore di polarit Far misurare da un elettrico l alimentazione di corrente e il motore Se il motore difettoso far sostituire il motore Il tavolo rotante si blocca dura...

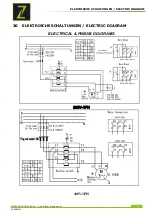
Страница 49: ...ELEKTRISCHE SCHALTUNGEN ELECTRIC DIAGRAM ZIPPER MASCHINEN GmbH www Zipper Maschinen at 49 ZI RMM94H49 30 ELEKTRISCHE SCHALTUNGEN ELECTRIC DIAGRAM ELECTRICAL PNEUM DIAGRAMS 230V 1PH 400V 3PH...

Страница 50: ...art drawing with the spare part order on which the required spare parts are clearly marked You will find the ordering address under customer service addresses in the foreword to this documentation FR...

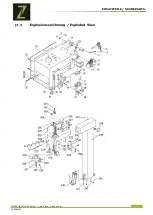
Страница 51: ...ERSATZTEILE SPARE PARTS ZIPPER MASCHINEN GmbH www Zipper Maschinen at 51 ZI RMM94H51 Explosionszeichnung Exploded View...

Страница 52: ...ERSATZTEILE SPARE PARTS ZIPPER MASCHINEN GmbH www Zipper Maschinen at 52 ZI RMM94H52...

Страница 53: ...ERSATZTEILE SPARE PARTS ZIPPER MASCHINEN GmbH www Zipper Maschinen at 53 ZI RMM94H53...

Страница 54: ...in 1 602 End cap 1 130 gasket M12 1 604 Washer 1 131 screw M12 20 1 605 6010 bearing 1 201 hexagon screw M10 30 1 606 Shaft of gear box 1 202 Cap 1 607 Flat key 1 203 antiskid nuts 1 608 Bearing 1 204...

Страница 55: ...30 PU tube 1 24 switch plate 1 431 Coupler 1 25 shaft 1 432 Piston of small cylinder 1 26 29 screw 4 433 Nut M8 1 30 elbow 1 434 Cap of small cylinder 1 31 joint 1 435 Joint bar of caps 1 32 pressing...

Страница 56: ...erungen an der Maschine vorgenommen werden die nicht mit uns abgestimmt wurden EN Hereby we declare that the above mentioned machines meet the essential safety and health requirements ofthe above stat...

Страница 57: ...schem Treibstoffen Frostsch den in Wasserbeh ltern Treibstoff ber Winter im Benzintank des Ger tes c Ausgeschlossen sind Defekte an Verschlei teilen wie Kohleb rsten Fangs cke Messer Walzen Schneidepl...

Страница 58: ...water tanks leaving fuel in the tank during the winter etc c Defects on wear parts are excluded e g carbon brushes collection bags knives cylinders cutting blades clutches sealings wheels saw blades...

Страница 59: ...tc c D fauts des pi ces d usure sont exclus par exemple balais en charbon sacs d aspirateur lames cylindres lames embrayages joints roues lames de scie cales de division lame inciseur extensions de ca...

Страница 60: ...toio della benzina della macchina durante l inverno c Sono escluse anomalie ai componenti soggetti a usura quali spazzole di carbone sacchi di raccolta lame cilindri inserti dispositivi di taglio guid...

Страница 61: ...Quality Management policy Your opinion is essential for further product development and product choice Please let us know about your Impressions and suggestions for improvement experiences that may b...

Страница 62: ...PRODUKTBEOBACHTUNG PRODUCT MONITORING ZIPPER MASCHINEN GmbH www Zipper Maschinen at 62 ZI RMM94H62...

Отзывы:

Похожие инструкции для ZI-RMM94H 230V