


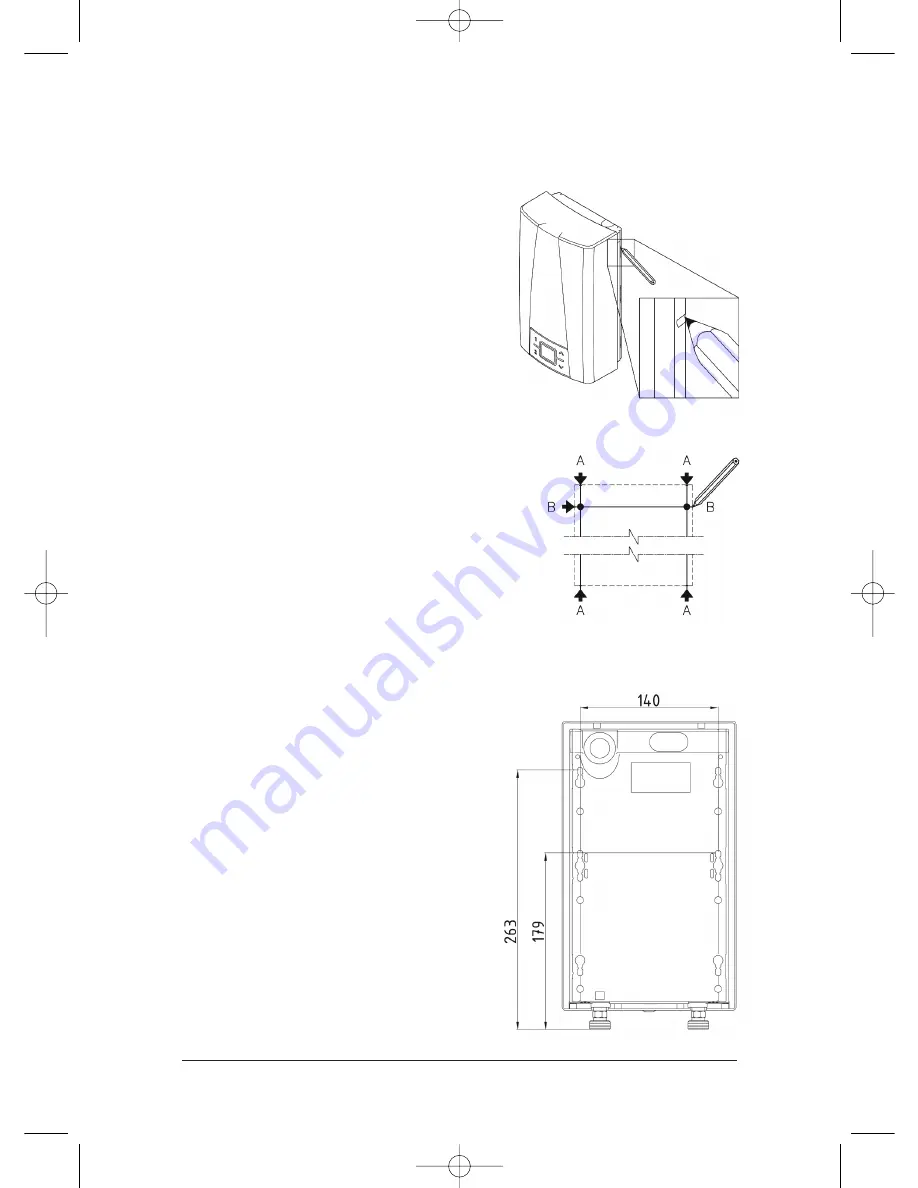
Fig 1
Fig 3
Fig 2
Installing the appliance
1. Thoroughly flush the water supply pipes
before installation to remove any water borne
debris.
2. Hold the appliance on the wall and mark the
drill lines at top and bottom, left and right,
corresponding to the small notches at the
edge of the front cover (see Fig 1).
3. Join the top and bottom marks vertically
(A-A) and the left and right marks horizontally
(B-B). The intersections of these lines are the
drill points (see Fig 2).
4. Drill the holes using a 6mm drill then insert
the dowels and screws provided leaving the
screws protruding 5mm from the wall.
5. Hang the appliance with the screws
engaging in the key-hole slots in the back
plate until it clicks into place (see Fig 3).
6. Attach the water connecting pipes to the
appliance water connections using the ½”
seals.
7. Ensure that all air is eliminated from the
water heater by opening and closing the hot
water tap until all air has been eliminated
from the water heater and no more air
emerges.
CEX-O & CEX-U Installation, Maintenance and User Instructions - August 2011
8
CEX pages qxd:Varipoint qxd 30/8/11 14:27 Page 7