background image

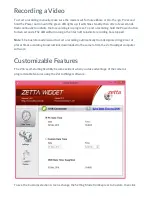
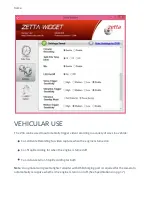
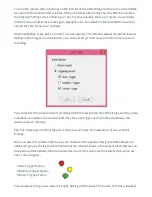
on the circular icon to the left of “Sync Settings to DVR” to complete your choices. A confirming
checkmark in green next to “Settings Saved” will appear on the screen.

Setting the Date and Time

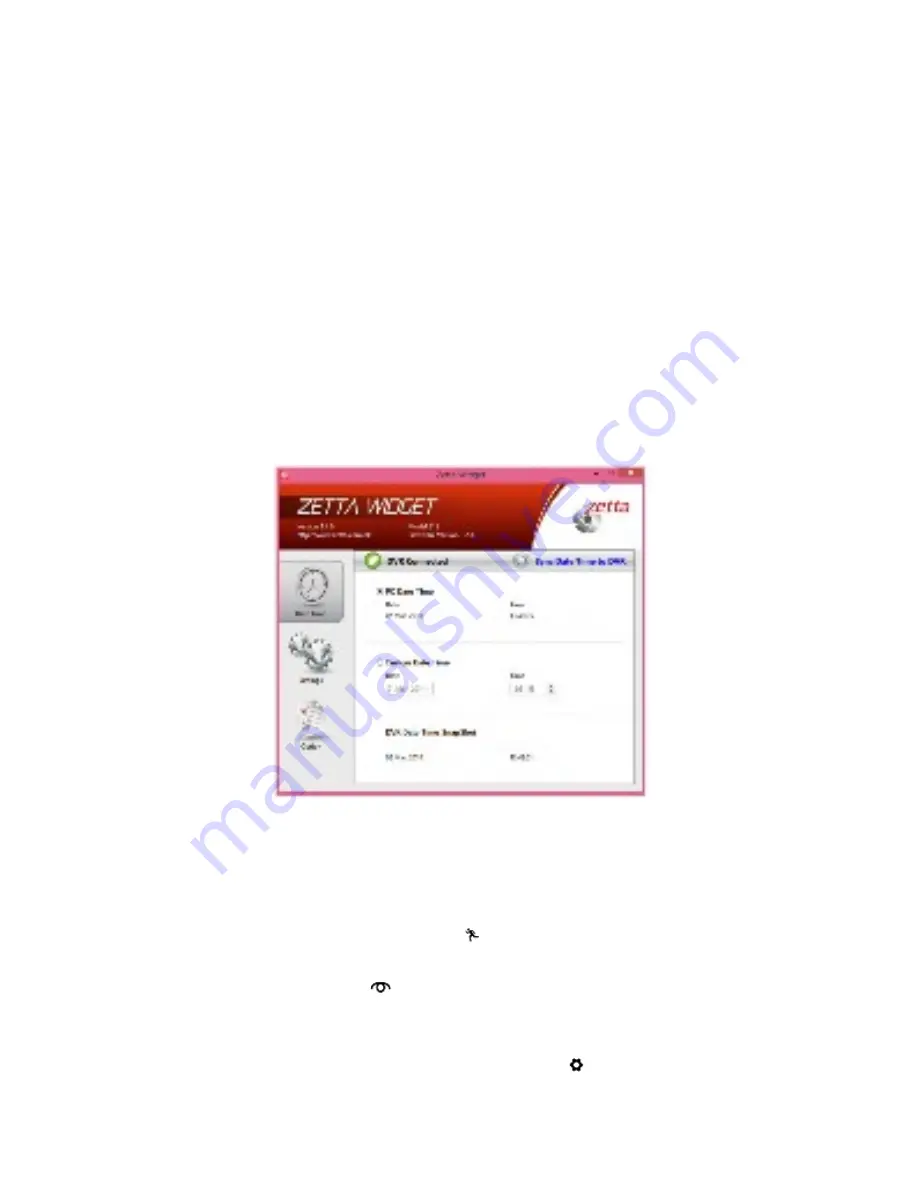
In order to superimpose the correct date and time in videos recorded with the Z16, you must first use
the Zetta Widget software. With the plug icon shown in green and labeled “DVR Connected,” click on
the clock in the left icon. You can accept the PC Date Time active on your computer or you can click on
the Custom Date Time. Either way, make sure to click on Sync Date Time to DVR so that the settings
are saved to the camera. By default, the date and time are superimposed on the bottom-right cor-
ner of the video as it’s being recorded. See Timestamp (pg. 8) under Customizable Features if you
want to record videos without the date and time.

Note: Remember to connect the camera to your computer to adjust the time when the clock springs
ahead or falls back an hour.

Setting the Mode

To get high-definition resolution (1280 x 720) during manual recording, move the three-position
switch to the middle position, the On-the-go mode  . For less resolution (640 x 360) but longer
recording time before running out of memory or overwriting previous video in a circular recording,
move the switch to Surveillance mode 

. The frame rate is the same for both modes. Neither mode

supports the automated triggers or unattended recording times you can set using the Zetta widget.
If you’ve set the camera from the Zetta widget to start recording on its own from a trigger or
designated time, you must leave the slider in the Custom position .

Содержание Z16

Страница 1: ...nition 720p video The lens housing rotates vertically 180 for flexible image framing from a hidden vantage point Recordings can be triggered automatically by motion vibration or voice and videos are d...

Страница 2: ...ime stamp willnot be accurate since it would need to be first adjusted from the computer software Move the three position switch to the middle position On the go mode indicated by the run ning man ico...

Страница 3: ...rn off completely If the three way switch is in Custom the LED willlight up orange then green The green LED willflash briefly then turn off Tip There s no way to tellwhether the battery is fully or pa...

Страница 4: ...rench German Italian and Chinese simplified or traditional Adjusting the Camera s Settings from the Software Using the included USB cable attach the camera to the computer where the Zetta Widget softw...

Страница 5: ...as it s being recorded See Timestamp pg 8 under Customizable Features if you want to record videos without the date and time Note Remember to connect the camera to your computer to adjust the time wh...

Страница 6: ...The LED willturn orange then turn off to indicate recording has stopped Note The Custom mode is used to start a recording automatically from designated triggers or at preset times according to instruc...

Страница 7: ...means that the video is saved with the least amount of file compression Low Quality with the most compression The default video quality is High Once you ve clicked on High Medium or Low make sure to...

Страница 8: ...erating Make sure to click on Sync Settings to DVR and keep the camera s three position switch on Custom mode Orientation The camera can operate upside down which is a capability you may want to put t...

Страница 9: ...umes you don t need to archive days old video but simply want the ability to retrieve recent footage when a surveillance situation or vehicular accident warrant further review Click on the Enable butt...

Страница 10: ...ore manageable Split File Time is not a factor when operating the camera in Surveillance or On the go modes for short periods of time For longer durations files willbe created at timed intervals as fo...

Страница 11: ...n set the camera to start video recording by using up to three triggers voice vibration and or motion The camera s responsiveness to these triggers each can be adjusted according to three levels of se...

Страница 12: ...go modes As for the Zetta Widget s custom settings the default is Power Saving Motion Trigger Sensitivity The most usefulautomatic trigger to cause a video to start recording from a fixed position ca...

Страница 13: ...ding for video capture when the engine is turned on Car Stop Recording for when the engine is turned off Car Activate Car Stop Recording for both Note An optionalcar cigarette lighter adapter with USB...

Страница 14: ...recording video when the ignition is started Car Activate Car Stop Recording To capture video while both driving and when the car is parked the camera can be set to record for 24 hours of coverage Af...

Страница 15: ...n the go modes Scheduling the Camera for Auto Recordings Most times you llwant to leave the camera unattended so that it starts and stops recordings on its own Using the Zetta Widget software you have...

Страница 16: ...start recording You can instruct the camera to start recording within the designated time block if triggered by a voice a vibration or a motion You can check off more than one trigger and any of them...

Страница 17: ...record within those blocks of time Note Auto recordings are only possible when the camera s three way switch is left in Custom mode Playing and Transferring Video When you re ready to review videos c...

Страница 18: ...rding While Connected to Computer Orange steady charging Green steady charging complete Specifications Lens Fixed Lens head verticalrotation 180 Sensor 1 MP 1280 x 960 Resolutions 1280 x 720 720p or 6...

Страница 19: ...etta Widget Software Loads But Won t Operate The camera must be connected and recognized by your computer for you to use the software Otherwise options willbe grayed out and every screen willshow an u...

Страница 20: ...two removable drives added Choose the drive for the microSD card with capacity 59 63 128 GB listed Choose Erase Choose MS DOS FAT under the Format Press Erase at the lower right corner Then press Eras...

Страница 21: ...o Custom Mode and no light coming from the LED press the Power button untilthe green LED turns on It willshine steadily then flash for a few seconds and turn off The camera is set for standby You can...

Страница 22: ...or accessories encountered by normaluse This warranty does NOT cover damages resulting from improper use of the device including the use of incompatible accessories such as chargers storage devices e...

Страница 23: ...not exceed one year from the date of sale...

Отзывы: