Zenoah EXZ2600DL, Руководство пользователя
Владелец Zenoah EXZ2600DL может найти и скачать руководство пользователя на русском языке абсолютно бесплатно. Эта полезная инструкция поможет вам ознакомиться с функциями и правильным использованием продукта. Скачайте руководство с manualshive.com прямо сейчас.
Поделиться
Скачать


Отзывы:
Нет отзывов
Похожие инструкции для EXZ2600DL

580
Бренд: Dahle Страницы: 40

TC085
Бренд: Cembre Страницы: 10

HCP50
Бренд: Baudat Страницы: 16

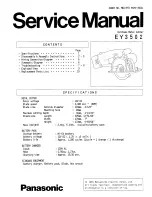
EY3550
Бренд: Panasonic Страницы: 6
EY3502 - CORDLESS METAL SAW
Бренд: Panasonic Страницы: 10

EY45A2
Бренд: Panasonic Страницы: 17

EY3552 - 18V METAL SAW
Бренд: Panasonic Страницы: 124

EY45A2
Бренд: Panasonic Страницы: 176

COX790125
Бренд: Conmetall Meister Страницы: 24

Tough SQ84T SQUealer
Бренд: Bush Hog Страницы: 1

3715
Бренд: Bush Hog Страницы: 1

TOUGH 2010 Series
Бренд: Bush Hog Страницы: 1

1812
Бренд: Bush Hog Страницы: 150

SRM-210AE
Бренд: Echo Страницы: 19

TMC24 TURF multi Cutter
Бренд: Groundsman Страницы: 22

FS 94
Бренд: Stihl Страницы: 104

FS 85
Бренд: Stihl Страницы: 104

4867
Бренд: Stihl Страницы: 460


