5
5.2.2. BLACK / Black level adjustment
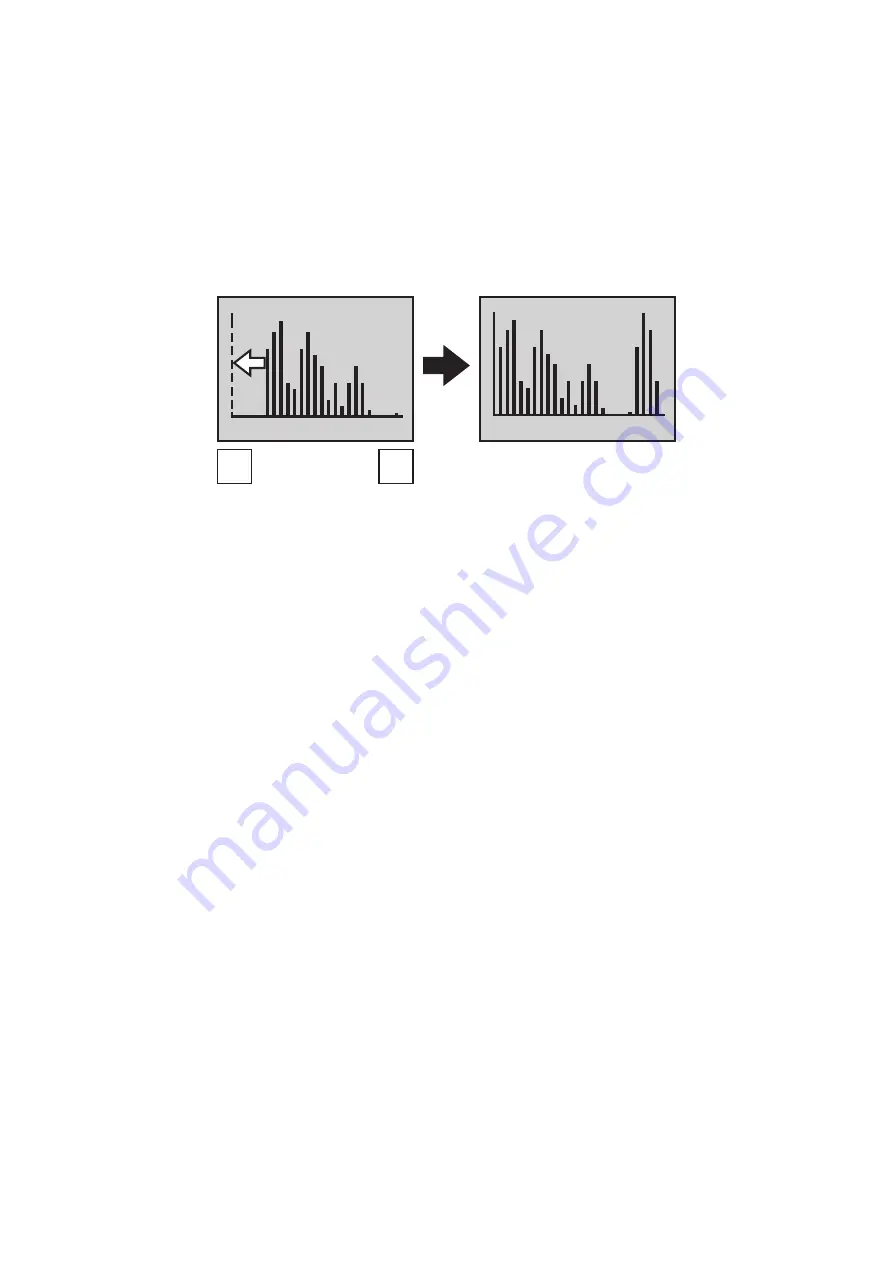
When black level doesn't drop down to the correct level in the range of input video signal
swinging, the effect of image clarifying will be poor. In such a case, better image can
be obtained by adjusting the black level. The black level is adjusted while watching a
histogram that simply shows the luminance level.
Select "BLACK" in the adjustment menu, and adjust the leftmost bar in the histogram to a
position near Level 0 with
/
buttons.
* Accurate matching to Level 0 is needless as the histogram is only a guidance.
5.2.3. BRIGHT / Brightness adjustment
This function adjusts the brightness of output image. The standard setting is "50".
Low brightness portion becomes easy to see by adjusting this setting in the plus direction
when low brightness portion in the image is hard to see. On the other hand, the noise
outstanding at low brightness portions can be reduced by adjusting this brightness level in
the minus direction.
5.2.4. STATUS / Status display switchover
This function switches over the status display of output video image.
When set to "ON", the current status of image clarifying processing strength is displayed at
the upper right on the screen.
* Image clarifying processing strength is selected by the setting described in "5.1. Image
clarifying processing".
5.2.5. QUAD / Quad (Quad partition image) processing switchover
This function divides input image into quad (Quad. partition) images and provides each
partition image with an appropriate image clarifying processing.
When the images from four cameras are synthesized into one image with an external
device such as a switcher, the image clarifying effect may be poor when the difference in
illuminance of the images from four cameras is great. In such a case, validate the Quad
(Quad partition image) processing function. (Refer to "4.3. Connection diagram".)
5.2.6. EXIT / MENU screen deletion
This function erases MENU screen.
* MENU screen will be also erased when this unit is left for approx. 20 seconds without any
operation or MENU button is held pressed for approx. 3 seconds.
0
0
▲
▼
Before Adjustment
After Adjustment


