background image

4

1

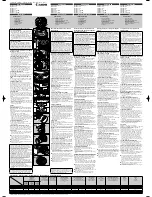
  front lens

2

  focus ring

3

  focus index mark

4

  lens foot

5

  zoom index mark

6

  zoom ring

7

  aperture index mark

8

  aperture ring

9

  lens barrel

10

  groove of the lens

11

  small screw

12

   rear  lens

13

  shims

14

  mount including the black inner ring

15

  T6 screws

Overview

Delivery Contents of a ZEISS CZ.2

2

1

3

5

6 7

8

9 11

4

12

13

14

15

10

•  1x ZEISS CZ.2
•  1x Front cap
•  1x Rear cap
•  1x Focus lever
•  3x Lens support riser 3/8"

Содержание Cinema Zoom 15-30

Страница 1: ...ZEISS Cinema Zoom Lenses Mount Change Instructions...

Страница 2: ...Technical Data 5 Changing the Mount of a ZEISS CZ 2 6 Detaching a Mount 6 Attaching a Mount 10 Adjusting a ZEISS CZ 2 to Your Digital Camera 15 Testing the Sharpness 16 Correcting the Flange Focal Di...

Страница 3: ...r Introduction In this manual you learn how to change the mount of a ZEISS Cinema Zoom CZ 2 abbreviation ZEISS CZ 2 and how to match it to a digital camera In order to explain the procedure this manua...

Страница 4: ...mark 8 aperture ring 9 lens barrel 10 groove of the lens 11 small screw 12 rear lens 13 shims 14 mount including the black inner ring 15 T6 screws Overview Delivery Contents of a ZEISS CZ 2 2 1 3 5 6...

Страница 5: ...1 Close focus distance is measured from the image plane 2 Front to PL mount flange 3 Horizontal angle of view for a full frame camera aspect ratio 1 1 5 dimensions 36 mm x 24 mm 1 42 x 0 94 4 Horizont...

Страница 6: ...d ZEISS CZ 2 ZEISS T6 torque wrench with a torque of 0 4 Nm alternatively regular T6 torque wrench with a torque of 0 4 Nm ZEISS Interchangeable Mount Set for ZEISS CZ 2 The use of tools offered by ZE...

Страница 7: ...al number is located at the side of the lens foot The serial number varies 2 Remove the rear lens cap You can now see the mount 3 With a T6 torque wrench remove the torx screws of the mount The black...

Страница 8: ...t than a PL mount you can now see the black adapter ring If you are changing from a PL mount skip Step 5 and 6 since the PL mount doesn t have an adapter ring 5 With a T6 torque wrench remove the torx...

Страница 9: ...ms 3 small screw in the groove of the lens 1 2 3 Now you see the shim s and a small screw in the groove of the lens barrel You successfully detached the mount When detaching the mount for the first ti...

Страница 10: ...ZEISS or your trusted ZEISS Dealer See Mount Change Accessories Requirements Ensure that your working space is flat and leveled in order to prevent the lens from tilting and falling over Ensure that t...

Страница 11: ...ith your ZEISS Interchangeable Mount Set for the ZEISS CZ 2 Make sure the small screw in the groove of the ZEISS CZ 2 sinks into groove of the adapter ring The shape and height of the black adapter ri...

Страница 12: ...ace the PL mount on the ZEISS CZ 2 in such a way that the groove of the PL mount lays on top of the small screw on the lens barrel 3 II EF mount Place the silver EF mount on the adapter ring in such a...

Страница 13: ...ce the F mount on the adapter ring in such a way that the notch aligns with the aperture index mark 3 IV MFT mount Place the MFT mount on the adapter ring in such a way that the notch aligns with the...

Страница 14: ...h tighten the torx screws using a torque of 0 4 N You now successfully changed the mount of a ZEISS CZ 2 In this chapter you learned how to detach the mount of your ZEISS CZ 2 and attach a new mount t...

Страница 15: ...terchangeable Mount Set for ZEISS CZ 2 alternatively ZEISS Shims set The use of tools offered by ZEISS is highly recommended You can purchase these tools directly from ZEISS or your trusted ZEISS Deal...

Страница 16: ...Mount the ZEISS CZ 2 on the camera 3 Mount the camera on a tripod 4 Position your camera at a testing distance according to the Shimming Table in the appendix The testing distance is measured from the...

Страница 17: ...otating the zoom ring 11 Set the focus ring according to the testing distance See Shimming Table 12 Turn the focus ring to determine if the sharpness is located below or above the testing distance Thi...

Страница 18: ...ra If you measured the sharpness above the testing distance you need to enlarge the distance between the test chart and the image plane of the camera 15 Now remeasure the testing distance between the...

Страница 19: ...e tables in the appendix See Shimming Table Any combination of shims is possible to achieve the required thickness and therefore the desired flange focal distance Always use the closest possible combi...

Страница 20: ...rewing in the screws 6 Follow the steps of chapter Attaching a Mount to attach a new mount 7 echeck the sharpness of the lens by following the steps of chapter Testing the Sharpness once more Check th...

Страница 21: ...e at best focus mm Change of total washer thickness mm Object distance at best focus ft Change of total washer thickness mm 4460 0 09 14ft 10 0 11 4470 0 07 14ft 10 1 2 0 08 4480 0 04 14ft 11 0 06 449...

Страница 22: ...0 7ft 0 0 00 2010 0 02 7ft 1 2 0 02 2020 0 04 7ft 1 0 05 2030 0 06 7ft 1 1 2 0 07 2040 0 07 7ft 2 0 10 Compact Zoom CZ 2 15 30 T2 9 Meter distance scale Feet distance scale Distance to test chart mm 1...

Страница 23: ...2016 449 Interchangeable Mount Set MFT CZ 2 15 30 T2 9 2075 925 Interchangeable Mount Set E CZ 2 70 200 T2 9 2002 827 Interchangeable Mount Set E CZ 2 28 80 T2 9 2016 450 Interchangeable Mount Set E...

Страница 24: ...446 Oberkochen Germany EN_10_070_0003I Printed in Germany CZ VIII 2017 Subject to change in design and scope of delivery and as a result of ongoing technical development Phone 49 7364 20 6175 Fax 49 7...

Отзывы: