background image


ZEBEX INDUSTRIES INC. 


Part Number 

Subject 

Version  

Date

Page 

Model Name 

Description  


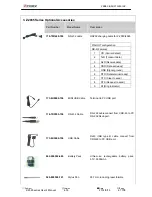
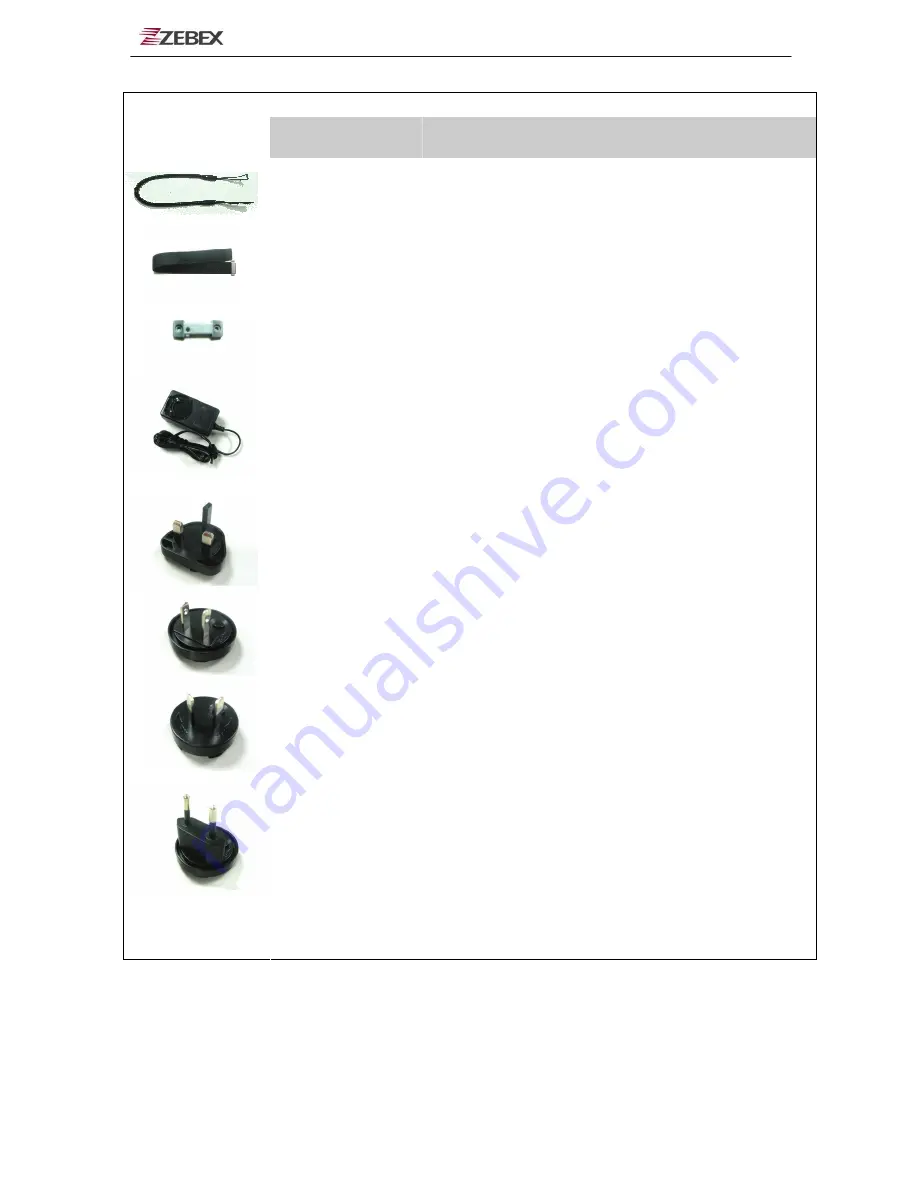
623-220500-061 

Sling 

Sling for stylus pen


623-220650-051 

Hand Strip 

Z-2065 hand strip and stylus pen 
holder 


560-020650-891 

Hand Strip Holder 

Z-2065 hand strip holder 


862-206502-400 

AC Adapter 

AC 100~240V 50/60HZ 0.6A, DC 
9V/2A 


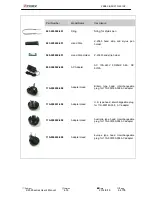
11S-000000-008 
 

Adapter Head 

Britain type head ,interchangeable 
plug, for 11S-900180-008 AC adapter


11S-000001-008 

Adapter Head 

U.S. type head ,interchangeable plug, 
for 11S-900180-008  AC adapter 


11S-000002-008 

Adapter Head 

Australia type head ,interchangeable 
plug, for 11S-900180-008 AC adapter


11S-000003-008 

Adapter Head 

Europe type head ,interchangeable 
plug, for 11S-900180-008 AC adapter


Z-2065 series User’s Manual 

4.00 

2014/9/19 

68

 / 70


Содержание Z-2065 series

Страница 1: ...ZEBEX INDUSTRIES INC 1...

Страница 2: ...ck Ver 2 00 2009 3 2 53 56 Adding the picture of How to order Ver 3 00 2010 1 25 26 49 Updated PowerPack Functions and pictures Ver 3 00 2010 3 16 30 39 Adding GPRS User Manual Ver 3 00 2010 3 19 1 26...

Страница 3: ...Guide 13 Getting Started 15 Inserting the Battery 15 Remove the Battery 15 Charging the Battery 16 Charging by cable 16 Charging by cradle 16 Cradle LEDs 17 Charging the battery separately in the cra...

Страница 4: ...2 Set Connection Properties 34 Phone Number 36 Set Dial Properties 37 Connect to GPRS Service 39 Disconnect GPRS Service 40 Using the Zebex PowerPack 41 Backlight 41 Calculator 43 File Transfer 44 Ex...

Страница 5: ...with an integrated 802 11b g wireless communication 1D 2D barcode scanner touch screen and 29 keys keypad The design is complies with IP64 regulations and ideal for the mobile worker as it simple and...

Страница 6: ...ilure to follow the instructions and warnings or misuse or alteration or repair of the products without written approval No part of this document may be reproduced transmitted stored in a retrieval sy...

Страница 7: ...damage Safety Operation WARNING Disassembly and Modification Never try to disassemble or modify the device in any way All servicing should be carried out by qualified Zebex personnel or Zebex approve...

Страница 8: ...horized ZEBEX service provider Continued use creates the danger of fire and electrical shock Foreign Objects Should any foreign matter ever get into the device immediately turn off the power and conta...

Страница 9: ...ation If this equipment does cause harmful interference to radio or television reception which can be determined by turning the equipment off and on the user is encouraged to try to correct the interf...

Страница 10: ...Adapter Z 2065 series Mobile Data Terminal Stylus Pen RS 232 DB9 F Cable Hand Strip USB cable Terminal connect to PC USB port Hand strip Holder Battery Pack Sling for stylus Pen Subject Version Date P...

Страница 11: ...ZEBEX INDUSTRIES INC Optional Parts Cradle package Docking Cradle RS232 cable AC Adapter USB cable Cradle to USB Subject Version Date Page Z 2065 series User s Manual 4 00 2014 9 19 10 70...

Страница 12: ...ories RS232 Cable AC Adapter RS 232 DB9 F Cable Britain Plug head USB cable Cradle to USB U S Plug head Battery Pack Australia Plug head Stylus Pen Europe Plug head Subject Version Date Page Z 2065 se...

Страница 13: ...ZEBEX INDUSTRIES INC Hand Strip for stylus Pen Sling for stylus Pen Hand strip Holder Subject Version Date Page Z 2065 series User s Manual 4 00 2014 9 19 12 70...

Страница 14: ...total of 29 keys are provided to turn power ON or OFF and other operations 6 Reset switch inside the hole Use reset needle take off the other side of stylus pen cover to press the RESET switch located...

Страница 15: ...Press to turn the LCD backlight on when it is off ESC Escape key Press to perform a cancel action SCAN Scan key Press and hold to scan a barcode SF Fn Shift key The key is used in combination with ot...

Страница 16: ...rted Inserting the Battery Insert the battery pack as shown and watch the battery direction Remove the Battery Push the side lock to pick up the battery pack Subject Version Date Page Z 2065 series Us...

Страница 17: ...itself or independently via the recharging slot at the back of the cradle Charging by cable Connect the charging cable and AC adaptor as shown Charging by cradle Cradle rear view Subject Version Date...

Страница 18: ...attery slot of the cradle for recharge It remains lit until the charge is complete Right LED The LED lit when the cradle is connected to AC power Charging the battery separately in the cradle Insert t...

Страница 19: ...e power jack to the cradle and plug AC adapter into the socket NOTES When charging the battery for the first time charge for at least 12 hours prior to use Subject Version Date Page Z 2065 series User...

Страница 20: ...ESC F1 3ghi F2 BS SCAN RESET 0 Using the Cold reset function Cool reset function allows you to return the device to the factory settings while wiping all data from the memory Press down and hold the...

Страница 21: ...ce USB RS 232 ports WLAN transmitter optional Bluetooth transmitter receiver optional Connecting To a PC In order to use the software supplied with the Z 2065 the mobile data terminal must be connecte...

Страница 22: ...SB Cradle The cradle must also be connected via one of your PC s USB ports Attach one end of the cable to the USB interface on the cradle and the other to your PC Subject Version Date Page Z 2065 seri...

Страница 23: ...he SD Slot cover as shown Insert the SD card 3 Close the SD slot Cover Remove the SD Card 1 Make sure the power is turn off 2 Open the SD Slot cover as shown Take off the SD card 3 Closed the SD slot...

Страница 24: ...nd shape back design allow it to sit in palm fitly for best operation comfort and for future expansion it has a gun grip design to broaden its application into more categories Z 2065 has an unbeatable...

Страница 25: ...82 65W1G0 000 882 65W1G0 100 Z 2065W 2G 882 65W2G0 000 Z 2065W 1S 882 65W1S0 000 882 65W1S0 100 Z 2065W 2S 882 65W2S0 000 Z 2065W 1H 882 65W1H0 000 882 65W1H0 100 Z 2065W 2H 882 65W2H0 000 e GPS S Spe...

Страница 26: ...sions 190 5 mm L x82 8 mm W x 50 5 mm H Weight Approx 480 g battery included Environmental Operating Temp 0 C 50 C Storage Temp 10 C 60 C Operating Humidity 10 70 non condensing Storage Humidity 5 70...

Страница 27: ...is used in the correct manner To scan a barcode 1 Hold the Z 2065 horizontally and point it directly at the barcode you wish to scan 2 Once in the correct position press the SCAN button An audible al...

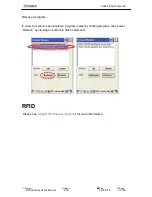
Страница 28: ...ou can find the program located in the Programs PowerPack RFID Scanning Position RFID scan module was installed in the back of terminals The devices can read from 30 to 50mm distance from the back sid...

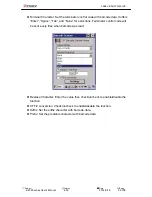
Страница 29: ...three UID types such as 15693 14443A and 14443B 2 User can also adjust scanning rate by selecting how many msec for scanning once Then confirm by clicking Timer button 3 After scanning UID it will be...

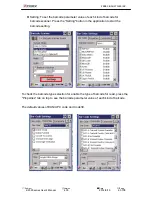
Страница 30: ...st input the location in column next to Read Block Then confirm by pressing Read Block button Read Data will appear in column showed in green circle of below diagram 3 To write UID from certain Block...

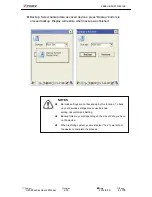
Страница 31: ...from Mifare UID card 1 Place UID card within valid range check UID by pressing Open Card button UID will display in red circle shown in below diagram 2 To perform read and write commands please refer...

Страница 32: ...Light UID card 1 To read data from UID card press the Read button Read Data will appear on the screen 2 To write UID card write the data into the column next to the Write button Confirm written data b...

Страница 33: ...ke New Connection 1 Click Network and Dial Up Connections in the settings Show as below figures 2 Click Make New Connection to create the new connection Show as below figures Subject Version Date Page...

Страница 34: ...INC 3 Select the Dial Up Connection and press Next button to make anew connection Show as below figure 4 Press Next button to select the modem Subject Version Date Page Z 2065 series User s Manual 4 0...

Страница 35: ...s 1 Select Internal GPRS Modem and press the Configure button to change the settings of properties Subject Version Date Page 2 Change the Baud Rate to 115200 in Port Settings Show as below figure Z 20...

Страница 36: ...e APN for GPRS connection For the setting of known APN around the work please refer below link http www quickim com support gprs settings html 4 Press OK button to complete the settings 5 Press Phone...

Страница 37: ...1 Set phone number to 99 or 99 1 This number depends on the service provider Show as below figure 2 Press OK button to finish the settings of new connection Subject Version Date Page Z 2065 series Us...

Страница 38: ...ZEBEX INDUSTRIES INC Set Dial Properties 1 Double Click the connection 2 Press the Dial Properties button Subject Version Date Page Z 2065 series User s Manual 4 00 2014 9 19 37 70...

Страница 39: ...STRIES INC 3 Create new one or select one setting in the Location and press the Edit button 4 Set the Dialing Patterns as below figure Subject Version Date Page Z 2065 series User s Manual 4 00 2014 9...

Страница 40: ...PRS Service 1 Press the Connect button 2 During the Dial Up The screen shows the status as below figure 3 It shows below figure when connected to GPRS service Subject Version Date Page Z 2065 series U...

Страница 41: ...ZEBEX INDUSTRIES INC Disconnect GPRS Service 1 Double click the connection icon in taskbar 2 Press the Disconnect button Subject Version Date Page Z 2065 series User s Manual 4 00 2014 9 19 40 70...

Страница 42: ...ch installs in each of our WinCE product It is free charge for you We offer several function for let you control your device without any programming Backlight This application is set up the Backlight...

Страница 43: ...es into suspend mode Always OFF This function can set up the backlight to be always off The Keypad Backlight setting Auto Mode This function can be used to set up the keypad backlight to be auto off a...

Страница 44: ...buffer of memory MR Got the value of buffer MS Storage the value to buffer M Append the value to the buffer CE Clear the display area to 0 but keep the value in buffer C Clear the display and the buf...

Страница 45: ...to auto search devices with Bluetooth communication so all devices within valid range will be listed in window of 1 Select Remote Device Function Instructions 1 Select Remote Device All devices with...

Страница 46: ...s can be activated under Switch Function within PowerPack software utilities 1 Select Query for searching Bluetooth devices below window will pop up on display 2 Select Bluetooth devices for receiving...

Страница 47: ...3 Click bottom to select the file need to be transferred then click OK bottom to confirm 4 Select Start Transfer bottom to start file transferring Subject Version Date Page Z 2065 series User s Manual...

Страница 48: ...plication program and even the windows system function like increasing or decreasing the volume or doing the adjustment of brightness on LCD panel You can find this application is located on path sett...

Страница 49: ...ON OFF Backlight Manager Power Switch Stylus Calibration Wi Fi ON OFF Bluetooth ON OFF Volume Volume Backlight Backlight Cut Copy Paste Program File Install application program according to demand th...

Страница 50: ...unction items 1 Select items need to be modified select by clicking Edit bottom to enter set up window as below Subject Version Date Page 2 Select new functional item and complete editing Z 2065 serie...

Страница 51: ...cution 1 Select Program File item then click Browse bottom to enter File 2 Opening Window Subject Version Date Page 3 Select software required auto execution then select OK bottom to complete selectin...

Страница 52: ...ge reappear on the display F1 on function key item lists had been updated to testkeypadChar GPS Information The GPS Information allows operators to view GPS status and to setup the GPS function during...

Страница 53: ...ed on top of display providing functionalities of Priority Remove and Browse Priority Providing UP and DOWN two bottoms for adjusting priority on the lists Edit Providing Remove and Browse two functio...

Страница 54: ...elow menu will appear select preload program by using folder Programs can be selected more than once Subject Version Date Page 2 Confirming file by clicking OK will get back to Preload Manager main pa...

Страница 55: ...eck everything please follow steps listed below 1 Select by clicking play music exe program and click Up bottom to move up the music exe 2 Then select by clicking check everything program and click Do...

Страница 56: ...move open explorer program select by clicking program then select Remove by clicking on bottom to finish command RFID Please see Using RFID Scanner Optional for more information Subject Version Date P...

Страница 57: ...nterface Window for setting up Wifi will pop up by double clicking small icon within red circle which shown as below diagram Under the content of Profile the available wireless network access point wi...

Страница 58: ...f main menu existing profile WiFi can be set up as Auto Profile Existing Profile lists can be viewed existing profile by clicking List button check profile and click on OK button Select On from Auto P...

Страница 59: ...ication that need to execute data as input ex WordPad Key Emulation Transfer barcode information via Key Emulation to executed software s edit window Key Emulation function can also be used for barcod...

Страница 60: ...ll be sent every time when barcode was read Replace Character Enter the value then check uncheck to enable disable the function UTF 8 conversion Check uncheck to enable disable the function Suffix Set...

Страница 61: ...n the application to start the barcode setting To check the barcode type selection for enable the type of barcode for read press the Properties tab on top to see the barcode parameter value of each ki...

Страница 62: ...backup or restore the device setting information into Flash Disk and storage card Application also provides selection of Flash Disk when there is no storage card When Mini SD Card was installed into...

Страница 63: ...ettings are not backed up by this function To back up your barcode settings please use barcode setting Export Import Setting Backup time may vary depending on the size of data you have on the device W...

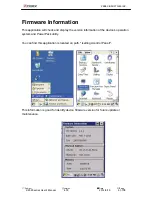
Страница 64: ...tion of the device s operation system and PowerPack utility You can find this application is located on path settings control Panel This information is good for identify device firmware version for fu...

Страница 65: ...ireless LAN BT GPRS GPS module 2D imager RS 232 DB9 F cable USB interface 882 65G1SH 100 Z 2065W1GS H WindowsCE NET Handheld Computer W Wireless LAN BT GPRS GPS module 1D engine RFID H RS 232 DB9 F ca...

Страница 66: ...9 180 RS 232 Cable RS232 charging cable for Z 2050 2065 173 0U0000 150 MINI USB Cable Terminal to PC USB port 862 206502 400 Battery Pack Lithium Ion rechargeable battery pack 3 7V 5000 mAh 560 820500...

Страница 67: ...rom CRD 60 to PC RS 232 Dsub port 173 0U3000 150 USB Cable RJ45 USB type B cable connect from CRD 60 to PC USB port PIN OUT configuration DB 9 F 1 CD Carrier detect 2 TxD Transmit data 3 RxD Receive d...

Страница 68: ...ignal ground 6 DTR Data terminal ready 7 CTS Clear to send 8 RTS Request to send 9 RI Ring indicator 173 0U0000 150 MINI USB Cable Terminal to PC USB port 174 1RF050 150 RS 232 Cable RS 232 cable conn...

Страница 69: ...er AC 100 240V 50 60HZ 0 6A DC 9V 2A 11S 000000 008 Adapter Head Britain type head interchangeable plug for 11S 900180 008 AC adapter 11S 000001 008 Adapter Head U S type head interchangeable plug for...

Страница 70: ...ZEBEX INDUSTRIES INC Subject Version Date Page Z 2065 series User s Manual 4 00 2014 9 19 69 70 MEMO...

Отзывы: