ZAP-680 802.11ac
Smart Access Point
Quick Setup Guide
This Quick Setup Guide provides step-by-
step instructions on how to set up your
ZAP-680 Smart Access Point. After
completing the steps described in this
guide, you will be able to place the AP at
your site and provide wireless network
access to users.
PACKAGE CONTENTS
HARDWARE OVERVIEW
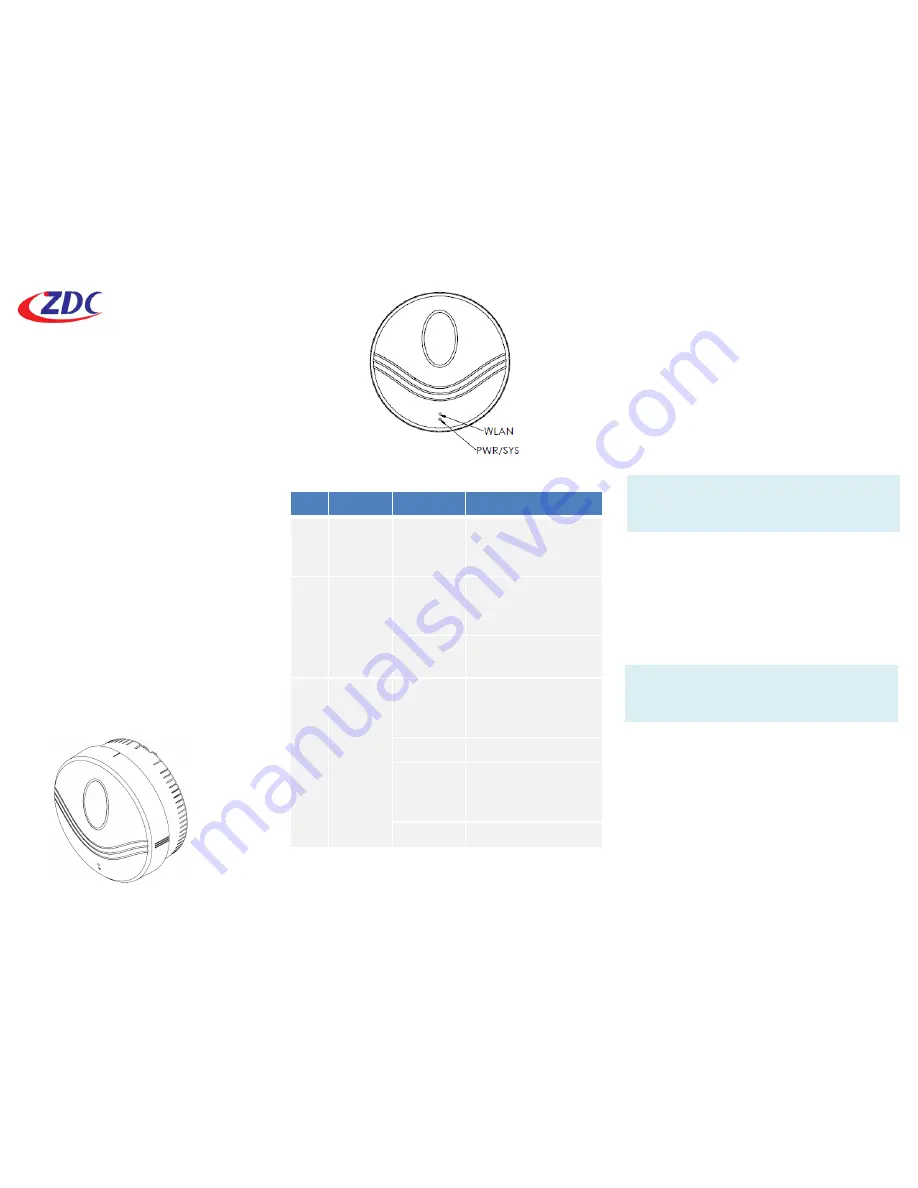
Front View
No
LED
State
Description
1
PWR
On
(Green)
Power is being
supplied to the
device
2
SYS
On
(Amber)
Device ready.
Ethernet port
connected.
Off
Ethernet port not
connected.
3
WLAN
Blinking
(Green)
2.4G radio enabled
or data being
forwarded
Off
2.4G radio disabled
Blinking
(Amber
5G radio enabled or
data being
forwarded
Off
5G radio disabled
LED Indicators on the Device
• ZAP-680 smart access point (1)
• DC power cord & PoE Injector (1)
• Mounting screws and brackets (2)
• A4 paper
SETUP REQUIREMENTS
Before installing your ZAP-680 access point, be
sure that you have the following:
• A computer running Windows 7, Vista, or XP
• A CAT5 UTP cable of required length
• One of the following power sources:
- IEEE 802.3at-compliant power over Ethernet
(PoE) source
- Power adapter came with the package
Note:
If the AP is deployed with a AP controller, please
follow the section
INSTALL THE AP
to proceed.
STEP 1: POWER ON THE AP
The Smart Access Point comes with a PoE
injector kit for connecting to power over the
Ethernet port. The Smart Access Point
automatically turns on as soon as it is connected
to a power source.
Cautions:
Use only the power adapter and PoE injector
that came with the wireless AP.
1. Insert one end of an Ethernet cable to the
P+DATA OUT
port on the PoE injector.
2. Insert the other end to the
LAN 1/PoE
port on the Smart Access Point.
3. Connect the power cord to the PoE
injector.
4. Connect the power plug to a wall socket.


