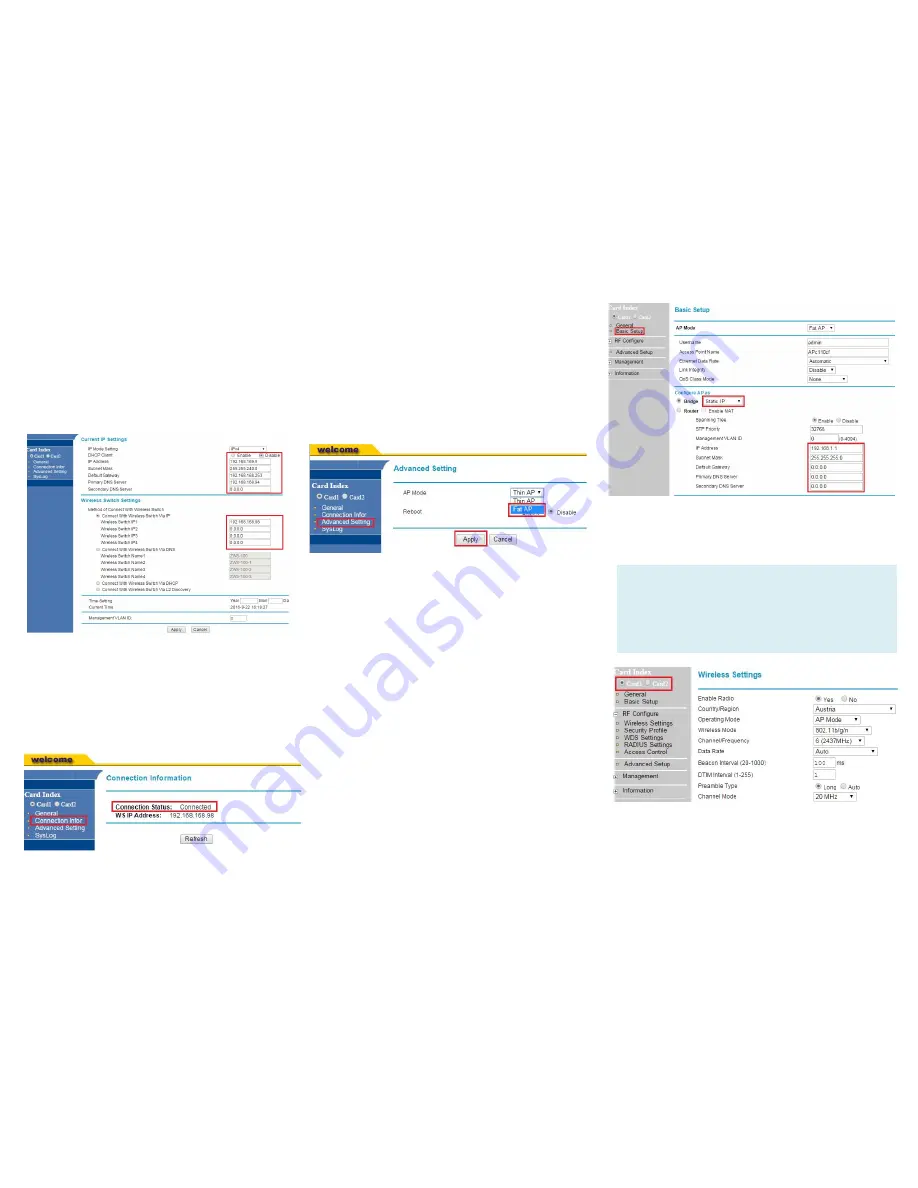
1. Once login, first assign a fixed IP address
or a DHCP IP to the AP under
Current IP
Setting
. Under
Wireless Switch Setting
,
select Connect With
Wireless Switch Via
IP
and input the IP address of the AP
access controller. Click Apply to take
effect.
2. On the main menu on the left, go to
Connection Info
to check the
connection status with the AP controller.
If the tunnel has been made successfully,
the connection status will show:
Connected.
Configuring for Standalone Operation
Before configuring fat AP Basic settings, make
sure that AP mode is set to
Fat AP.
1. If currently in Thin AP Mode: On the main
menu on the left, click
Advanced Setting
.
Select
Fat AP
from the drop-down list. Click
Apply to take effect.
2. On the main menu on the left, click
Basic
Setup
. In the
Basic Setup
page, go to the
section Configure AP as. If you want to
assign a fixed IP address, select
Static IP
.
Enter the parameters in the following fields:
IP Address, Subnet Mask, Default Gateway,
Primary DNS Server, and Secondary DNS
Server. If you want the wireless AP to obtain
the address from the DHCP Server
automatically, select
DHCP Client
. Click
Apply.
3. Go to
RF Configure
> Wireless Settings. (For
dual band 5G setting, select Card 2 first then
go to
RF Configure
>
Wireless Settings
.)
Note:
For dual band APs, the two radios (2.4GHz and
5GHz) need to be configured separately on the
Web interface. The rest of the configuration
procedures are the same as for 2.4G and 5G radio.
These are the essential wireless settings that will
enable wireless devices on the network to
associate with the Access Point.


