5
2.3.
READING THE BATTERY LEVEL INDICATOR
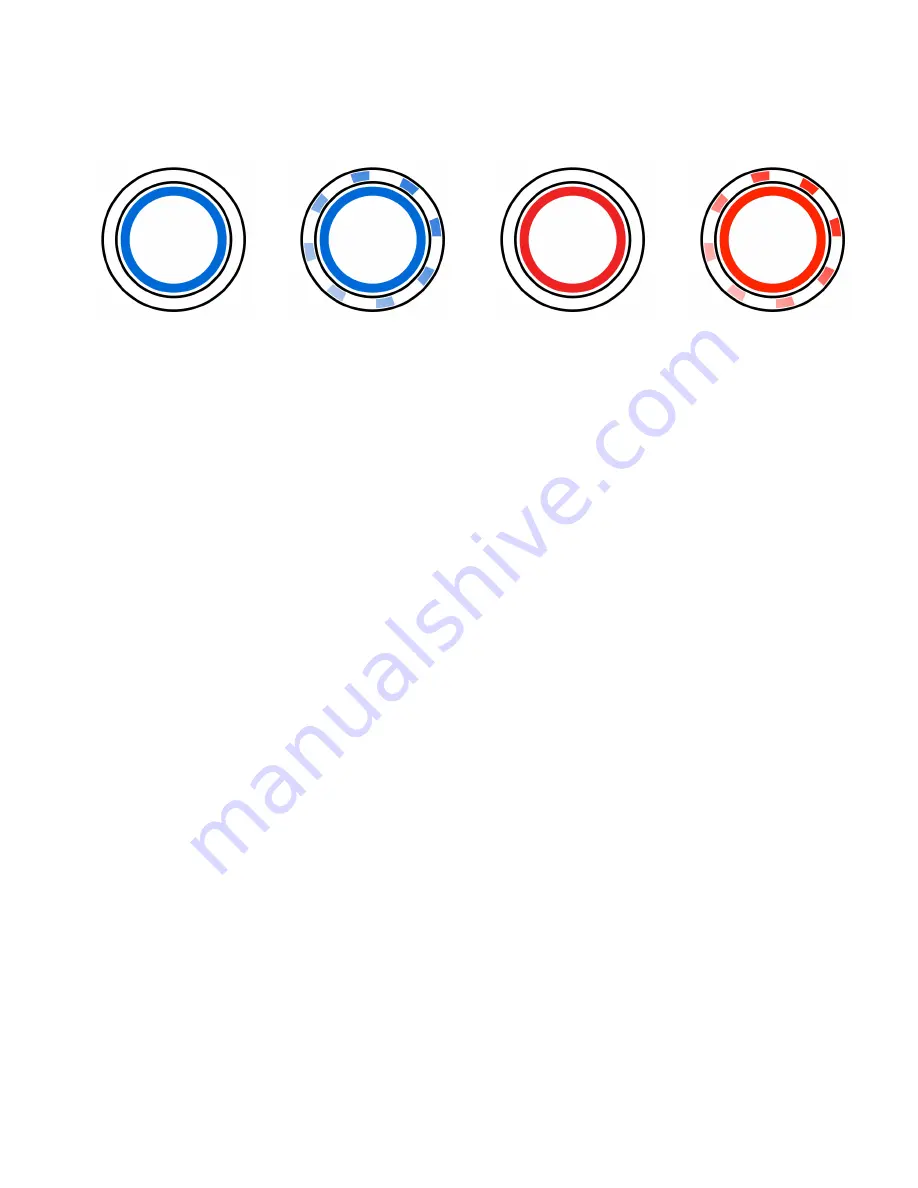
When the board is in the powered ON, the battery level remaining can be determined by
viewing the colors of the LED ring around the Power Button.
SOLID BLUE
Battery level is
GOOD
(50% - 100%). Charge
only if necessary
BLINKING BLUE
Battery level is
MEDIUM
(25% - 49%).
Charge at next
opportunity
SOLID RED
Battery level is
LOW
(10% - 24%). Charge
at next opportunity.
BLINKING RED
Battery level is
CRITICAL
(0% - 9%).
Charge at next
opportunity.
2.4.
TURNING ON THE HEADLIGHTS / TAIL LIGHTS
Certain
ZBoards are equipped with LED Headlights and Tail Lights. With the ZBoard powered
ON, quickly press and release the Power Button to turn both sets of lights ON. Press and
release a second time to make them blink, and press again turn them back OFF. The
Headlights and Tail Lights are set to OFF by default when first turning on the ZBoard. You
may have to wait up to seven seconds after powering on the board to turn on the lights.
2.5.
CHARGING THE ZBOARD
To properly charge your board, first
plug your charger into any standard 110V outlet then
insert the 3-pin DIN charge connector into the mating charge socket on the underside of the
battery box. The red LED on the charger will light up. Once this LED has turned green, your
battery is fully charged and ready for its first ride. 220V users may require an adapter.
2.6.
ADJUSTING SPEED AND ACCELERATION
Your ZBoard is equipped with four speed modes: Beginner, Normal, Expert, and Ludicrous.
Each successive mode has increased acceleration and top speed, along with reduced range
and added heat.
To adjust the Speed Mode, follow these directions:
1)
Turn the ZBoard OFF.
2)
Tilt the ZBoard vertically, with the nose pointing towards the sky.
3)
Press and hold the Power Button until the LED ring begins blinking. Once the LED ring is
blinking, release the Power Button. The board is now in Tuning Mode.
4)
View the blink rate and color. Compare it to the chart below.
Содержание Blue Edition
Страница 1: ...Owner s Manual ...


