16
Zanussi 818 15 02--02/5
Electrical connection
Any electrical work required to install this
appliance should be carried out by a
qualified electrician or competent person.
This appliance must be earthed.
The manufacturer declines any liability should
these safety measures not be observed.
Electrical Requirements
Before switching on, make sure the electricity
supply voltage is the same as that indicated on the
appliance rating plate.
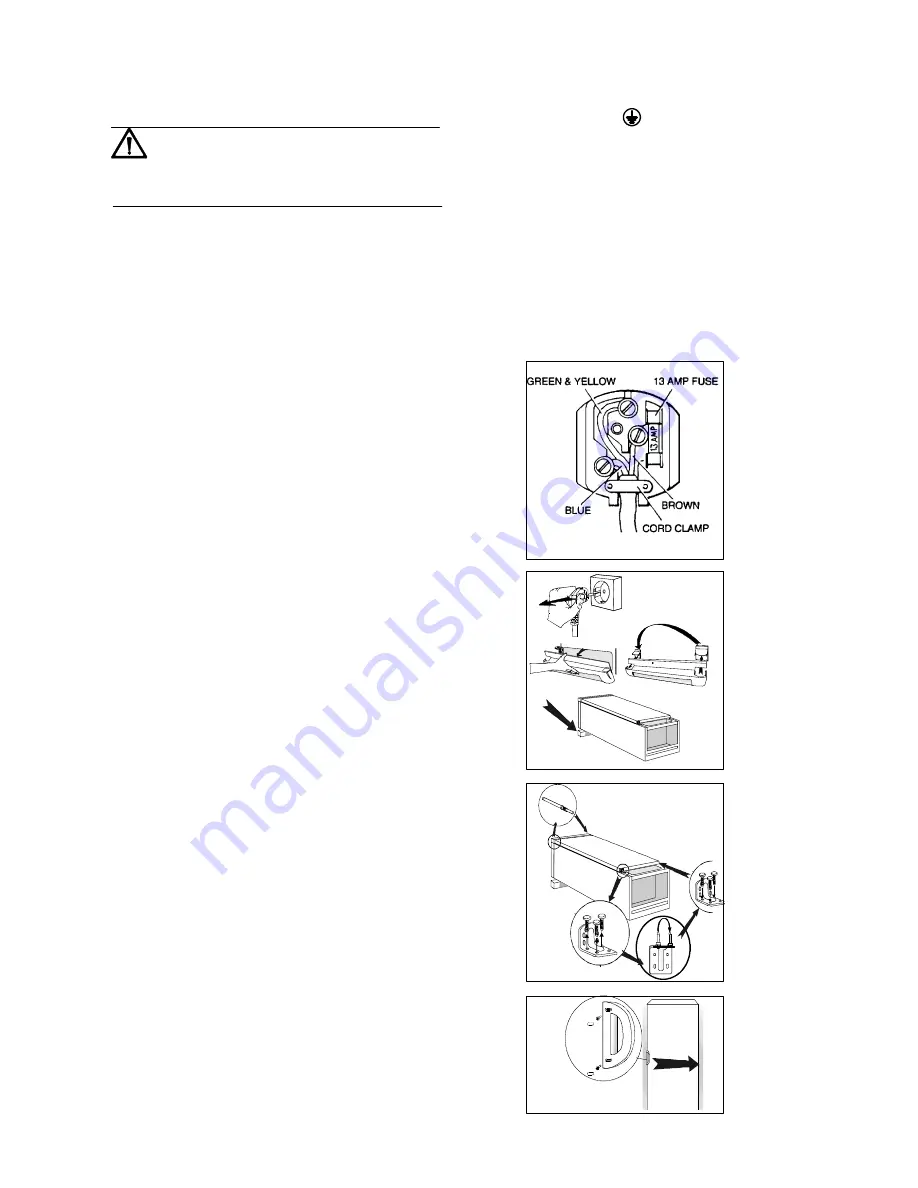
The appliance is supplied with a 13amp plug fitted.
In the event of having to change the fuse in the plug
supplied, a 13amp ASTA approved (BS1362) fuse
must be used.
Should the plug need to be replaced for any reason.
The wires in the mains lead are coloured in
accoordance with the following code:
Green and yellow
-Earth
Blue
-Neutral
Brown
-Live
The wire coloured green and yellow must be
connected to the terminal marked with the letter "E"
or by the earth symbol
or coloured greeen and
yellow.
The wire coloured blue must be connected to the
terminal marked "N" or coloured black
The wire coloured brown must be connected to the
terminal marked "L" or coloured red.
Upon completion there must be no cut, or stray
strands of wire present and the cord clamp must be
secure over the outer sheath.
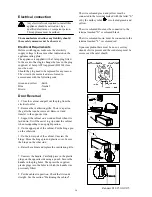
Door Reversal
1. Close the cabinet and pull out the plug from the
electrical outlet.
2. Remove the ventilation grille. There is a part on
the grille that can be removed. Remove it and
transfer to the opposite side.
3. Support the cabinet on a wooden block when it is
laid down. It will be easier to grip under the cabinet
when resupporting to an upright positon.
4. On the upper part of the cabinet. Put the hinge pin
on the other side.
5. On the lower part of the cabinet. Unscrew the
hinge. Move the hinge pin and plastic cover. Secure
the hinge on the other side.
6. Raise the cabinet and replace the ventilation grille.
7. Unscrew the handle. Carefully press in the plastic
plugs on the opposite side using a punch. Secure the
handle in the plug holes. Then press the supplied
plastic plugs into the holes to which the handle was
previously fitted.
8. Put the cabinet in position. Check that it stands
straight. See the section "Positioning the cabinet".
1
2
3
4
5
7
Содержание ZVR11R
Страница 1: ...FREEZER ZVR11R INSTRUCTION BOOKLET 8181502 02 5 ...
Страница 17: ......
Страница 18: ......
Страница 19: ......
Страница 20: ...MARIESTAD U AV Electrolux Household Appliances Limited 2000 ...

