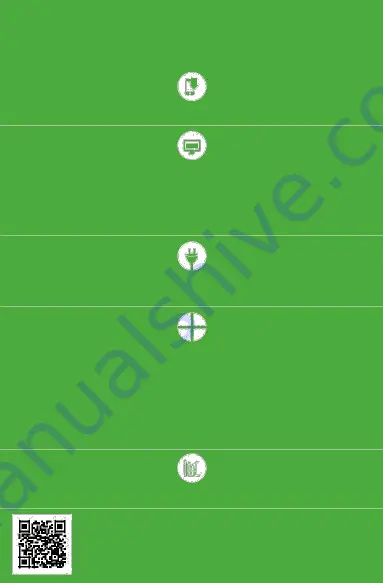
background image

App installieren 


Laden Sie die App auf Ihr Smartphone runter. 


Konto erstellen / Login 


Wechseln Sie zum nächsten Punkt über, falls Sie schon ein Konto besitzen oder bereits eingeloggt sind. 


Falls Sie kein Konto besitzen: Drücken Sie „Konto erstellen“ Geben Sie Ihre E-Mail Adresse sowie Ihr 

gewünschtes Passwort ein. Öffnen Sie die erhaltene E-Mail und bestätigen Sie die Registrierung, indem Sie 

den Aktivierungslink öffnen. Loggen Sie sich ein. 


Anschluss 


Schließen Sie das Produkt in Übereinstimmung mit dem Anschlussschema an. 


Gerät hinzufügen 


Öffnen Sie nach erfolgreichem Login den Ordner „Gerät hinzufügen”. Folgen Sie den Anweisungen auf dem 

Bildschirm so lange, bis die Konfiguration erfolgreich abgeschlossen ist. Bei einer erfolgreichen 

Konfiguration verbindet sich das Produkt mit dem Wi-Fi Router. Die Verbindung wird durch ein dauerhaftes 

Leuchten einer LED angezeigt. 


Sie können sich außerdem mit dem Wi-

Fi Netz „ZAMEL-SBW-01...“ verbinden. Geben Sie hierfür in der 

Adressleiste Ihres Webbrowsers die Adresse 192.168.4.1 sowie  die Routerdaten und die E -Mail Adresse 

für den Login ein. Drücken Sie die Taste „SAVE”. Ein erfolgreicher Speichervorgang wir durch die Mitteilung 

„Data saved“ angezeigt. Drücken Sie anschließend die Taste CONFIG, um die vorgenommenen 

Einstellungen zu speichern. 


Steuern Sie das Tor 


Steuern Sie das Tor ferngesteuert mittels der SUPLA App auf Ihrem Smartphone. 


EINE AUSFÜHRLICHE GEBRAUCHSANLEITUNG FINDEN SIE UNTER: 


https://supla.zamel.pl/produkt/SBW -01/ 

Содержание Supla SBW-01

Страница 1: ...https cloud supla org auth create Scan and proceed to register your account Wi Fi supla SBW 01...

Страница 2: ...thWi Fi communications 2 Observe the maximum outputs load 3 During installation make sure that the module is not exposed to direct contact with water and operation in a humid environment The installat...

Страница 3: ...correctly select Add device from the application menu The Add Device Wizard is launched Follow the on screen instructions until the configuration is successful After proper configuration the device w...

Страница 4: ...Reichweitenverlusten f hren 2 Beachten Sie sie die maximale Ausgangslast 3 Beachten Sie w hrend der Montage dass das Produkt keiner berm igen Feuchtigkeit ausgesetzt ist Sch tzen Sie das Produkt vor...

Страница 5: ...Bildschirm so lange bis die Konfiguration erfolgreich abgeschlossen ist Bei einer erfolgreichen Konfiguration verbindet sich das Produkt mit dem Wi Fi Router DieVerbindung wird durch ein dauerhaftes...

Страница 6: ...b g n Wi Fi 2 2 2 x NO 5 A 250 2 x 5 A 250 350 6 2 5 2 60 10 do 55 C IP20 47 5 x 47 5 x 23 0 046 EN 60669 1 EN 60669 2 1 ETSI EN 300 328 ETSI EN 301 489 1 EN 301 489 17 1 15 Wi Fi 2 350 AC3 3 10 55 C...

Страница 7: ...SUPLA SUPLA Wi Fi Wi Fi ZAMEL SRW 01 192 168 4 1 Wi Fi SAVE Datasaved CONFIG SUPLA https supla zamel pl produkt srw 01...

Страница 8: ...curarsi che il modulo non sia esposto all acqua diretta e o in ambiente con elevata umidit Latemperatura nel luogo di installazione deve essere tra 20 e 55 C 4 Il modulo SBW 01 progettato per l instal...

Страница 9: ...procedura guidata Aggiungi dispositivi verr avviata Seguire le istruzioni sullo schermo fino a quando l intera configurazione ha avuto esito positivo Dopo la corretta configurazione il dispositivo si...

Страница 10: ...ngimo metu atkreipkite d mes tai ar modulis nebus tiesiogiai veikiamas vandens ir ar neveiks padidintos dr gm s aplinkoje Prijungimo vietoje temperat ra turi b ti ne emesn kaip 10 C ir ne auk tesn kai...

Страница 11: ...s rengini traukimo k r jas Vadovaukit s ekrane rodomais nurodymais kol visas konfig ravimo procesas s kmingai baigsis Tinkamai atlikus konfig ravim renginys prisijungs prie belaid io interneto mar rut...

Страница 12: ...s lacommunication Wi Fi 2 Respecter la sortancemaximale 3 Lors de l installation s assurer que le module n est pas expos l eau directe et un travail dans un environnement d une humidit lev e La temp r...

Страница 13: ...le menu de l application L Assistant d ajout des dispositifs va d marrer Suivre les instructions apparues sur l cran jusqu ce que toute la configuration soit r ussie Apr s une configuration correcte...

Отзывы: