background image

z-K6 manual


4

Controlling Channel Output Levels 


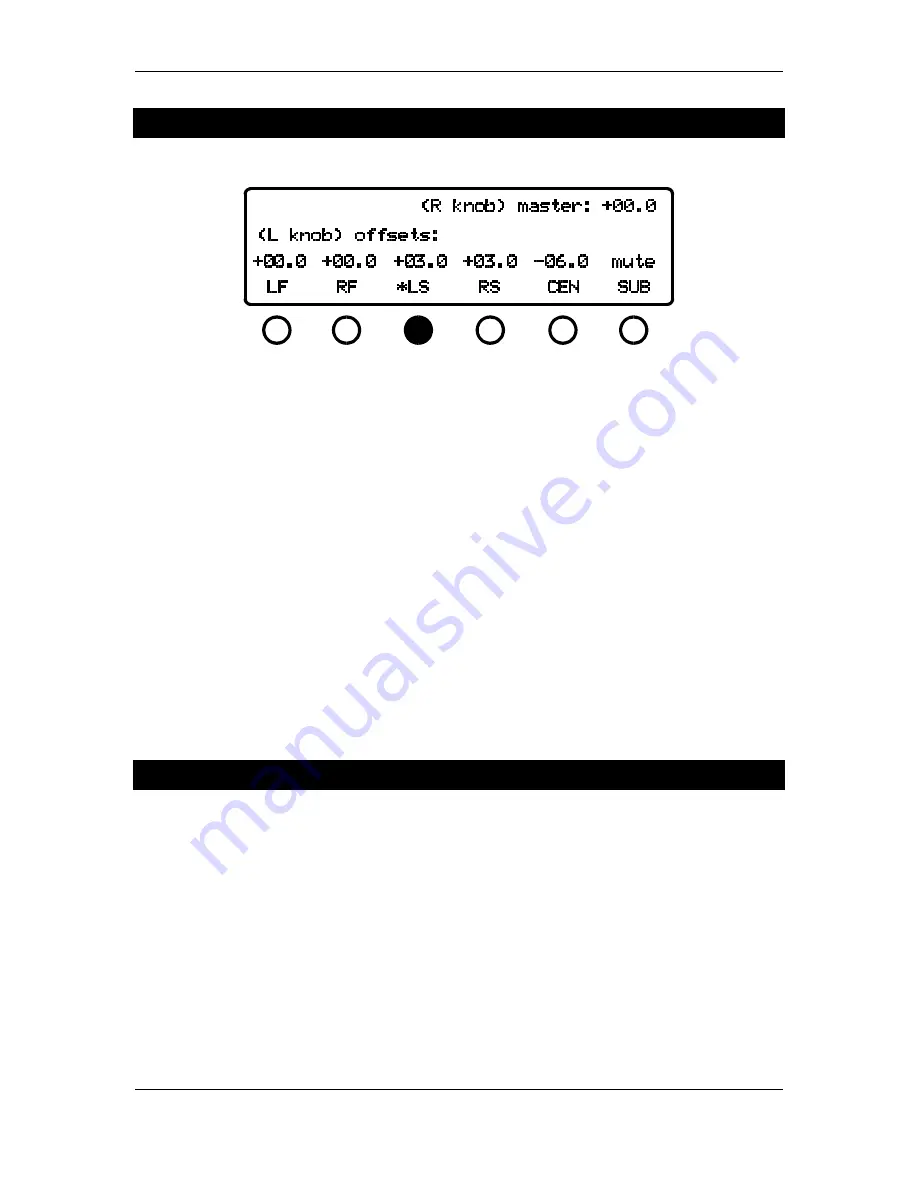
Figure  3 - channel level control screen  


Press the 

EQ/Master Level, offsets 

button until the display appears as in Figure 3 (this button 

toggles between EQ and level functions).  As indicated by the display, the left knob controls the 
individual channel offsets and the right knob controls the overall system level.  To change the level 
of a channel offset, press the button below that channel's label.  The display will show an asterisk 
next to the name and the left knob will control that channel's offset.   Pressing the button again 
will mute that channel.  Pressing the button a third time will bring that channel out of mute and 
restore the channel's gain to its value before the mute was invoked.  The master system level is 
applied after the channel offsets so that the relative levels between offsets will be maintained 
regardless of overall system level. 
 
The z-K6 is also endowed with the ability to solo channels.  If you press and hold one of the 
channel select buttons, that channel will solo -- i.e., the other channels will mute and you will only 
hear that channel.  If you hold down the channel button again, the unit will "un-solo" that 
channel and return to the state before the solo function was invoked.  This includes all of the 
various channel mutes from the other channels. 


Controlling Front Ambience 


Press the 

system 

button.  The display will appear as in Figure 4.  Notice that the top-right part of 

the display indicates that the display is showing ambience parameters for the LRC page.  That is, 
this screen pertains to the left, right, and center channels.  The left side of the screen has an arrow 
pointing to the first button below the screen, along with the words "to LRS page."  As indicated, 
pressing this button will take the unit to a similar mode, only one in which the surround 
ambience parameters are displayed.  On the LRC page, the left knob controls the front K-level and 
the right knob controls which algorithm is used to enhance the ambience. 
 
The front K-level is best interpreted as the amount of added ambience.  It varies from an "off" 
position (fully counter-clockwise) to +6.0 dB (fully clockwise).  For more information on the 
meaning of K-level, see the Appendix. 
 

Содержание z-K6

Страница 1: ...Front Ambience Equalization 7 Controlling Surround Equalization 8 Bypassing the z K6 8 Saving and Loading Presets 8 MIDI Automation 10 Adjusting Sample Rate Wordwidth 11 Specifications 12 Important no...

Страница 2: ...nnel subsystem First the signal is passed through a pair of shelving filters allowing you to selectively filter the low and high frequency response of the input signal Next the front ambience extracti...

Страница 3: ...ng validity indicator on the front panel will illuminate indicating the presence of signal The outputs from the z K6 are as follows 1 2 Left and right front 3 4 Left and right surround 5 6 Center and...

Страница 4: ...ect buttons that channel will solo i e the other channels will mute and you will only hear that channel If you hold down the channel button again the unit will un solo that channel and return to the s...

Страница 5: ...s in the screen the focus The focus parameter effectively controls the mono ness of the three channel image i e how much the stereo image pulls toward the center Nominally you should leave the focus s...

Страница 6: ...ages the ambience enhancement module which can also be accomplished by turning the K level control to its off position If one of the three channel algorithms is engaged the off position still produces...

Страница 7: ...timbral character of the music will not change appreciably resulting in a very natural surround experience that is comparable to having heard the source material in a real acoustic space The character...

Страница 8: ...emulate a highly absorptive space you ll want to attenuate the highs in the surrounds whereas a very live space will have high frequencies coming from the rear Bypassing the z K6 The master bypass but...

Страница 9: ...urn the z K6 to a blank setting If you attempt to over write preset 00 the display will tell you that the preset was not saved and that you should choose another preset number To recall a preset from...

Страница 10: ...u know that the z K6 is sending its entire bank of presets one at a time to the MIDI sequencer via MIDI system exclusive commands When the system exclusive dump is finished the blinking asterisk will...

Страница 11: ...ppear to indicate the selection as in Figure 13 Unlike most digital audio processors the z K6 does not auto detect the input sample rate Rather you must select the sample rate manually This will chang...

Страница 12: ...erminated AES EBU 3 inputs 3 outputs Sample rates supported 32 kHz 96 kHz Input resolution up to 24 bits Output resolution 16 20 or 24 bits undithered TPDF dithered or POW r noise shaped Dynamic range...

Отзывы: