


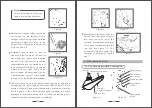
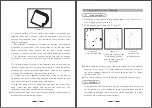
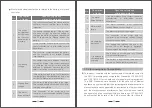


Figure 20
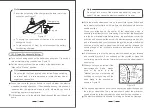
Fold up the pedals
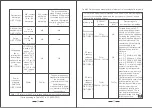
Figure 22
Put down the
folded backrest
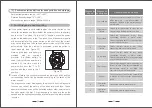
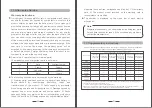
Figure 19
8. Transportation and Storage
(1). Transportation
(2). Storage
Handle the product gently during transportation. Do not throw, turn
over or apply great pressure to it.
Folding steps: (see Figures 20, 21 and 22)
Before boarding a plane, run out the battery capacity until the battery
capacity is low (up to 1/3 of total battery capacity) and the red or
red-yellow indicator lights are lit or the voltage is within 23V (lithium
battery: within 26V).
Turn off the power switch on the battery box during transportation.
This product should be placed in dry and ventilated place and should
not be stored in a place subjected to high temperatures and rapid
temperature changes; this product should be separated from acid,
alkali and other chemical corrosive items.
18
19
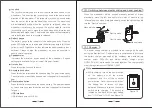
b. Take the battery out of the battery box, remove the positive and
negative leads with a wrench, install the new battery and affix the
positive and negative leads. The remaining wiring harness shall
remain unchanged;
c. Pay attention to distinguish between the positive and negative
electrodes on both sides of the wiring harness. For the right hand
battery connecting wires, connect the red wire with the positive
electrode (+) and connect the brown wire with the negative electrode
(-); for the battery on the left, connect the red wire with the positive
electrode (+) and connect the black wire with the negative electrode
(-).
(2). If a lithium battery is used, only one battery box is provided at the
right and the battery box only has a lithium battery: red on the battery
indicates the positive electrode and black indicates the negative
electrode. The battery shall be replaced as follows:
a. Loosen the 6 self-tapping screws from inside of the electric
wheelchair (i.e. back of the battery box) and open the back cover (the
illustration is same as that of the lead-acid battery);
b. Take the battery out of the battery box, separate the connector by
hand, install the new battery and replace the connector. The
remaining wiring harness shall remain unchanged.
Waste should be disposed of in accordance with the relevant national
environmental protection regulations.
Figure 21
Lift up the cushion with
both hands until the
span length cannot be
decreased


