T
Meter Setup Before Use
Battery Installation
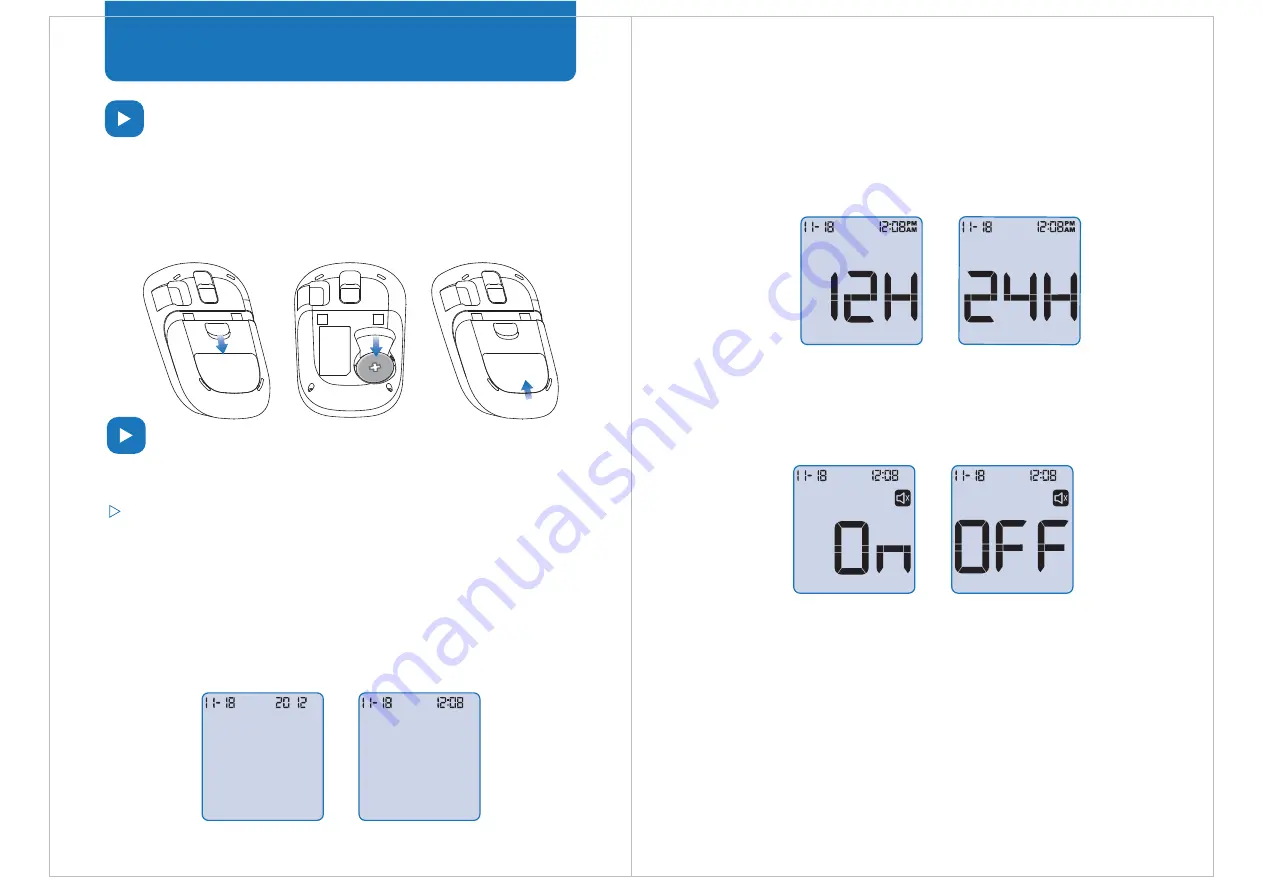
The meter requires a CR2032 3.0V coin cell battery. You can find one in
the carrying case. Please follow the steps below for installation:
1.
2.
3.
Month Day Year
Month Day Time
Turn the meter to the back side, press to open the battery door as
shown in the picture.
Insert the battery. Make sure that the positive side (+) is facing up.
Replace the battery door, making sure that it is closed tightly.
or
2.
3.
The display will now show the month and day in the top left corner.
Change the month and day by pressing the “<” or “>” buttons .
Press “M” to save.
Next, set the correct time. By default, the meter will show the time
in 24 hour display mode. Press “M” to save the correct time. The
meter will now allow you to change to either 24 hour or 12 hour
display mode by pressing “<” or “>”. Press “M” to save and
continue to the next step.
Audio Settings
You can turn your meter’s sound on and off in the audio settings menu.
Press “<” or “>” to turn on or off the sound. Press the “M” button to save
this setting.
When the sound is on, the meter will provide a beep when:
You will hear a one beep warning sound when the meter is powered on,
if the blood sample is adequately applied, and when the test results are
displayed. You will hear 2 short beep warning sounds if an error occurs.
Please refer to the error code table included in this instruction manual.
After you have chosen the audio setting, the meter will enter the high
and low blood glucose alarm settings.
a. The meter is powered on
b. The blood sample is adequate
c. The test results are displayed
d. An error occurs
e. A test reminder alarm is activated
or
Meter Setup
Follow the steps below to set up your meter:
System Settings
Before using your meter for the first time, make sure all system settings
are correct. For example, setting the correct time is essential for the
history function to work properly.
Press the “<” button for 2 seconds to enter the
system settings
menu.
Time Settings
1.
The display will show the month, day, and year. In the upper right
portion of the screen, the year will flash. Press the “<” or “>” buttons
to change the year, and then the “M” button to save your choice.


