5
Assembly Instructions
1. Before unpacking or assembling,
please note that the
motherboard flange is somewhat susceptible to
bending
, we do not recommend resting the weight of
the case directly on this flange, or holding the chassis
by this flange. For ease of assembly, you may lay the
chassis in the provided foam packaging insert when
you are installing the motherboard and graphics card.
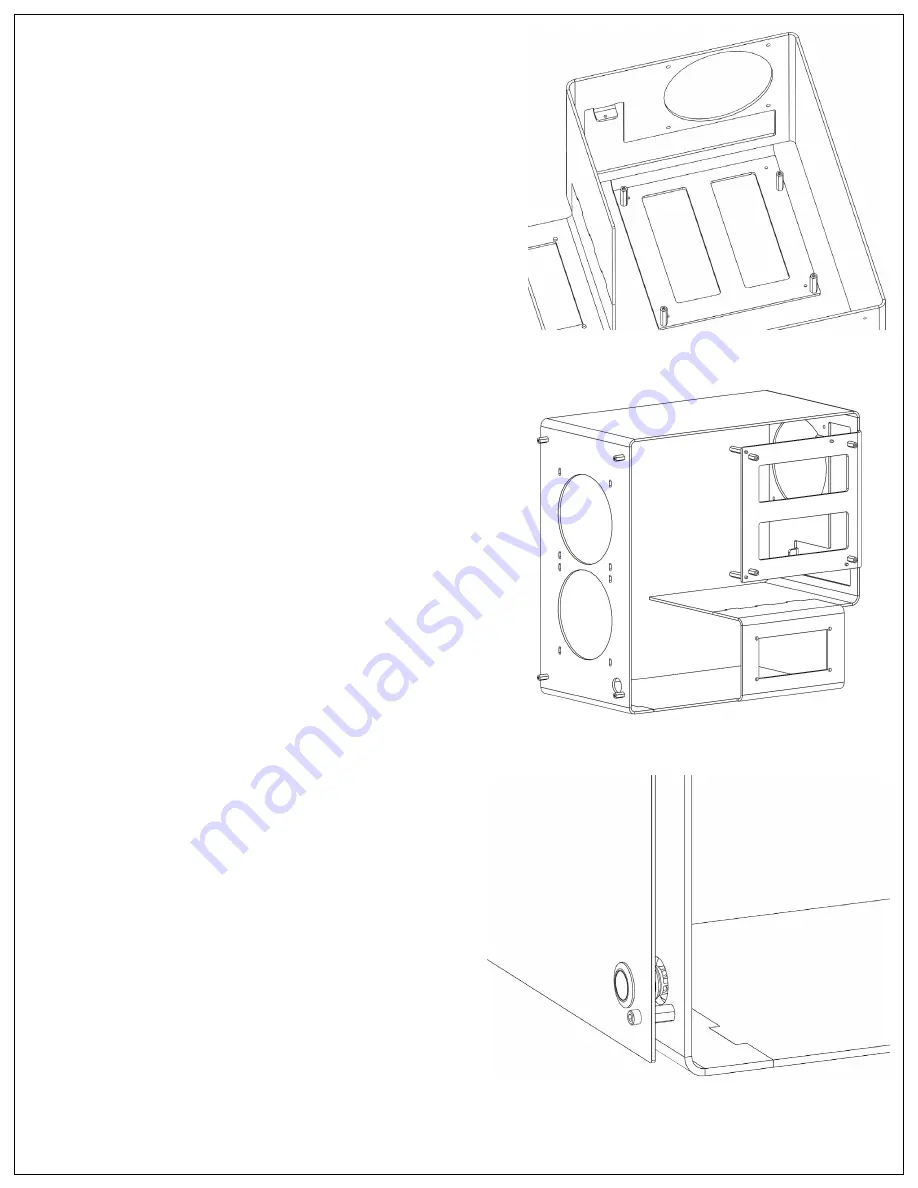
2. Screw the four 1” standoffs into the motherboard
flange by hand (fig. 1). Pre-install the CPU cooler as
well as the RAM, then mount the motherboard to the
stand-offs using the provided 6-32 screws.
3. Install the GPU and use the thumb screw to secure the
card into the GPU flange. If there is mis-registration
between the GPU and the mounting flange, double
check that the correct 1” motherboard standoffs were
used.
4. Remove the chassis from the foam insert and stand
it up normally. If you are using an AIO CPU or GPU
cooler, secure the radiators to the inside fan mounting
hole patterns.
5. Screw four of the 1/2” standoffs into the front of
the chassis, and the other four into the back of the
motherboard flange (fig. 2). Screw the thread caps
onto the exposed threads of the front panel and
motherboard standoffs.
6. Secure the PSU into the hole pattern on the lower area
of the chassis, we recommend adhering cable clips to
the horizontal band in the middle of the motherboard
flange.
7. Fasten the backplate into place behind the
motherboard. Mount the provided 16mm button onto
the hole in the front plate. Screw the ferrules of the
power wire into the button contacts and mount the
front plate so the button fits into the through hole on
the chassis (fig. 3).
fig. 1
fig. 2
fig. 3


