YO Temp
User guide
v1.1
page 21/27
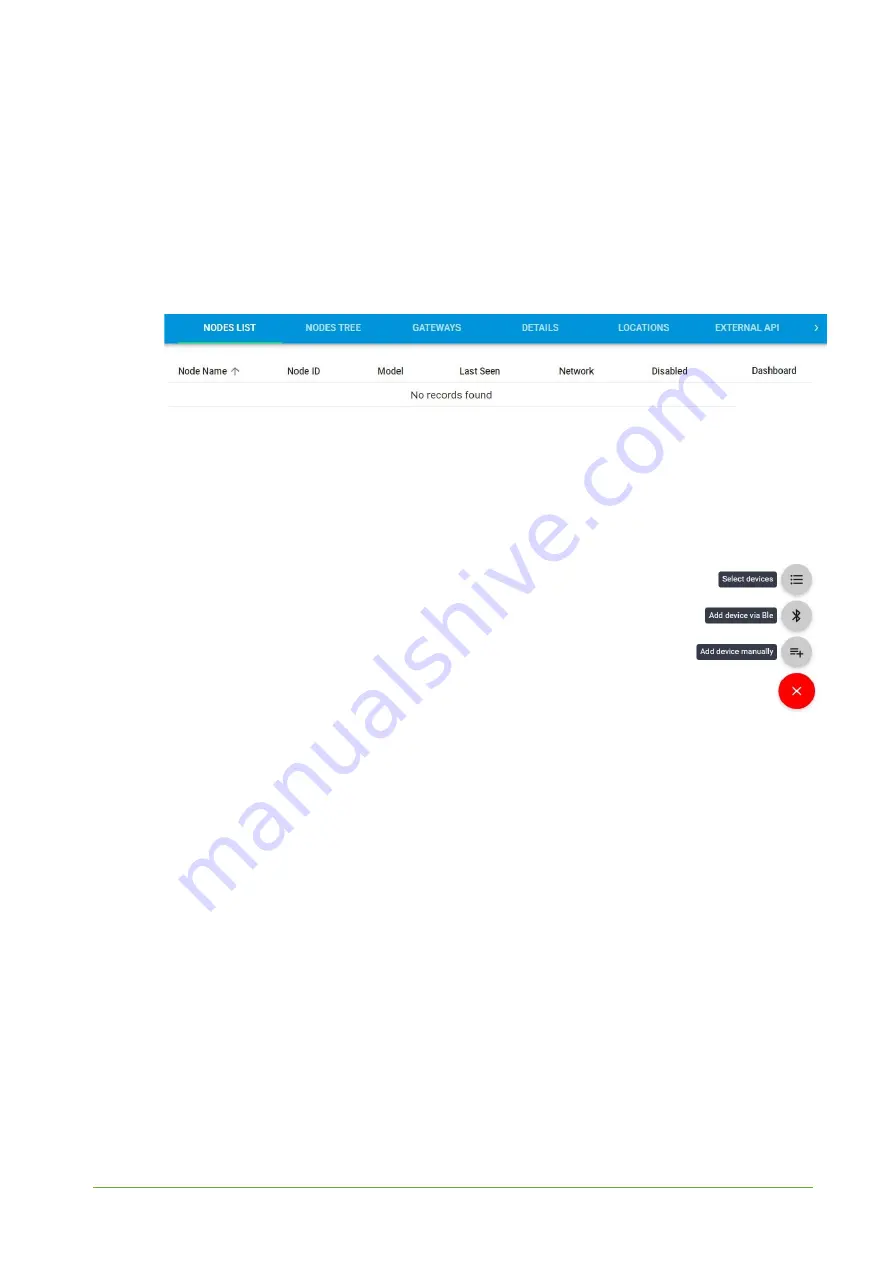
4. Proceed to the application by clicking its name on the list, then press the ‘
≡
’ button to add a
node. Click ‘
Add manually
’. Set the node’s ‘Name’ and ‘Description’ fields, and fill in ‘Node ID’
(
deveui
) and ‘OTAA Key’ (otaa section
– appkey
).
All device identifiers are provided by
Yosensi Support when you order the nodes.
Select a model that is compatible with your device — this choice affects the number of charts
and data source (YO Temp). You can also set the node’s ‘Location’, if locations have been
pre-defined. If you haven’t defined a suitable location, leave this field set at <None>.
Figure 17
Adding node to the Yosensi Management Platform section view.
Содержание YO Temp
Страница 1: ...YO Temp User guide v1 1...
Страница 9: ...YO Temp User guide v1 1 page 9 27 Figure 7 Battery voltage exemplary chart www yosensi io...
Страница 26: ...YO Temp User guide v1 1 page 26 27 Compliance statements www yosensi io...
Страница 27: ...YO Temp User guide v1 1 page 27 27 www yosensi io...


