Mechanical Assembly
Part 2
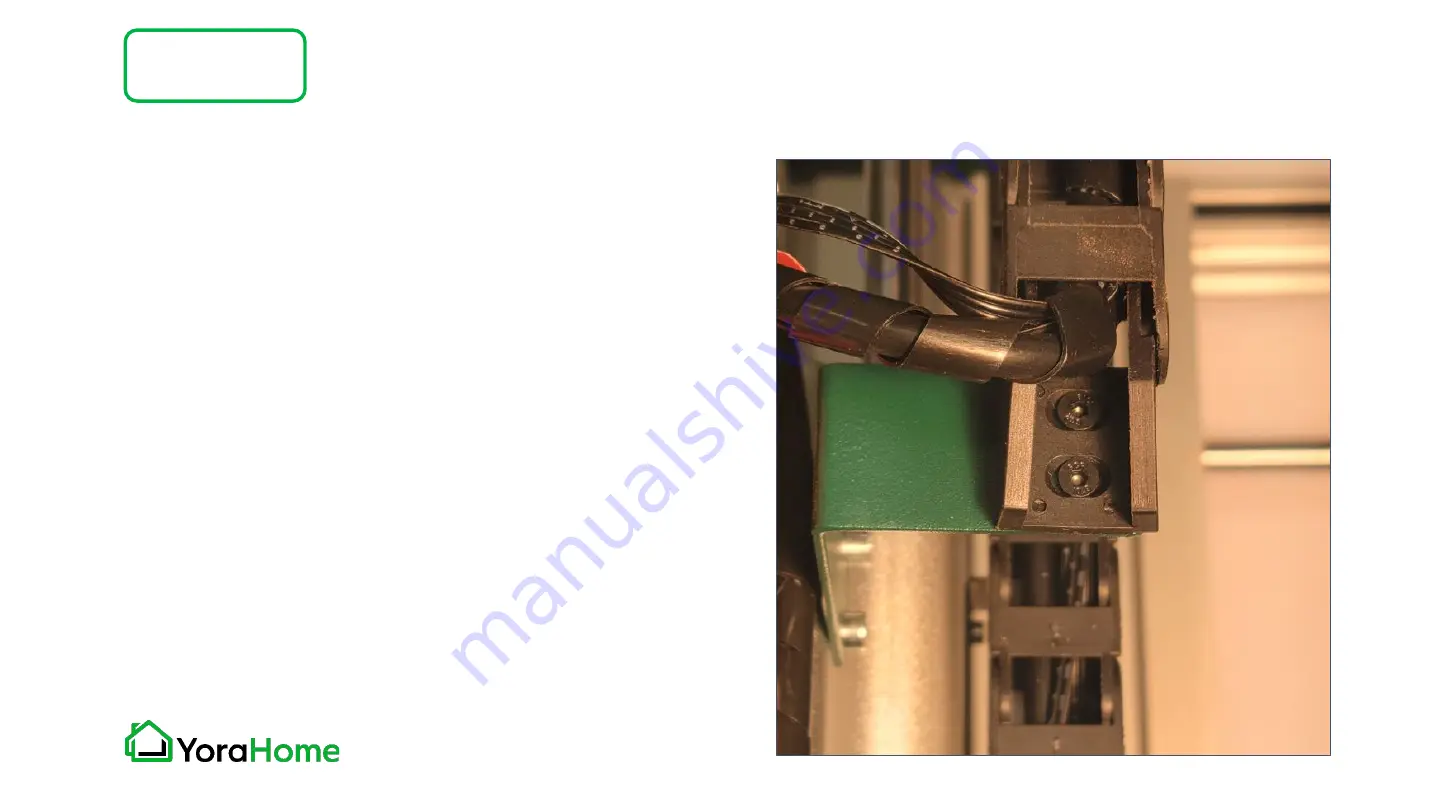
Step 3 - Install Drag Chain/Wire Harness
4/4
Bring the other end of the Drag Chain in a
loop, aligning the end of the Drag Chain with
the previously installed bracket.
Using the Countersunk M3 x 6mm Screws,
attach the end of the Drag Chain to the Drag
Chain Bracket at the rear of the Z/X Axis
Assembly
Содержание MANDRILL 3036
Страница 1: ...YORA MANDRILL 3036 CNC ROUTER USER MANUAL Version 1 0 February 2022...
Страница 7: ...Packing List1 7 Part 1 Item Size Picture Quantity Mandrill Controller 1...
Страница 8: ...Packing List2 7 Part 1 Item Size Picture Quantity Z X Axis Assembly 1 Base Y Axis Assembly 1...
Страница 14: ...Mechanical Assembly Part 2 Step 1 Assemble Base Z X Assembly 1 4 Parts Required 8 M5 x 8mm Screws...
Страница 25: ...Mechanical Assembly Part 2 Step 5 Install Wiring Connections 1 5 Right end of X Axis Assembly X Motor X Limit...
Страница 26: ...Mechanical Assembly Part 2 Step 5 Install Wiring Connections 2 5 Rear of Base Assembly Y Motor Y Limit...
Страница 27: ...Mechanical Assembly Part 2 Step 5 Install Wiring Connections 3 5 Top of Z X Axis Assembly Z Limit Z Motor...
Страница 36: ...Step 2 Easel driver Click on the blue Carve button Machine Setup Part 4...
Страница 50: ...Machine Setup Part 4 Step 16 Z Probe setup The Mandrill does have a Z Probe Click on the blue Yes button...
Страница 68: ...WWW FACEBOOK COM GROUPS YORAHOME CNC WWW YORAHOME COM SUPPORT YORAHOME COM...


