1
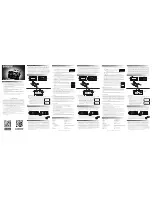
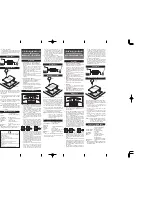
Connecting the power cables
Connect the power cables to the power source
(a stable power supply of at least 12V 14A).
The display will turn on when powered on.
※
Although the MMS features an internal circuit for
reverse-polarity protection, please pay special
attention to the polarity of the power cables.
2
Connecting the RPM sensor
Connect the RPM sensor to the plug located
on the front panel.
3
Connecting the Motor Plug.
Attach the Motor Plug to the motor shaft.
※ Make sure to attach the Motor Plug correctly to
prevent it from falling off while spinning.
4
Switch and Ouput Dial check
Make sure that the RPM field in the display
reads [STP] (indicates output off state). If
the RPM field reads [000], press the 'START/
STOP' button to switch it to [STP]. Turn the
Output Dial fully left to turn down the output
voltage to 0V.
※ Please make sure to set the dial to 0V to prevent
the motor from suddenly spinning when the motor
cables are connected.
5
Attaching the Motor Cables
Attach the Motor Cables to the motor.
※ Securely attach the clips.
※ Make sure that the polarity is correct when connecting
the clips to prevent damage to the motor. Connecting
the clips in reverse may cause the internal protection
circuit to cut off power.
Operating Instructions
6
Securing the motor
Please hold the motor tightly.
※ The motor will exert a good amount of rotating force
when spinning. Please make sure to hold onto the
motor tightly.
※ The motor will build up heat when spinning, and may
get extremely hot.
7
START & STOP
Press the 'START/STOP' button and turn the
dial to the right. Once the motor begins to
spin, adjust the dial to the desired voltage.
The motor's current draw and condition will be
displayed.
Pressing the 'START/STOP' button once more
will cut power to the motor and the motor will
stop spinning.
8
Checking motor condition
The Condition Graph indicates the condition of
the motor.
A rapidly fluctuating bar graph indicates a
motor in bad condition. If the graph is stable
and shows little movement, the motor is in
good condition.
9
Measuring RPM
Position the RPM Sensor about 5mm away
from the Motor Plug. The RPM will be displayed
on the screen. Multiply the displayed RPM
number by 100 to obtain the actual RPM.
※ If the RPM is not displayed on the screen, slightly
change the position of the sensor to get a better
reading from the plug.
Black = Negative
Red = Positive
Black = Negative
Red = Positive
Bad
Good
Change the position slightly
About 5mm


