


3/6
IM AQ7277-61EN
Connecting the AQ7277 to Your PC
Using the USB Interface to Connect the Devices
1. Download the USB driver, “YKMUSB,” to your PC from the YOKOGAWA web page (https://y-link. yokogawa.
com/YL007.po).
2. Follow the instructions in the USB driver’s installation manual to install the USB driver.
3. Connect a USB cable to the AQ7277 type B USB port.
Using the Ethernet Interface to Connect the Devices
1. Connect a UTP (Unshielded Twisted-Pair) or STP (Shielded Twisted-Pair) cable that is connected to a hub or
other network device to the 100BASE-TX port on the AQ7277.
The Ethernet address settings are not configured when you purchase the AQ7277. Use a USB cable to connect
your PC to the AQ7277, and then configure the network settings.
Starting the Software and Selecting the Interface
1. Double-click the
AQ7277 RemoteController
icon.
The remote controller starts, and the Remote Controller dialog box appears.
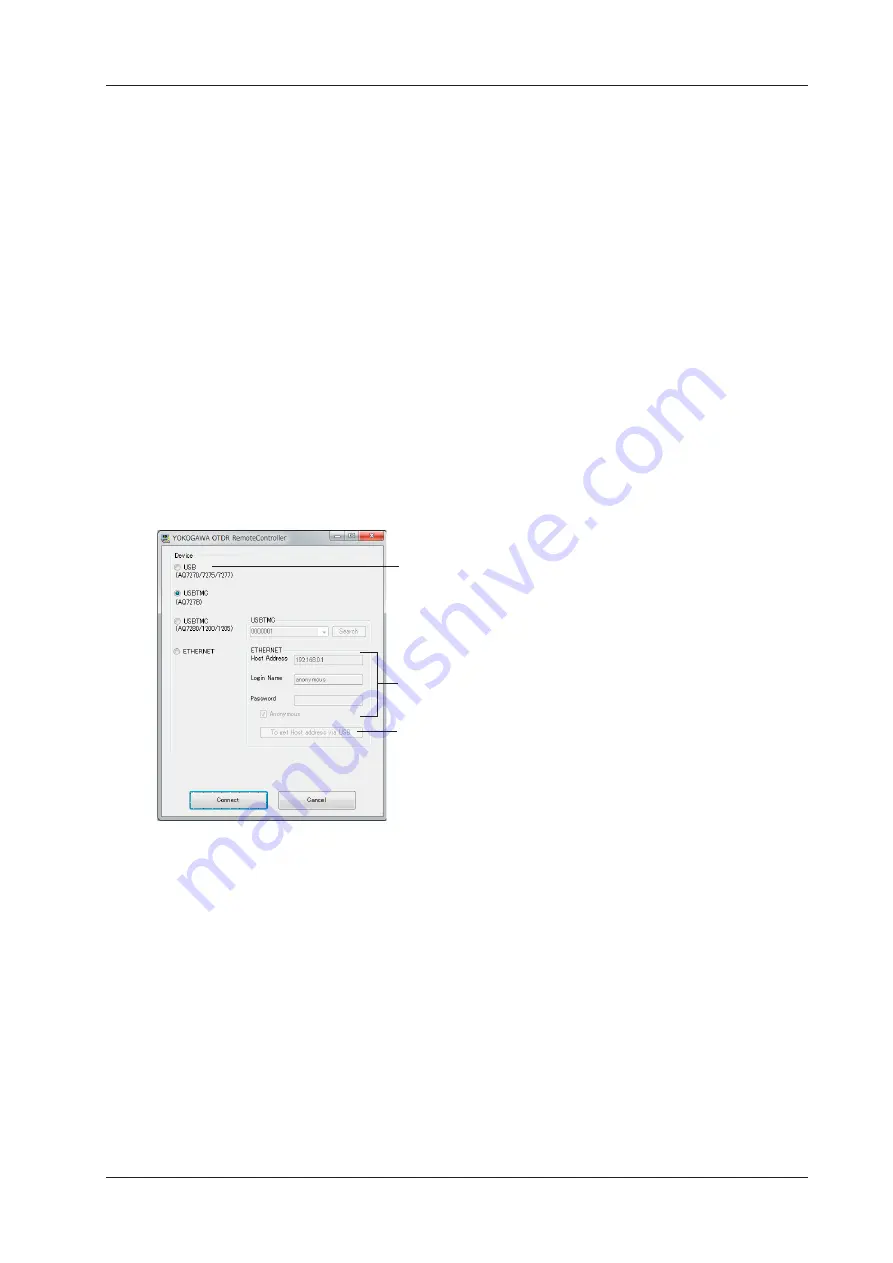
2. Select the interface that you want to use. The first time that you configure the settings after you purchase the
AQ7277, select
USB
.
Set these values when you are using the
Ethernet interface.
Use a USB cable to connect the AQ7277 and
your PC, and then click this button to acquire
the host address of the connected AQ7277
through the USB interface.
Select “USB(AQ7270/7275/7277) when
you are using the USB interface.
• USB interface
Use the USB interface to connect the AQ7277 to your PC.
• Ethernet interface
Use the Ethernet interface to connect the AQ7277 to your PC.
Use a USB cable to connect the AQ7277 and your PC, select
ETHERNET
, and then click
To get Host
address via USB
to acquire the host address of the connected AQ7277.
For details on the Ethernet settings, see the remote controller’s help.
3. Click
Connect
.
A window for configuring the AQ7277 appears.
For details on how to configure the settings, see the remote controller’s help.


