


29
Firebox and Burn Grate Assembly Maintenance
It is recommended that the
fi
rebox assembly is regularly inspected to be certain that it remains free of
ash and debris which will ensure proper performance.
The
fi
rebox is a fully welded structure that carries the burn grate and channels the combustion air. The
fi
rebox is bolted to the cooking chamber
fl
oor. The seams on the hopper wall and the
fl
oor of the cooking
chamber are sealed with a high temperature silicone. Perform regular inspection of the silicone seal,
particularly on the top side of the
fi
rebox along the hopper wall. If this seal is broken, remove the old
silicone, clean the surface, reapply new high temperature silicone and let it cure. We recommend using
Permatex 81160
high temperature silicone or
Sure Bond SB-188
.
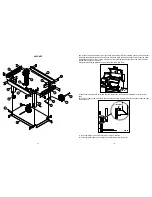
The seating of the burn grate into the
fi
rebox is critical for proper grill performance. Begin by resting the
right hand side of the burn grate on the
fi
re pot and then pressing down on the left hand side of the burn
grate until fully seated. Once the burn grate is seated there is little to no movement in this assembly.
Also, check to be certain that the igniter assembly is centered in the respective hole in the burn grate.
Stainless Steel Burn Grate
It is important to regularly check the combustion air holes located on the
fl
oor and sides of the burn grate
for any blockage or build-ups. Using a wire brush or
fl
at-head screwdriver, scrape o
ff
any build-up or
debris.
Burn Grate Inspection
NOTE
: Only do this when the smoker is completely cool.
To ensure that the pit is burning e
ffi
ciently, a visual inspection of the burn grate is required periodically.
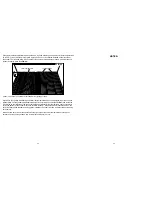
The burn grate should sit
fl
at against the back wall. Due to the
intense heat that is created, the burn grate can change shapes. There should be no more than a 3/16”
gap from the back wall to the burn grate. If a gap does exist, then it must be corrected to ensure proper
pellet burning. To get to the burn grate see Page 16.
If the gap is greater than 1/8”, the steps below should be followed.
NO MORE THAN A 3/16” GAP BETWEEN
BURN GRATE AND BACK WALL.
BURN GRATE
NO MORE THAN A 3/16” GAP BETWEEN
BURN GRATE AND BACK WALL.
BURN GRATE
FIG 28
30
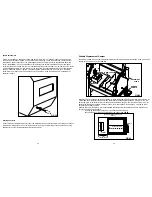
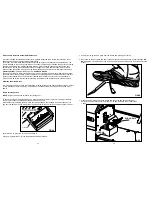
1.
Start by removing the burn grate from the
fi
rebox and placing it on its top.
2.
Next, step on the burn grate and apply enough pressure to bend it back to its original shape.
DO
NOT
apply too much pressure or you will overcorrect the burn grate and it will not
fi
t back into the
fi
rebox.
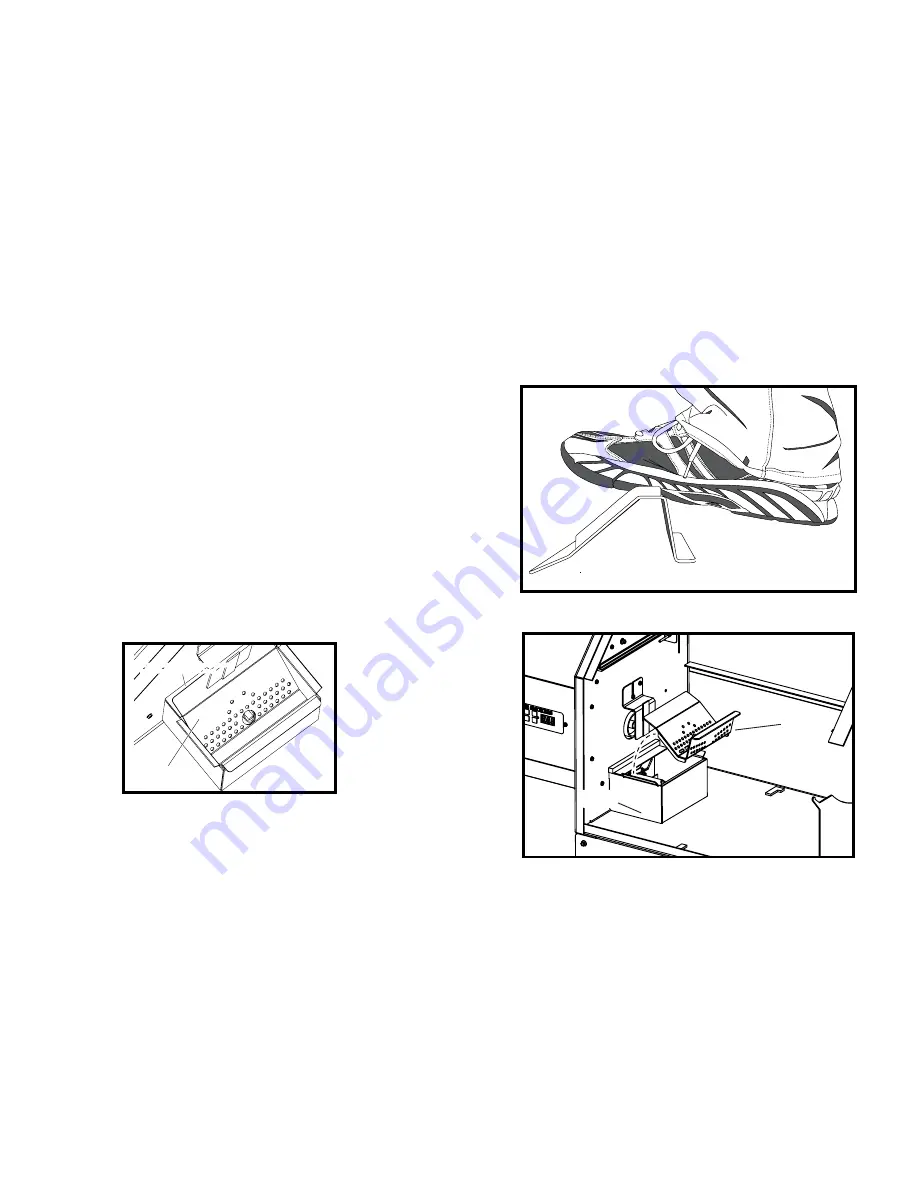
3.
Place the burn grate back into the
fi
rebox and check the gap between the back
wall and the burn grate to ensure a proper
fi
t. If a gap still exists, then repeat steps
1 and 2.
FIG 29
FIREBOX
BURN GRATE
FIG 30
Содержание YS 640
Страница 1: ......


