ASSEMBLY INSTRUCTIONS
4
LCD User Manual
1. Instructions:
(1) The default personal code is "1234" and management code is "123456".
(2) The "#" key on the keypad serves as the power-on key. After powering up,
the password lock will automatically scan, and the screen will display "ALL
READY" before entering sleep mode. Pressing the "#" key will activate the
LCD screen and the circuit board, putting it into working mode.
(3) The "*" key on the keypad is the clear key to clear away incorrect digit inputs.
Each press of the "*" key will clear one digit.
(4) Each press of a number key will produce a beep sound, and the LCD screen
will display the entered number, indicating that the digit has been input. If
there is no further operation within approximately 10 seconds of pressing
any key, the circuit board will automatically enter sleep mode. The screen
will display the year, month, day, hour, minute, and day of the week. Pressing
"#" will wake it up and re-enter the functional operation mode.
2.Setting the Management Password
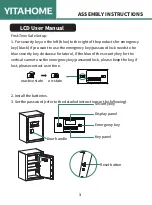
To set the management password, press the red key once. The screen will
display "--," indicating that you can now set the management password. Enter
any 1-8 digit password and press the "#" key to confirm. The screen will display
"INTO," showing the management password has been successfully set.
3.Setting Personal Code
Press the "#" key to wake up the control panel, then press "0" twice, followed by
pressing the red key once. The screen will display "--," indicating that you
can now set a personal password. Enter any 1-8 digit password, then press the
"#" key to confirm. The screen will display "INTO," signifying that the personal
password has been successfully entered.
Содержание HNXD-V1
Страница 1: ...ASSEMBLY INSTRUCTIONS SAFE BOX HNXD V1 IMISSB 0001 IMISSB 0002...
Страница 9: ...Pure Easy...


