Yingli Solar G/G Modules, Installation and User Manual
page 4
Table 2: Required minimum field wiring specifications
Testing standard
Wire size
Temperature rating
Required minimum field wiring
EN 50618
4 mm
2
-40 ºC to +90 ºC
Cables should be fixed to the mounting structure in such a way that mechanical
damage of the cable and/or the module is avoided. Do not apply stress to
the cables, the minimum cable bending radius should be 40 mm. For fixing,
use appropriate means, such as sunlight resistant cable ties and/or wire
management clips specifically designed to attach to the mounting structure.
While the cables are sunlight resistant and waterproof, where possible, avoid
direct sunlight exposure and water immersion of the cables.
Connectors
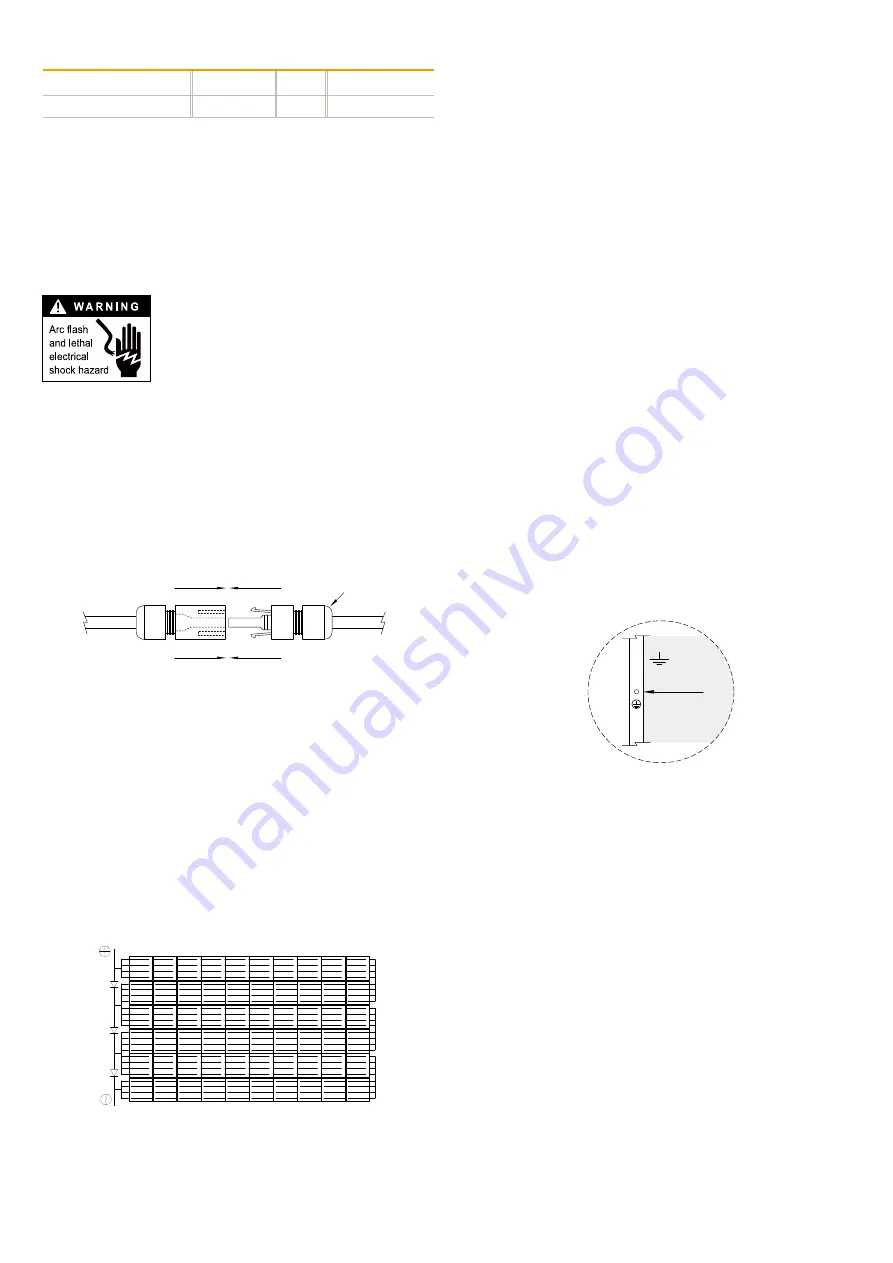
Keep connectors dry and clean, and ensure that connector
caps are hand tight before connecting the modules. Do
not attempt making an electrical connection with wet,
soiled or otherwise faulty connectors. Avoid sunlight
exposure and water immersion of the connectors. Avoid
connectors resting on the ground or roof surface.
Faulty connection can result in arcs and electrical shock. Check that all electrical
connections are securely fastened. Make sure that all locking connectors are
fully engaged and locked.
Modules must not be interconnected using connectors from different
manufacturers and/or of different types. If modules having such different
connectors need to be interconnected, a qualified professional may replace
connectors according to the manufacturers’ specified instructions such that an
interconnection can be made with connectors from the same manufacturer and
the same type.
Figure 7: Connector of the plugs
Bypass Diodes
The junction boxes used with Yingli Solar PV modules contain bypass diodes
wired in parallel with the PV cell strings. In the case of partial shading, the
diodes bypass the current generated by the non-shaded cells, thereby limiting
module heating and performance losses. Bypass diodes are not overcurrent
protection devices.
Bypass diodes divert current from the cell strings in the event of partial
shading. See Figure 8 for a diagram showing how the cell strings are electrically
connected with the diodes. In the event of a known or suspected diode failure,
installers or maintenance providers should contact the company which the PV
modules were purchased from. Never attempts to open the junction box of a
Yingli Solar PV module yourself.
Figure 8: Electrical circuitry of cells and bypass diodes
PV Array Grounding
For optimal performance, Yingli Solar recommends that the negative pole of the
PV array be connected to ground.
Equipment Grounding
The frame of the PV module, as well as any exposed non-current-carrying metal
parts of fixed equipment that are able to become energized by the PV system,
must be connected to the equipment grounding conductor (EGC) in order to
prevent electrical shock. Even when applicable regulations, code requirements
and standards do not require safety-related grounding, Yingli Solar recommends
grounding all PV module frames in order to ensure the voltage between
electrically conductive equipment and earth ground is zero in all circumstances.
Proper equipment grounding is achieved by bonding all exposed non-current-
carrying metal equipment continuously to one another using an appropriately
sized EGC or racking system that can be used for integrated grounding (see
Option B in Grounding Methods below).
Yingli Solar PV modules employ a coated aluminum frame for corrosion
resistance. In order to properly ground the module frame, the coating must be
penetrated.
The potential for corrosion due to the electrochemical action between dissimilar
metals in contact is minimized if the electrochemical voltage potential between
the dissimilar metals is low. The grounding method must not result in the direct
contact of dissimilar metals with the aluminum frame of the PV module that
will result in galvanic corrosion. An addendum to UL Standard 1703 “Flat Plate
Photovoltaic Modules and Panels” recommends metal combinations not exceed
an electrochemical potential difference of 0.5 Volts.
The frames have pre-drilled holes marked with a grounding sign, as illustrated
in Figure 9. These holes should be used for grounding purposes and must not be
used for mounting the PV modules. Do not drill additional holes into the frames.
Figure 9: Grounding hole detail
The following grounding methods are available:
Option A: Screw assembly (see Figure 10)
• A grounding screw assembly must be attached to a designated grounding hole
location using only stainless steel hardware. Insert a M5 stainless steel screw
firstly through the stainless steel cup washer, and then through the grounding
hole.
• Loosely engage a stainless steel backing nut and toothed lock washer to the
screw.
• Bend the EGC into an omega (Ω) shape to tightly fit between the partially
installed screw head and cup washer. The EGC shall be exclusively in contact
with stainless steel.
• Tighten the screw to 4.0 N·m torque. The toothed lock washer should be
visibly engaged to the frame.
• Route the appropriately sized EGC in such a way as to avoid contact with the
aluminum module frame.
Fully Engage and Lock
Cap
+
–
Grounding Holes


