Инструкция по эксплуатации Yingang YG125-24 доступна для скачивания бесплатно на нашем веб-сайте. Просто посетите manualshive.com и загрузите свой руководство. Получите полезные советы и информацию по использованию этого продукта для лучшего опыта.
YG125-24 instructions (BM125)
Preparation: Review:
Sign: Check:
Standardization:
Approval:
Страница 1: ...YG125 24 instructions BM125 Preparation Review Sign Check Standardization Approval ...
Страница 2: ... more technical advice and after sales service for you Our company reserves the right to constantly improve and improve our products This instruction manual contains the default of the introduction of basic configuration because the factory time user requirements and design improvements the actual vehicle may have some differences contents in this specification and any inconvenience this may cause...
Страница 3: ... Maintenance and maintenance 15 Spark plug selection and replacement 16 Cleaning and assembly of air filter 16 Check and adjust valve clearance 17 Check and adjust the throttle operation 18 Drive chain inspection adjustment and lubrication 19 Inspection of hydraulic disc brake before and after 20 The rear wheel disassembling 21 Battery maintenance 22 Replacement of insurance inserts 22 rake light ...
Страница 4: ...he parking lot at the intersection When riding a bike please take two hands to relax and step on the pedal 6 When riding a bike please take two hands to relax and step on the pedal Protection measures 1 In order to ensure personal safety wear helmet protective mask dustproof glasses gloves and other protective equipment during driving 2 During the driving period the exhaust system will become hot ...
Страница 5: ...Obstructing control operations etc 2 Please do not install the attachment that can produce large air resistance such as the windshield of driving so that the driving is not stable Please do not install less A reduction device for the cooling air flow of a small engine 3 Do not install electrical equipment at will so as to cause the power consumption of motorcycle to overload and fuse causing loss ...
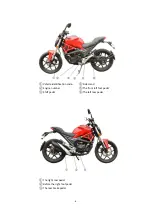
Страница 6: ...ation code VIN is engraved on the right side of the frame and the locomotive turns to the left to see see figure 1 Products signs The product sign is riveted to the left of the frame riser and the locomotive turns to the right to see see figure 2 Engine no The engine model and factory number are printed in the bottom of the left crankcase of the engine as shown in figure 3 Parts location The posit...
Страница 7: ... 6 Vehicle identification code Engine number Shift pedal The right rear pedal Before the right foot pedal The rear brake pedal Side stand The front left foot pedal The left rear pedal ...
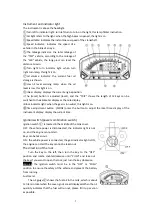
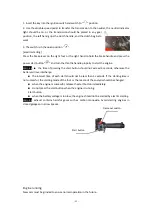
Страница 8: ... mile display i Block indicator light when the gear is in neutral this light is on Time adjustment button MODE press the button to adjust the local time display of the instrument display display the current time Ignition switch power combination switch Ignition switch is located in the middle of the tank cover OFF the vehicle power is disconnected the indicator light is not on and the engine canno...
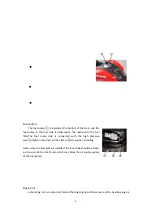
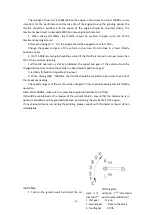
Страница 9: ...ght switch turn light switch Turn on the light switch has three positions To turn left turn the switch to the position the front and back of the left turn on the light When turning to the right turn the switch to the position the front of the right side and the rear turn light Press the switch to turn the light on and off the switch back to the middle position headlight switch When you need to clo...
Страница 10: ...ump side is connected with the high pressure pipe Tighten the screw on the clamp screw when installing Note when the fuel pump is installed the inner side should be clean and no particles can be found which may block the oil supply system of the fuel pump Engine oil Lubricating oil is an important factor affecting engine performance and life Gasoline engine ...
Страница 11: ...ed and check for oil leakage Check front and rear brake before and after the action of the rear brake the free travel is too large or too hour should be adjusted Check the air pressure and wear and tear of the tyres before and after the inspection Check the throttle control check the action of the throttle handle control the connection of the cable and the free travel of the handle adjust or repla...
Страница 12: ... the time of pressing the start button should not exceed 3 seconds otherwise the battery will overdischarge the interval time of each start should not be less than 5 seconds If the starting time is not successful the starting mode of the foot or the reason of the analysis should be changed when the engine is successful release the start button immediately do not press the start button when the eng...
Страница 13: ...ited the speed and gear of the vehicle should be changed in due time to drive the vehicle in a fixed throttle position or gear It is strictly forbidden to operate at low level 3 When driving 500 1000 km the throttle should be avoided to open more than 3 4 of the maximum opening The speed and gear of the car should be changed in time to avoid speeding and full throttle operation Note after 1000km m...
Страница 14: ...ars otherwise it will cause damage to the engine transmission chain and other parts The front brake and the rear brake should be operated in a coordinated manner so that the brake of the wheel is not too tight or the braking effect will be reduced and the operation of the vehicle will be difficult to control 2 The engine change mode shall prevail in kind Brake use 1 When it is necessary to reduce ...
Страница 15: ...otorcycle stops the transmission should be changed into neutral Switch the ignition switch to close and pull out the key 2 Park the motorcycle with side support 3 Lock the head lock to prevent theft 4 If equipped with burglar alarm it should be in alarm state of alarm Check the sensitivity of burglar alarm Note the ground must be flat and firm to avoid tipping over Maintenance and maintenance Lubr...
Страница 16: ... the cleaning solvent 5 Install the oil drain cover bolts and ensure that the seals are well sealed 6 injection about 1 liter recommendation grade engine oil with oil scale starting the engine idle quick turn off for a few more minutes stay a few minutes later check the oil if necessary to add lubricating oil or blow off lubricating oil Note areas with serious dust should increase the number of oi...
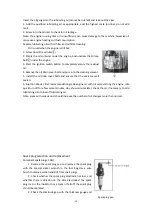
Страница 17: ...aking out extrude extra oil with no drop of oil 5 The assembly shall be carried out in the reverse order Warning When the filter core is clogged with dust or added too much oil the motorcycle fuel consumption will be greatly increased and the power performance will be reduced The gasoline and low flammable solvent are highly flammable substances and cannot be used for cleaning the filter Check and...
Страница 18: ...ness gauge is inserted there is slight resistance and after adjusting tighten the control stack After the adjustment check the valve clearance again Then cover the ignition timing hole cover and the center hole cover on the left side Check and adjust the throttle operation 1 Check the throttle handle from full open to full closed position 2 Check whether the throttle control line between the throt...
Страница 19: ... way Drive chain inspection adjustment and lubrication Drive chain inspection and adjustment Check the tensioning of the drive chain as follows If the chain is short of oil add lubricating oil 1 Move the chain under the hand and allow the mobile range to be about 10 20 mm 2 Turn the back wheel to check the reliability of the chain If a section of the chain is not flexible add a proper amount of lu...
Страница 20: ...the chain lock clamp properly ensure that the closed end of the lock clamp is in the normal direction of the wheel 4 Adjust the tightness of the chain and the state of the rear brake and put the chain box and the back cover back in place Note when installing the chain lock clip the opening should be opposite to the normal motion of the chain Inspection of hydraulic disc brake before and after 1 Th...
Страница 21: ... accident The maintenance station personnel must be asked to adjust and exhaust the operation 4 Do not drive immediately when the new brake disc is changed The brake handle should be manipulated several times until the brake disc is meshed with the brake clamp so that the front brake handle is returned to the normal stroke The brake fluid 1 the front and rear wheels of hydraulic brakes brake fluid...
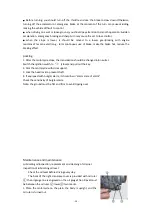
Страница 22: ...ly The rear axle nut torque 50 60 N m 5 0 6 0 kg m adjust the brake and chain according to the relevant chapters After loading the rear wheel brake several times the rear wheel should be free to rotate when the brake is rechecked Battery maintenance The battery is located under the right cover and the right lid can be seen This car adopts 12V A battery Check the mileage between the periodic table ...
Страница 23: ...he insurance insert first open the cover up and remove the damaged insurance plug Replace the backup insurance cartridge with the new insurance cartridge and press the cover to the bottom Rear brake light switch adjustment Rear brake light switch is located on the right side and right side of the engine The adjustment method is if the brake light is too late it will adjust the letty turn clockwise...
Страница 24: ...0kmR per drive 2000kmR Oil filter screen R each year C Timing chain tensioning A A A A Carburetor adjustment I I I I Brake oil hose R every four years I I I I Brake oil cup I I I I Brake oil R every two years Change every two years Maintenance project The maintenance cycle Project cycle Odometer km 1000km 1000km 1000km 1000km note Driving chain I L every 500 km battery A month I I I I The braking ...
Страница 25: ...e maintained and stored according to the following requirements 1 Fuel oil in the fuel tank fuel line and carburetor float chamber 2 Replace the oil oil and clean the oil filter 3 Remove the empty fuel tank and inject a cup about 80m into the fuel tank shake the fuel tank so that it can be coated on the inside surface and then release the remaining oil Reload the fuel tank 4 Remove the spark plug ...
Страница 26: ...ish of the paint surface 11 Remove the battery and charge it store it in a dry place and charge it once a month Do not store it in hot or cold places below 0 or above 30 12 Cover the motorcycle car cover no plastic cloth or other coated materials and store it in a cool dry and warm room Note the vehicle should be overhauled before storing the vehicle Take a motorcycle after a long time 1 Remove th...
Страница 27: ...environmentally friendly motorcycle please click the following requirements for use and maintenance 1 The system involves air filter the silencer one way valve oil water separator canister and the engine cylinder block cylinder head emissions of key parts maintenance adjustment maintenance and replacement should be carried out to the company designated special maintenance station 2 Users must use ...
Страница 28: ...e oil and water separator and remove the oil in the separator 5 The carbon tank is the core element of the fuel evaporation pollution control device which cannot be removed and replaced at will 6 Muffler and carbon tank with a service life of 2 years or 20 000 km should be replaced on time to ensure the discharge effect ...