Page 29
www.yerf-dog.com
For questions in USA, 888-926-6554
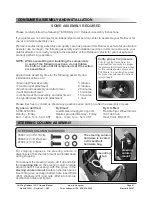
Battery, Box of Electrolyte
Hardware bag 1: (1) Bracket 04704, (1) 1/4" Nut 04767, (1) 1/4" Washer 05195 and (1) J-Bolt 05326
Hardware bag 2: (2) Nuts 06344, (2) Bolts 06333, (2) Hoses
Instructions titled: "Motorcycle Battery Dry & Charged"
WARNING
CAUTION
• Do not over tighten the battery bracket, this could cause damage
to the battery.
• If battery wire terminals are damaged or corroded, replace or
clean them as necessary. Failure to do so may cause them to
overheat during operation.
• Do not jump-start a dead battery using another battery and jumper cables.
• To avoid the possibility of explosion, always connect battery cables in the order specified:
Red (+) first; Black (-) last. An exploding battery can cause serious injury or death.
NOTE: If the CUV will not be operated for 3 months or more, the battery
should be removed, charged to proper level, and stored in a cool, dry
place. Before reusing, take the battery to your Service Center for testing
and recharging.
1. The battery and it’s components are located in a box under the driver’s
seat. Remove the battery and it’s components from box and place battery
on a level surface.
2. Fill battery with electrolyte and charge, as outlined in the "motorcycle
battery dry & charged" instructions. Use caution when handling
electrolyte!!!
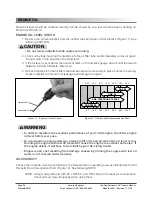
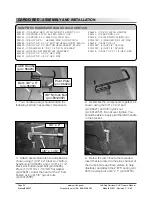
3. Place charged battery into battery bay located under driver’s seat (Figure 17A).
4. Insert nuts into both the positive and negative battery posts (Figure 17B).
5. Insert bolts through both the positive and negative battery cable connectors.
(Figure 17C).
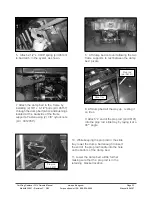
6. Insert each bolt (with battery cable connected) through holes in each
battery post, align with nuts (previously inserted) and tighten bolts
securely. (Figure 17D)
Note: red wire is positive!!! Cover positive post with red cap.
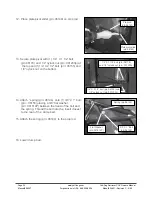
7. Remove lock nut and washer from j-bolt, remove lock nut and washer
from stud located on side wall.
8. Insert j-bolt into hole in frame, with threaded end up.
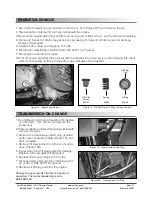
9. Slide battery bracket (u-shape up) onto the j-bolt and onto the threaded
stud located on side wall (Figure 17E).
10. Attach using washers and 1/4” lock nuts. Equally tighten both lock nuts
enough so that the battery does not move.
Figure 17A
BATTERY INSTALATION HARDWARE AND COMPONENTS
Figure 17B
Figure 17C
Figure 17D
Figure 17E
Yerf-Dog Retriever CUV Owners Manual
Model# 34851 • Revision C - 2/05
Manual# 06367
Battery Installation
Please follow the below instructions carefully.

