background image

11

EN

Safety measures

The scooter in its basic equipment is designed for riding 
during daylight in areas meant for sport and recreation. For 
roads with car traff ic or for riding in the dark, you need to 
provide your scooter with safety features (lights, reflectors, 
etc.) in accordance with the regulations valid in your country. 
Pay attention to traff ic and general safety regulations and use 
protective accessories (helmets, knee and elbow pads, good 
shoes, etc.) 

Before each ride, always check good function of the brakes 
and the overall technical condition of the scooter. Do not 
exceed the maximum loading capacity of the scooter
(as specified on the front side). The scooter is designed for
one rider only! Do not overload the scooter, it is not intended 
for jumping or acrobatic riding.

All the speed-limiting mechanisms (brake pads or discs, rims, 
and tires etc.) can become warm when used. For this reason,
it is not recommend able to touch them before cooling off !

To park the scooter, use the kick-stand! Beware that its 
loading capacity is approximately 15kg. Do not step on
the footboard when the scooter is parked.

Riding instructions

When riding, always grip the handlebar with both hands. While 
pushing off  with one foot, place the other foot on the footboard 
of the scooter. Regularly exchange feet. In order to brake, press 
the brake levers on the handlebars. Usually you would use the 
right lever which controls the rear brake. The front brake should 
only be used to supplement the stopping power of the rear 
brake. Never squeeze the front brake without also squeezing 
the rear brake with equal or greater force. 

Warning:

 sudden 

violent braking may cause injury.

Maintenance

Correct and regular maintenance increases safety and 
lengthens the life span of your scooter. Regularly inspect screw 
connections, quick releases, pressure in tires and lubricate the 
moveable parts (wheels, bearings, handlebars bearings, cables, 
brake parts etc.). Make sure that no lubricant gets on the rims 
or brake pads. Grease reduces their eff ect!

If this situation occurs, it is necessary to remove the grease 
from all the parts, using a solvent and/or degreaser.

Inspect the tires for cuts, nicks and deformities. Replace tires 
that show excessive wear and damage with an equivalent tire. 

Inspect the self-locking nuts. If they get loose freely, exchange 
them with new ones.

Check the spokes for defects. Irregular strain or looseness in 
spokes can cause their cracking or can make the wheel wobble. 

Keep your scooter clean, use soft cloth moistened with water. 
It should be stored inside, on a dry and shaded place. Do not 
expose the scooter to high humidity or extreme temperatures 

over a long period of time. Before the winter, prepare it against 
corrosion and inflate the tires to its maximal value as specified 
on the side of the tire. The producer does not cover damage 
caused solely by neglected maintenance, non-adequate 
adaptation, or inappropriate treatment and storage.

The product complies with the corresponding EU standards 
(ČSN EN 14619) and received quality and safely certifications 
from a leading Czech testing lab – Engineering Test Institute 
(Strojírenský zkušební ústav, s.p.). 

Producer: EU INTREA – PIKO, s.r.o., Sasanková 2657/2, 106 00 
Praha 10, Česká republika, www.yedoo.eu

Warranty list

General regulations

The content, extend and duration of the warranty conforms to 
the valid legal code in the respective country of the purchase 
of the scooter.

Warranty period

The buyer of the new Yedoo scooter (product) can apply the 
warranty during the period of 36 months from the purchase. 
The warranty commences on the day of the sale to the end user 
and is automatically extended when the product is taken into 
repair during warranty period. 

Warranty application

The warranty must be filled out with the retailer, where
the product was purchased (see bellow). When applying the 
warranty, we recommend presenting the filled out sheet bellow, 
the receipt and a complete and cleaned product. The seller 
will give a written confirmation to the buyer regarding the 
acceptance of the product into the warranty process.

Warranty conditions

The product must be assembled following the instructions of 
the manual. The products shall only be used for the purposes, 
which it was designed for. The product must be stored and 
maintained in the ways in accordance with the Instruction 
manual. The warranty does not cover damage caused by 
common wear and tear is not covered by this warranty. The 
producer does not cover damage caused by incorrect assembly 
or by use in contradiction with the Instruction manual. 

Product model:

Serial number of the frame:

Date of purchase:

Retailer:

Signature and stamp:

RUNRUN_CITY_manual-PANTONE.indd   11

13.06.18   17:38

Содержание Cities 16"

Страница 1: ...RUNRUN MEZEQ MULA CITY Cities New York Tokyo Amsterdam London User manual RUNRUN_CITY_manual PANTONE indd 1 13 06 18 17 38 ...

Страница 2: ...e www yedoo eu for more language versions 2 Yedoo Mezeq 20 16 Maximum load 150 kg 330 lb Mula 20 16 Maximum load 150 kg 330 lb City 16 12 Maximum load 120 kg 265 lb Cities 16 12 Maximum load 120 kg 265 lb i RUNRUN_CITY_manual PANTONE indd 2 13 06 18 17 38 ...

Страница 3: ...3 Yedoo Mezeq 5 mm 4 mm 6 mm RUNRUN_CITY_manual PANTONE indd 3 13 06 18 17 38 ...

Страница 4: ...4 Yedoo Mula 5 mm 4 mm 6 mm RUNRUN_CITY_manual PANTONE indd 4 13 06 18 17 38 ...

Страница 5: ...5 Yedoo City Cities 5 mm 4 mm 6 mm RUNRUN_CITY_manual PANTONE indd 5 13 06 18 17 38 ...

Страница 6: ...ry this manual contains all the information you need to help you assemble your new balance bike Send your questions comments and suggestions for improvement of our products by e mail to info yedoo eu 6 Yedoo frames are protected by a Registered Community Design RCD the commercial names are protected by registered trade marks More information from the world of scooters and the list of distributors ...

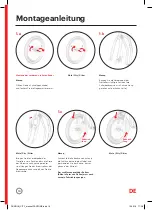
Страница 7: ...fork of the scooter is well positioned brake levers are facing forward Release the brake cable from its holder and loosen the brake arms Mezeq Place the wheel into the front fork so that is well centred The tread pattern arrow shaped lines on the tires must be pointing to the front Assembly Instructions 1 b 1 a 1 1 2 2 Direction of rota tion Direction of rota tion Mula City Cities Mula City Cities...

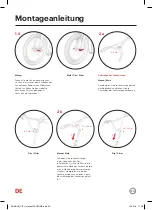
Страница 8: ... in a way that the quick release lever points backwards for safety reasons Mezeq Mula Insert the handlebar tube into the front frame 1 and adjust the height according to the rider s needs not higher than indicated by the line Check that the handlebar is upright and properly tighten the screw on the stem 2 2 a 1 d 1 1 20 22 Nm 20 22 Nm 6 8 Nm 6 8 Nm 2 2 Mula City Cities City Cities City Cities RUNR...

Страница 9: ...le straight line This should be the position of the brake levers The upper dropout which also makes the footboard go lower and thus reduces the load on the standing leg is intended for flat surface Riding will be less tiring 3 a 3 a 3 b 5 2 c The highest possible height of the handlebars is marked with vertical grooves at the maximum height the grooves should be visible only partly Max Installing ...

Страница 10: ... 2 Assembly Instructions 7 b 7 a Mezeq Mula City Cities Fasten the end of the brake cable in the lock and secure with the cable tie then trim the tie 6 b Adjustment of brakes Mezeq On both wheels check that the discs are not touching the brake pads when the wheel is turning If yes loosen the adjusting screws 1 and regulate the position of both brake pads so that they are parallel to the disc on th...

Страница 11: ...nt tire Inspect the self locking nuts If they get loose freely exchange them with new ones Check the spokes for defects Irregular strain or looseness in spokes can cause their cracking or can make the wheel wobble Keep your scooter clean use soft cloth moistened with water It should be stored inside on a dry and shaded place Do not expose the scooter to high humidity or extreme temperatures over a...

Страница 12: ...se nebojte a s chutí se do montáže pusťte s námi Dotazy připomínky a náměty na zlepšení našich výrobků nám prosím posílejte na e mail info yedoo cz CZ 12 Rámy koloběžek Yedoo jsou chráněny zapsanými průmyslovými vzory Společenství obchodní názvy jsou chráněny zapsanými ochrannými známkami Více informací ze světa koloběžek a seznam distributorů najdete na www yedoo cz RUNRUN_CITY_manual PANTONE ind...

Страница 13: ... je přední vidlice koloběžky natočená ve správném směru ramena V brzdy směřují dopředu Uvolněte brzdové lanko z vodítka a uvolněte brzdová ramena Mezeq Kolo vsaďte do přední vidlice tak aby bylo přesně uprostřed Vzorek pneumatiky rýhy ve tvaru šípů by měl směřovat dopředu po směru jízdy viz směrová šipka na boku pláště Montážní návod 1 b 1 a 1 1 2 2 Směr otáčení Směr otáčení Mula City Cities Mula ...

Страница 14: ...ku zavřete v takové pozici aby se nedotýkala vidlice a zároveň nemohlo dojít k jejímu náhodnému otevření během jízdy Mezeq Mula Zasuňte řídítkovou tyč do hlavové trubky rámu koloběžky 1 a nastavte požadovanou výšku řídítek max po vyznačenou rysku Zkontrolujte zda jsou řídítka rovně a dotáhněte šroub na představci 2 2 a 1 d 1 1 20 22 Nm 20 22 Nm 6 8 Nm 6 8 Nm 2 2 Mula City Cities City Cities City C...

Страница 15: ...u ruky Do této polohy nastavte páčky Horní úchyt vidlice který sníží výšku stupátka a zároveň odlehčí stojné noze je určen pro jízdu na hladkém povrchu Jízda bude méně namáhavá 3 a 3 a 3 b 5 2 c Nejvyšší možná výška řídítek je vyznačena svislými rýhami ty by pak v poloze maximálního vysunutí měly být viditelné pouze zčásti Max Instalace brzdových lanek Zmáčkněte brzdovou páčku na maximum a do kula...

Страница 16: ...ínacími šroubky 3 6 a 1 1 3 3 2 Montážní návod 7 b 7 a Mezeq Mula City Cities Konec brzdového lanka zafixujte do zámku a zabezpečte stahovací páskou pásku poté zastřihněte 6 b Seřízení brzd Mezeq Na předním i zadním kole zkontrolujte zda kotouč brzdy při roztočení kolečka neškrtá o brzdovou destičku Pokud ano povolte seřizovací šroubky 1 a nastavte polohu obou destiček tak aby byly po celé své plo...

Страница 17: ...átů ve výpletu může způsobit jejich praskání nebo rozcentrování kol Koloběžku udržujte v čistotě zašpinění otřete vlhkým hadrem Skladujte ji uvnitř na suchém a stinném místě dlouhodobě ji nevystavujte zvýšené vlhkosti ani extrémním teplotám Před zazimováním ošetřete antikorozním přípravkem a pneumatiky nahustěte na maximální hodnotu uvedenou na boku pláště Výrobce neodpovídá za škody vzniklé výluč...

Страница 18: ...Montage einfach ist Folgen Sie den beschriebenen Schritten der Montageanleitung und beachten Sie sämtliche Warnhinweise Fragen Bemerkungen und Verbesserungsvorschläge zu unseren Produkten schicken Sie bitte an folgende E Mail Adresse info yedoo eu 18 DE Die Rahmen der Tretroller Yedoo sind geschützt durch ein ein getragenes Gemeinschaftsge schmacksmuster die kommerzi ellen Bezeichnungen sind durch...

Страница 19: ...in Position dass die Arme der V Bremse nach vorne gerichtet sind Hängen Sie das Bremsseil aus der Gegenzugseite aus und öffnen Sie die Bremsarme Mezeq Führen Sie die Radachse von unten in die Schlitze der vorderen Gabel und positionieren Sie das Rad so dass es genau in der Mitte ist Das Laufflächenprofil des Reifens Rillen in Form von Pfeilen muss nach vorne in Fahrrichtung zeigen Montageanleitung ...

Страница 20: ...chließen Sie den Hebel so dass er nach hinten geklappt ist aus Sicherheitsgründen Mezeq Mula Schieben Sie die Lenkerstange in das Hauptrohr des Tret rollerrahmens 1 und stellen Sie die gewünschte Höhe des Lenkers ein bis max in Höhe des gekennzeichneten Striches Überprüfen Sie ob der Lenker gerade ist und ziehen Sie die Inbusschraube der Lenkerstange fest 2 2 a 1 d 1 1 20 22 Nm 20 22 Nm 6 8 Nm 6 8...

Страница 21: ...nkel Die Position in der oberen Gabelhalterung verringert die Höhe des Trittbrettes und entlastet zugleich das Standbein ist für Fahrten auf ebener Oberfläche bestimmt Die Fahrt ist somit weniger anstrengend 3 a 3 a 3 b 5 2 c Die höchstmögliche Höhe des Lenkers ist mit Strichen gekennzeichnet diese sollten bei der höchstmöglichen Einstellung nur zum Teil sichtbar sein Max Montage der Bremszüge Zie...

Страница 22: ...Bremsarme durch die Spannschrauben 3 symmetrisch ein 6 a 1 1 3 3 2 Montageanleitung 7 b 7 a Mezeq Mula City Cities Biegen Sie das Ende des Bremsseiles so dass es das Kind nicht stört wenn es fährt 6 b Einstellung der Bremse Mezeq Überprüfen Sie auf beiden Rädern dass die Bremsscheiben die Bremsbeläge beim freien Drehen des Rades nicht berühren Falls doch lösen Sie die Justierschrauben 1 und stelle...

Страница 23: ...t gleichen Dimensionen aus Überprüfen Sie den Stand der selbstsichernden Schraubenmuttern falls diese sich während der Fahrt unbeabsichtigt lockern tauschen sie diese gegen neue aus Überprüfen Sie regelmäßig die Spannung der Speichen eine ungleichmäßige Spannung der Drähte der Speiche kann zu deren Reißen oder zu einer schlechten Ausrichtung der Räder führen Halten Sie den Tretroller sauber möglic...

Страница 24: ...его не бойтесь и займитесь сборкой вместе с нами Вопросы замечания и предложения по улучшению наших изделий пожалуйста посылайте нам на e mail info yedoo eu 24 RU Рамы самокатов Yedoo являются защищенными и зарегистрированными промышленными образцами Евросоюза коммерческие названия защищены зарегистрированными товарными знаками Дополнительную информацию о свете самокатов и список дистрибуторов най...

Страница 25: ...о передняя вилка самоката расположена правильно тормозные рычаги должны быть спереди Выньте тормозной трос из держателя и ослабьте тормозные рычаги Mezeq Поместите колесо в вилку так чтобы оно располагалось строго по центру Рисунок протектора стреловидные линии на покрышке должен быть направлен вперед Инструкция по монтажу 1 b 1 a 1 1 2 2 Направ ление враще ния Направ ление враще ния Mula City Cit...

Страница 26: ...нтрик таким образом чтобы рычаг эксцентрика был направлен к заднему колесу из соображений безопасности Mezeq Mula Вставьте вынос руля 1 в раму и отрегулируйте высоту в соответствии с ростом гонщика не выше чем обозначено линией Убедитесь что руль находится в вертикальном положении и затяните винт выноса руля 2 2 a 1 d 1 1 20 22 Nm 20 22 Nm 6 8 Nm 6 8 Nm 2 2 Mula City Cities City Cities City Cities...

Страница 27: ...и и пальцы образовывали единую прямую линию Таким должно быть положение тормозных ручек Установка заднего колеса в верхнем положении позволяет установить ножную платформу ниже В результате уменьшается нагрузка на опорную ногу и езда становится менее утомительной Это идеально для катания на ровных поверхностях 3 a 3 a 3 b 5 2 c Максимальная высота руля обозначена вертикальными канавками которые в н...

Страница 28: ...асстояние между тормозными рычагами и колесом с помощью винта 3 6 a 1 1 3 3 2 Инструкция по монтажу 7 b 7 a Mezeq Mula City Cities Закрепите конец троса тормоза в замке и закрепите его затяжным хомутом затем отрежьте лишний конец 6 b Регулировка тормозов Mezeq Убедитесь что при вращении обоих колес они не задевают тормозные колодки Если это происходит то ослабьте регулировочные винты 1 и отрегулир...

Страница 29: ...или колебание колеса Храните самокат в чистом виде В случае загрязнения используйте влажную ткань Самокат должен храниться в помещении в сухом и затененном месте Не подвергайте самокат действию повышенной влажности и высокой температуры в течение длительного периода времени Для хранения зимой смажьте подвижные части самоката для защиты от коррозии и накачайте покрышки до максимального значения как...

Страница 30: ...nebojte a s chuťou sa do montáže pusťte s nami Otázky pripomienky a námety na zlepšenie našich výrobkov nám prosím posielajte na e mail info yedoo cz 30 SK Rámy kolobežiek Yedoo sú chránené zapísanými priemyslovými vzormi Spoločenstva obchodné názvy sú chránené zapísanými ochrannými známkami Viacej informácií zo sveta kolobežiek a zoznam distribútorov nájdete na www yedoo cz RUNRUN_CITY_manual PAN...

Страница 31: ...lujte či je predná vidlica kolobežky natočená v správnom smere ramená V brzdy smerujú dopredu Uvoľnite brzdové lanko z vodítka a uvoľnite brzdové ramená Mezeq Koleso vsaďte do prednej vidlice tak aby bolo presne uprostred Vzor pneumatiky ryhy v tvare šípov by mal smerovať dopredu v smere jazdy Návod na montáž 1 b 1 a 1 1 2 2 Smer otáčania Smer otáčania Mula City Cities Mula City Cities RUNRUN_CITY...

Страница 32: ...čku dotiahnite 2 sklopte do polohy v ktorej bude smerovať k zadnému kolesu z bezpečnostných dôvodov Mezeq Mula Zasuňte tyč riadenia do hlavovej trubky rámu kolobežky 1 a nastavte požadovanú výšku riadidiel max po vyznačenú rysku Skontrolujte či sú riadidlá rovno a dotiahnite skrutku na tyči riadenia 2 2 a 1 d 1 1 20 22 Nm 20 22 Nm 6 8 Nm 6 8 Nm 2 2 Mula City Cities City Cities City Cities RUNRUN_C...

Страница 33: ...tejto polohy nastavte páčky Horný úchyt vidlice slúži na zníženie výšky stúpadla čím sa odľahčí stojná noha Je určený na jazdu na hladkom povrchu jazda bude menej namáhavá 3 a 3 a 3 b 5 2 c Najvyššia možná výška riadidiel je vyznačená zvislými ryhami tie by potom v polohe maximálneho vysunutia mali byť viditeľné iba čiastočne Max Montáž brzdových laniek Stlačte brzdovú páčku na maximum a do guľaté...

Страница 34: ...cími skrutkami 3 6 a 1 1 3 3 2 Návod na montáž 7 b 7 a Mezeq Mula City Cities Koniec brzdového lanka zafixujte do zámku a zabezpečte sťahovacou páskou pásku potom zastrihnite 6 b Nastavenie bŕzd Mezeq Na obidvoch kolesách skontrolujte či sa kotúč brzdy pri roztočení kolieska nedotýka brzdovej platničky Pokiaľ áno povoľte nastavovacie skrutky 1 a nastavte polohu obidvoch platničiek tak aby boli po ...

Страница 35: ...skanie alebo rozcentrovanie kolies Kolobežku udržujte v čistote znečistenie otrite vlhkou handričkou Skladujte ju vnútri na suchom a tienistom mieste dlhodobo ju nevystavujte zvýšenej vlhkosti ani extrémnym teplotám Pred zazimovaním ošetrite antikoróznym prípravkom a pneumatiky nahustite na maximálnu hodnotu uvedenú na boku plášťa Výrobca nezodpovedá za škody spôsobené zanedbaním údržby neodborným...

Страница 36: ...Yedoo Mezeq Yedoo Mula RUNRUN_CITY_manual PANTONE indd 36 13 06 18 17 38 ...

Страница 37: ...Yedoo City Cities www yedoo eu RUNRUN_CITY_manual PANTONE indd 37 13 06 18 17 38 ...

Страница 38: ...Notes RUNRUN_CITY_manual PANTONE indd 38 13 06 18 17 38 ...

Страница 39: ...RUNRUN_CITY_manual PANTONE indd 39 13 06 18 17 38 ...

Страница 40: ...RUNRUN_CITY_manual PANTONE indd 40 13 06 18 17 38 ...

Отзывы: