Marquee™ Bridge 49
PRELIMINARY
Quick Start Guide
MNL-500267-001 – Rev ED2
5
Aug 2004
7. On the
Setup
screen, click on the
Interface Setup
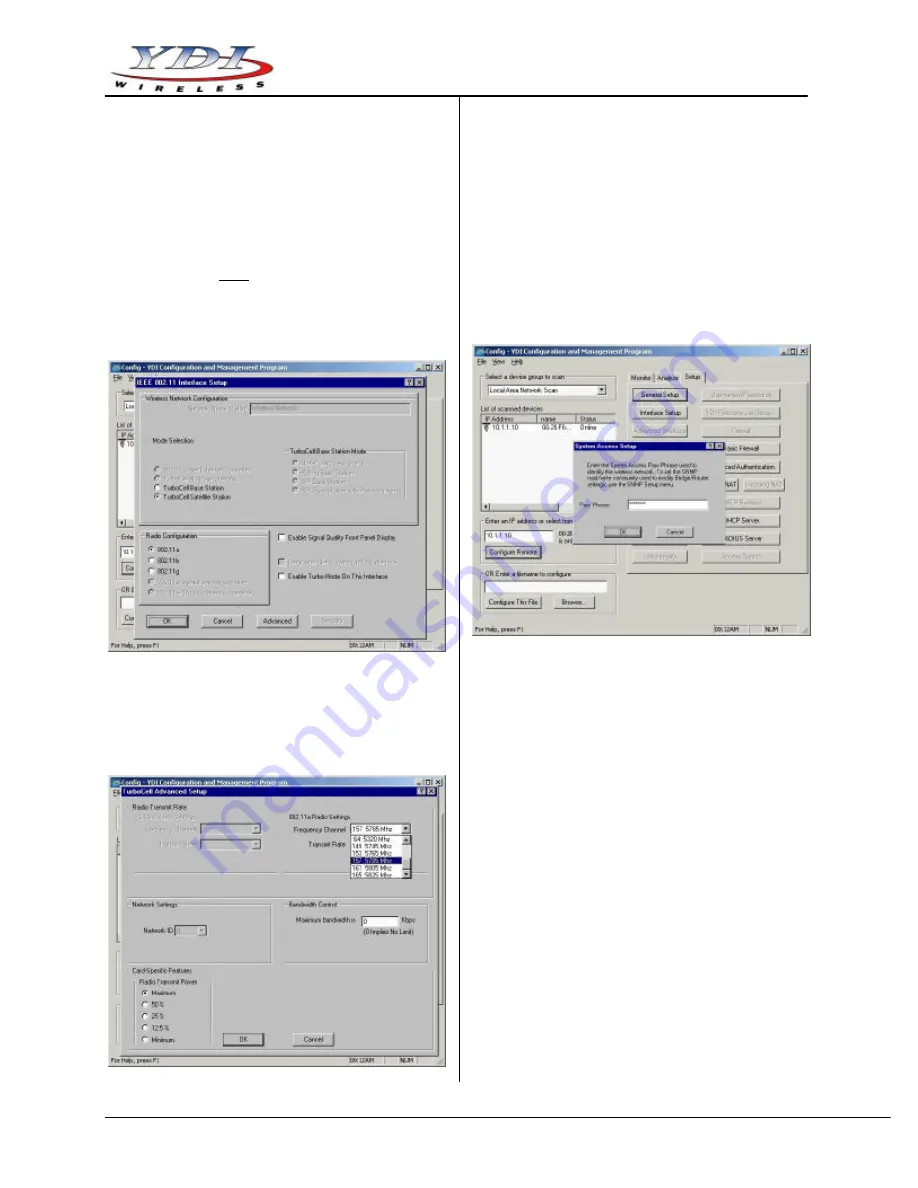
button. The corresponding screen appears (see
Figure 14).
8. Click on
Setup 2
. The
802.11 Setup
screen appears
(see Figure 15). Select the type of Station this
Marquee Bridge 49 is going to be. In a p-p
configuration, one unit must be
Base
and the other
must be
Remote (Satellite)
. In a p-mp
configuration, one unit must be
Base
and all the
others must be
Remote (Satellite)
.
Radio
Configuration
must be set to
802.11a
. The Base
station should be set for
Polling Base Station
.
Leave the rest of the buttons unchanged.
Figure 15 – 802.11 Setup Screen
9. Click the
Advanced
button. The corresponding
screen appears (see Figure 16). Select a
Frequency Channel
from the pull down menu box.
All units must be configured with the same value.
Figure 16 – 802.11 Advanced Setup Screen
10. The Marquee Bridge 49 is optimized for a transmit
rate of 36 Mbps and the transmit power is preset
from factory with the proper value.
NOTE:
Make sure the output power is set to 50%
when using a sector antenna.
11. Click
OK
. Click
OK
again.
12. Click the
System Access
button. The corresponding
screen appears (see Figure 17). Enter a Pass
Phrase to identify the wireless network. All units
must be configured with the same value. Click
OK
.
Figure 17 – System Access Setup Screen
13. Go to
File
and click
Save Config
: this will save the
new settings.
14. After the Marquee Bridge 49 is finished saving its
configuration, exit the YDI Configurator program.
The Marquee Bridge 49 is ready to use. Refer to
the online help for complete instructions on setting
up other features in the unit.


