


Management functions in main menu
19
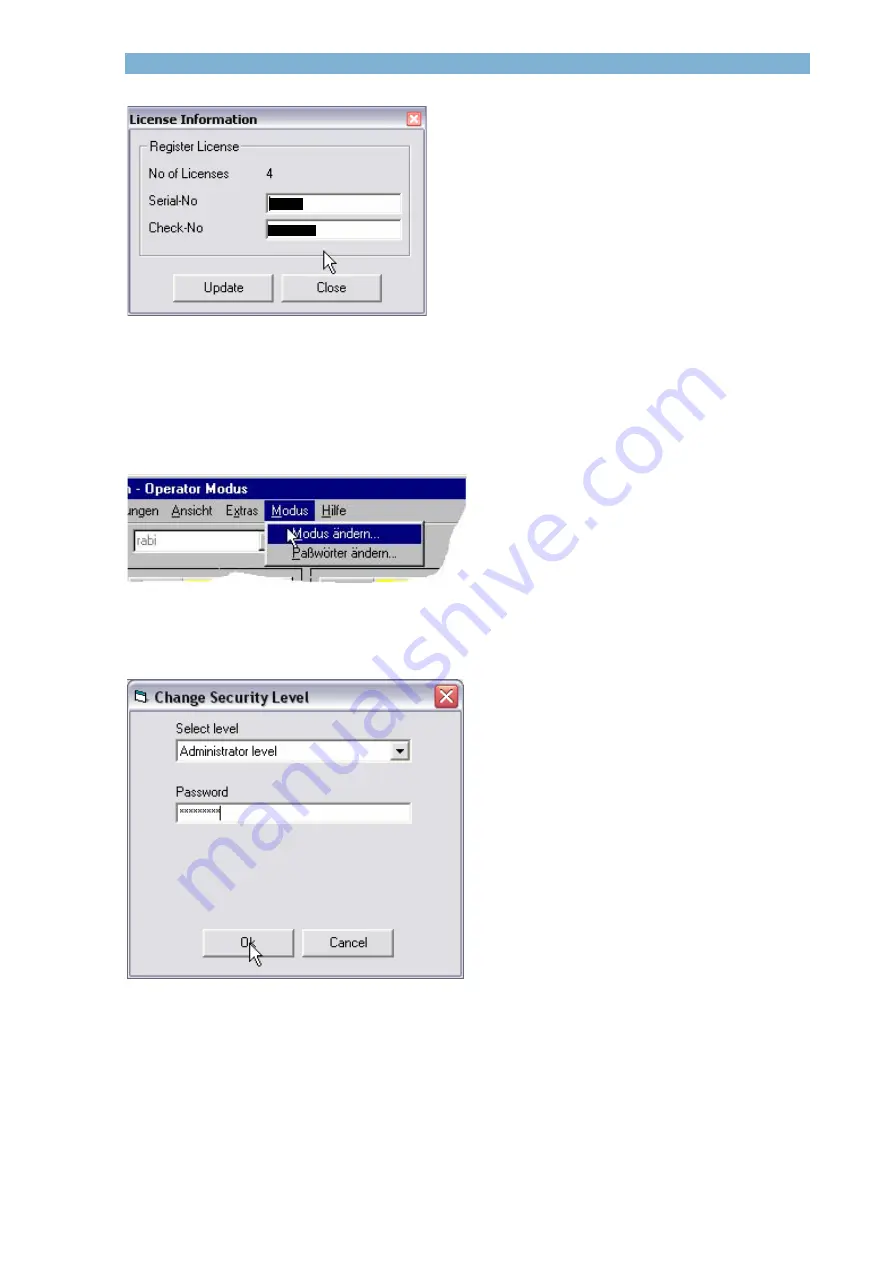
Figure 7
Register licenses
3.5 Mode menu
The current security level can be changed by selecting the
Change security level
menu item.
Figure 8
Mode Menu
To change to a different level select desired level and enter password.
Figure 9
Change security level
If the entered password is valid for the selected security level the level will be changed. You
can see the current security level in the title bar of the main window.
Es existieren in MotoAdmin 3 Sicherheitsmodi:
►
Operator Mode:
Yaskawa Europe GmbH
22.08.2011
32/55
Содержание MOTOMAN DX100
Страница 14: ...MotoAdmin 14 55...


