background image

PERIODIC MAINTENANCE AND ADJUSTMENT

6-1

6

EAU17245

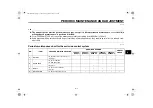
Periodic inspection, adjustment, and
lubrication will keep your vehicle in the
safest and most efficient condition
possible. Safety is an obligation of the
vehicle owner/operator. The most im-
portant points of vehicle inspection,
adjustment, and lubrication are ex-
plained on the following pages.
The intervals given in the periodic
maintenance charts should be simply
considered as a general guide under
normal riding conditions. However, de-
pending on the weather, terrain, geo-
graphical location, and individual use,
the maintenance intervals may need to
be shortened.

WARNING

EWA10322

Failure to properly maintain the vehi-
cle or performin

g

 maintenance ac-

tivities incorrectly may increase
your risk of injury or 

d

eath 

d

urin

g

service or while usin

g

 the vehicle. If

you are not familiar with vehicle ser-
vice, have a Yamaha 

d

ealer perform

service.

WARNING

EWA15123

Turn off the en

g

ine when performin

g

maintenance unless otherwise
specifie

d

.

A runnin

g

 en

g

ine has movin

g

parts that can catch on 

b

o

d

y

parts or clothin

g

 an

d

 electrical

parts that can cause shocks or
fires.

Runnin

g

 the en

g

ine while ser-

vicin

g

 can lea

d

 to eye injury,

b

urns, fire, or car

b

on monoxi

d

e

poisonin

g

 – possi

b

ly lea

d

in

g

 to

d

eath. See pa

g

e 1-3 for more in-

formation a

b

out car

b

on monox-

i

d

e.

WARNING

EWA15461

Brake 

d

iscs, calipers, 

d

rums, an

d

linin

g

s can 

b

ecome very hot 

d

urin

g

use. To avoi

d

 possi

b

le 

b

urns, let

b

rake components cool 

b

efore

touchin

g

 them.

EAU17303

Emission controls not only function to
ensure cleaner air, but are also vital to
proper engine operation and maximum
performance. In the following periodic
maintenance charts, the services relat-
ed to emissions control are grouped
separately. These services require
specialized data, knowledge, and
equipment. Maintenance, replace-
ment, or repair of the emission control
devices and systems may be per-
formed by any repair establishment or
individual that is certified (if applicable).
Yamaha dealers are trained and
equipped to perform these particular
services.

U5D7E5E0.book  Page 1  Thursday, August 21, 2014  9:30 AM

Содержание YZF-R125

Страница 1: ...PANTONE285C YZF R125 YZF R125A OWNER S MANUAL 5D7 F8199 E5 Read this manual carefully before operating this vehicle English E ...

Страница 2: ...EAU46091 Read this manual carefully before operating this vehicle This manual should stay with this vehicle if it is sold U5D7E5E0 book Page 1 Thursday August 21 2014 9 30 AM ...

Страница 3: ... and injury In addition the many tips given in this manual will help keep your motorcycle in the best possible condition If you have any further questions do not hesitate to contact your Yamaha dealer The Yamaha team wishes you many safe and pleasant rides So remember to put safety first Yamaha continually seeks advancements in product design and quality Therefore while this manual contains the mo...

Страница 4: ...tial personal injury hazards Obey all safety messages that follow this symbol to avoid possible injury or death A WARNING indicates a hazardous situation which if not avoided could result in death or serious injury A NOTICE indicates special precautions that must be taken to avoid damage to the vehicle or other property A TIP provides key information to make procedures easier or clearer WARNING NO...

Страница 5: ... OWNER S MANUAL 2014 by MBK INDUSTRIE 1st edition July 2014 All rights reserved Any reprinting or unauthorized use without the written permission of MBK INDUSTRIE is expressly prohibited Printed in France U5D7E5E0 book Page 2 Thursday August 21 2014 9 30 AM ...

Страница 6: ...alling the cowlings and panel 6 8 Checking the spark plug 6 10 Engine oil and oil filter element 6 11 Coolant 6 14 Replacing the air filter element and cleaning the check hose 6 16 Checking the engine idling speed 6 16 Adjusting the throttle grip free play 6 17 Valve clearance 6 17 Tires 6 18 Cast wheels 6 20 Adjusting the clutch lever free play 6 21 Checking the front brake lever free play 6 22 A...

Страница 7: ...g the license plate light bulb 6 36 Supporting the motorcycle 6 36 Front wheel for non ABS models 6 37 Rear wheel for non ABS models 6 38 Troubleshooting 6 40 Troubleshooting charts 6 42 MOTORCYCLE CARE AND STORAGE 7 1 Matte color caution 7 1 Care 7 1 Storage 7 3 SPECIFICATIONS 8 1 CONSUMER INFORMATION 9 1 Identification numbers 9 1 INDEX 10 1 U5D7E5E0 book Page 2 Thursday August 21 2014 9 30 AM ...

Страница 8: ...u Safe Riding Perform the pre operation checks each time you use the vehicle to make sure it is in safe operating condition Failure to inspect or maintain the vehi cle properly increases the possibility of an accident or equipment damage See page 4 1 for a list of pre operation checks This motorcycle is designed to carry the operator and a passen ger The failure of motorists to detect and recogniz...

Страница 9: ... main tain control of the motorcycle The passenger should always hold onto the operator the seat strap or grab bar if equipped with both hands and keep both feet on the passenger footrests Never carry a passenger unless he or she can firmly place both feet on the passenger footrests Never ride under the influence of alcohol or other drugs This motorcycle is designed for on road use only It is not ...

Страница 10: ...ycle is changed To avoid the possibility of an accident use extreme caution when adding cargo or accessories to your motorcycle Use extra care when riding a motorcycle that has added cargo or accessories Here along with the information about accessories below are some general guidelines to follow if loading cargo to your motorcycle The total weight of the operator pas senger accessories and cargo ...

Страница 11: ...hange any of the vehicle s design or operation characteristics can put you and others at greater risk of serious injury or death You are responsible for injuries related to changes in the vehicle Keep the following guidelines in mind as well as those provided under Load ing when mounting accessories Never install accessories or carry cargo that would impair the per formance of your motorcycle Care...

Страница 12: ...struc tions before transporting the motorcy cle in another vehicle Remove all loose items from the motorcycle Check that the fuel cock if equipped is in the OFF position and that there are no fuel leaks Point the front wheel straight ahead on the trailer or in the truck bed and choke it in a rail to pre vent movement Shift the transmission in gear for models with a manual transmis sion Secure the ...

Страница 13: ...1 Battery page 6 31 2 Owner s tool kit for ABS models page 6 2 3 Owner s tool kit page 6 2 4 Fuse box page 6 33 5 Shift pedal page 3 13 6 Engine oil drain bolt page 6 11 7 Coolant reservoir page 6 14 U5D7E5E0 book Page 1 Thursday August 21 2014 9 30 AM ...

Страница 14: ... 4 5 6 1 Front brake fluid reservoir page 6 24 2 Spark plug page 6 10 3 Engine oil filter element page 6 11 4 Dipstick page 6 11 5 Rear brake fluid reservoir page 6 24 6 Brake pedal page 3 14 U5D7E5E0 book Page 2 Thursday August 21 2014 9 30 AM ...

Страница 15: ...ever page 3 13 2 Left handlebar switches page 3 11 3 Multi function meter unit page 3 4 4 Main switch steering lock page 3 1 5 Right handlebar switches page 3 11 6 Throttle grip page 6 17 7 Brake lever page 3 13 U5D7E5E0 book Page 3 Thursday August 21 2014 9 30 AM ...

Страница 16: ...s started and stays on until the key is turned to OFF even if the engine stalls EAU10662 OFF All electrical systems are off The key can be removed WARNING EWA10062 Never turn the key to OFF or LOCK while the vehicle is moving Otherwise the electrical systems will be switched off which may result in loss of control or an accident EAU10693 LOCK The steering is locked and all electrical systems are o...

Страница 17: ...ight This warning light comes on when the fuel level drops below approximately 3 0 L 0 79 US gal 0 66 Imp gal When this occurs refuel as soon as possible The electrical circuit of the warning light can be checked according to the following procedure 1 Turn the key to ON 2 If the warning light does not come on have a Yamaha dealer check the electrical circuit 1 Push 2 Turn 1 2 1 Turn signal indicat...

Страница 18: ... for an expla nation of the ABS WARNING EWA16041 If the ABS warning light does not go off after traveling at a speed of 10 km h 6 mi h or higher or if the warning light comes on or flashes while riding the brake system re verts to conventional braking If ei ther of the above occurs or if the warning light does not come on at all use extra caution to avoid possi ble wheel lock during emergency brak...

Страница 19: ... will momen tarily appear in order to test the electrical circuit The speedome ter tachometer fuel meter and coolant temperature meter will then perform a display check and a welcome message will scroll across the multi function display For the U K only To switch the speedometer and multi function displays between kilometers and miles press the SELECT and RESET button together turn the key to ON a...

Страница 20: ... When the hour digits start flash ing use the RESET button to set the hours 4 Push the SELECT button and the minute digits will start flashing 5 Use the RESET button to set the minutes 6 Push the SELECT button and then release it to start the clock TIP When setting the hours and minutes push the RESET button briefly to in crease the increment value one by one or push and hold the button to increas...

Страница 21: ...s with changes in the weather and engine load When the coolant temperature is near the maximum limit the second segment from the top will flash If the 2 top segments and start flashing HIGH TEMP message will also ap pear stop the vehicle and let the en gine cool NOTICE ECA10022 Do not continue to operate the en gine if it is overheating TIP For radiator fan equipped vehi cles the radiator fan s au...

Страница 22: ...RIP 2 F TRIP fu el reserve tripmeter ODO To reset a tripmeter select it by push ing the SELECT button until TRIP 1 TRIP 2 F TRIP is displayed While TRIP 1 TRIP 2 F TRIP is displayed push the RESET button for two sec onds The fuel reserve tripmeter will re set automatically and disappear after you have refueled and turned the key to OFF Multi function display The multi function display is equipped ...

Страница 23: ...les in the following order C Ave__ _mpg C INS__ _mpg TRIP TIME _h __min AVE SPEED __mph DIST SERV __miles Instantaneous fuel consumption display The instantaneous fuel consumption display can be set to either km L L 100 km or MPG for the UK only Push the INFO button to switch be tween these display settings km L The distance that can be traveled on 1 0 L of fuel under the current riding conditions...

Страница 24: ... _ _ km h AVE SPEED __ _ mph for the UK only push the INFO button to switch between these display settings AVE SPEED_ _ _ km h Your av erage traveling speed in kilome ters per hour AVE SPEED_ _ _ mph for the UK only Your average traveling speed in miles per hour To reset the average speed display mode ODO should be selected se lect it by pushing the INFO button and then push the RESET button for t...

Страница 25: ...d before the oil change indicator comes on i e be fore the set oil service interval has been reached the indicator must be reset for the next oil change to be indicated at the correct time To reset the oil change indicator before the periodic oil change interval has been reached fol low the below procedure To reset the oil change indicator mode ODO should be selected select DIST SERV by pushing th...

Страница 26: ...quipped with a self di agnosis device for various electrical circuits If a problem is detected in any of those circuits the engine trouble warning light will come on and the display will indicate an error code If the display indicates any error codes note the code number and then have a Yamaha dealer check the vehicle NOTICE ECA11591 If the display indicates an error code the vehicle should be che...

Страница 27: ...ergen cy such as when the vehicle overturns or when the throttle cable is stuck EAU12713 Start switch Push this switch to crank the engine with the starter See page 5 1 for start ing instructions prior to starting the en gine EAU44712 The engine trouble warning light and ABS warning light ABS model only may come on when the key is turned to ON and the start switch is pushed but this does not indic...

Страница 28: ...part of the igni tion circuit cut off system See page 3 19 EAU12872 Shift pedal The shift pedal is located on the left side of the motorcycle and is used in combination with the clutch lever when shifting the gears of the 6 speed con stant mesh transmission equipped on this motorcycle EAU12892 Brake lever The brake lever is located on the right side of the handlebar To apply the front brake pull t...

Страница 29: ...as rough or gravel roads the brak ing distance may be longer with the ABS than without The ABS is monitored by an ECU which will revert the system to conven tional braking if a malfunction occurs TIP The ABS performs a self diagno sis test each time the vehicle first starts off after the key is turned to ON and the vehicle has traveled at a speed of 10 km h 6 mi h or higher During this test a clic...

Страница 30: ...the key clockwise to the orig inal position and then remove it 3 Close the lock cover TIP The fuel tank cap cannot be installed unless the key is in the lock In addi tion the key cannot be removed if the cap is not properly installed and locked WARNING EWA11142 Make sure that the fuel tank cap is properly installed before riding Leaking fuel is a fire hazard 1 Front wheel sensor rotor 2 Front whee...

Страница 31: ... ECA10072 4 Be sure to securely close the fuel tank cap WARNING EWA15152 Gasoline is poisonous and can cause injury or death Handle gaso line with care Never siphon gasoline by mouth If you should swallow some gasoline or inhale a lot of gas oline vapor or get some gasoline in your eyes see your doctor immedi ately If gasoline spills on your skin wash with soap and water If gaso line spills on you...

Страница 32: ...catalytic converter in the exhaust system WARNING EWA10863 The exhaust system is hot after op eration To prevent a fire hazard or burns Do not park the vehicle near possible fire hazards such as grass or other materials that easily burn Park the vehicle in a place where pedestrians or children are not likely to touch the hot exhaust system Make sure that the exhaust sys tem has cooled down before ...

Страница 33: ...oot while holding the vehicle upright TIP The built in sidestand switch is part of the ignition circuit cut off system which cuts the ignition in certain situa tions See the following section for an explanation of the ignition circuit cut off system WARNING EWA10242 The vehicle must not be ridden with the sidestand down or if the side stand cannot be properly moved up or does not stay up otherwise...

Страница 34: ...ctions It prevents starting when the transmission is in gear and the sidestand is up but the clutch le ver is not pulled It prevents starting when the transmission is in gear and the clutch lever is pulled but the side stand is still down It cuts the running engine when the transmission is in gear and the sidestand is moved down Periodically check the operation of the ignition circuit cut off syst...

Страница 35: ...Move the sidestand up 11 Keep the clutch lever pulled 12 Push the start switch Does the engine start The system is OK The motorcycle can be ridden The neutral switch may not be working correctly The motorcycle should not be ridden until checked by a Yamaha dealer The sidestand switch may not be working correctly The motorcycle should not be ridden until checked by a Yamaha dealer The clutch switch...

Страница 36: ...a dealer Before using this vehicle check the following points ITEM CHECKS PAGE Fuel Check fuel level in fuel tank Refuel if necessary Check fuel line for leakage 3 16 Engine oil Check oil level in engine If necessary add recommended oil to specified level Check vehicle for oil leakage 6 11 Coolant Check coolant level in reservoir If necessary add recommended coolant to specified level Check coolin...

Страница 37: ...throttle grip free play and lubricate ca ble and grip housing 6 17 6 28 Control cables Make sure that operation is smooth Lubricate if necessary 6 27 Drive chain Check chain slack Adjust if necessary Check chain condition Lubricate if necessary 6 25 6 27 Wheels and tires Check for damage Check tire condition and tread depth Check air pressure Correct if necessary 6 18 6 20 Brake pedal Make sure th...

Страница 38: ...uments lights signals and switches Check operation Correct if necessary Sidestand switch Check operation of ignition circuit cut off system If system is not working correctly have Yamaha dealer check vehicle 3 18 Battery Check fluid level Fill with distilled water if necessary 6 31 ITEM CHECKS PAGE U5D7E5E0 book Page 3 Thursday August 21 2014 9 30 AM ...

Страница 39: ...ing to do so will pre vent the engine from starting even though the engine will crank when pushing the start switch EAUM3530 Starting the engine In order for the ignition circuit cut off system to enable starting one of the following conditions must be met The transmission is in the neutral position The transmission is in gear with the clutch lever pulled and the sidestand up See page 3 19 for mor...

Страница 40: ...a Yamaha dealer to check the electrical circuit 3 Start the engine by pushing the start switch If the engine fails to start release the start switch wait a few sec onds and then try again Each starting attempt should be as short as possible to preserve the battery Do not crank the engine more than 10 seconds on any one attempt NOTICE ECA11043 For maximum engine life never ac celerate hard when the...

Страница 41: ...eds with no load on the en gine Turn the engine off instead of let ting it idle for an extended length of time e g in traffic jams at traf fic lights or at railroad crossings EAU16831 Engine break in There is never a more important period in the life of your engine than the period between 0 and 1000 km 600 mi For this reason you should read the fol lowing material carefully Since the engine is bra...

Страница 42: ...out of the tachometer red zone If any engine trouble should oc cur during the engine break in period immediately have a Yamaha dealer check the vehi cle EAU17214 Parking When parking stop the engine and then remove the key from the main switch WARNING EWA10312 Since the engine and exhaust system can become very hot park in a place where pedestri ans or children are not likely to touch them and be ...

Страница 43: ...erforming maintenance unless otherwise specified A running engine has moving parts that can catch on body parts or clothing and electrical parts that can cause shocks or fires Running the engine while ser vicing can lead to eye injury burns fire or carbon monoxide poisoning possibly leading to death See page 1 3 for more in formation about carbon monox ide WARNING EWA15461 Brake discs calipers dru...

Страница 44: ... intended to assist you in the performance of preventive maintenance and minor repairs How ever additional tools such as a torque wrench may be necessary to perform certain maintenance work correctly TIP If you do not have the tools or experi ence required for a particular job have a Yamaha dealer perform it for you 1 Owner s tool kit for ABS models 2 Owner s tool kit ZAUM1232 2 U5D7E5E0 book Page...

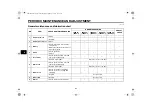
Страница 45: ...erformed by a Yamaha dealer as they require special tools data and tech nical skills EAU46921 Periodic maintenance chart for the emission control system NO ITEM CHECK OR MAINTENANCE JOB ODOMETER READING ANNUAL CHECK 1000 km 600 mi 6000 km 3500 mi 12000 km 7000 mi 18000 km 10500 mi 24000 km 14000 mi 1 Fuel line Check fuel hoses for cracks or damage 2 Spark plug Check condition Clean and regap Repla...

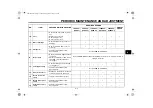
Страница 46: ...avity Make sure that the breather hose is properly routed 4 Clutch Check operation Adjust 5 Front brake Check operation fluid level and vehicle for fluid leakage Replace brake pads Whenever worn to the limit 6 Rear brake Check operation fluid level and vehicle for fluid leakage Replace brake pads Whenever worn to the limit 7 Brake hoses Check for cracks or damage Check for correct routing and clam...

Страница 47: ...fter washing the motorcycle riding in the rain or riding in wet areas 14 Steering bearings Check bearing play and steering for roughness Lubricate with lithium soap based grease Every 24000 km 14000 mi 15 Chassis fasteners Make sure that all nuts bolts and screws are properly tightened 16 Brake lever pivot shaft Lubricate with silicone grease 17 Brake pedal pivot shaft Lubricate with lithium soap ...

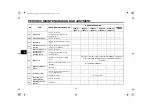
Страница 48: ... 3 10 and 6 11 When the oil change indicator light flashes 2000 km 1200 mi af ter the initial 1000 km 600 mi and every 3000 km 1800 mi thereafter Check oil level and vehicle for oil leakage Every 3000 km 1800 mi 25 Engine oil filter ele ment Replace 26 Cooling system Check coolant level and vehicle for coolant leakage Change coolant Every 3 years 27 Front and rear brake switches Check operation 28...

Страница 49: ...ake fluid Replace the brake hoses every four years and if cracked or damaged 29 Throttle grip Check operation Check throttle grip free play and adjust if necessary Lubricate cable and grip housing 30 Lights signals and switches Check operation Adjust headlight beam NO ITEM CHECK OR MAINTENANCE JOB ODOMETER READING ANNUAL CHECK 1000 km 600 mi 6000 km 3500 mi 12000 km 7000 mi 18000 km 10500 mi 24000...

Страница 50: ...owling in the original posi tion and then install the screws Cowling B To remove the cowling 1 Remove cowling A and panel A 2 Remove the screws slide the cowling forward and then take it off 3 Disconnect the turn signal light lead coupler To install the cowling 1 Connect the turn signal light lead coupler 2 Fit the projection on the cowling into the slot and then slide the cowling backward 3 Insta...

Страница 51: ...n pulling the fastener out To install the cowling 1 Place the cowling in the original position and then install the screws and the quick fasteners TIP To install the quick fasteners push the center pin out so that it will protrude from the fastener head insert the fas tener into the cowling and then push the protruding pin in until it is flush with the fastener head 2 Install cowlings C B A and pa...

Страница 52: ... the condition of the engine To remove the spark plug 1 Remove cowling A See page 6 8 2 Remove the spark plug cap 3 Remove the spark plug as shown with the spark plug wrench includ ed in the owner s tool kit To check the spark plug 1 Check that the porcelain insulator around the center electrode of the spark plug is a medium to light tan the ideal color when the vehi cle is ridden normally TIP If ...

Страница 53: ...490 Engine oil and oil filter ele ment The engine oil level should be checked before each ride In addition the oil must be changed and the oil filter ele ment replaced at the intervals specified in the periodic maintenance and lubri cation chart To check the engine oil level 1 Place the vehicle on a level sur face and hold it in an upright posi tion A slight tilt to the side can result in a false ...

Страница 54: ...rain attach ment provided with the owner s tool kit under the drain bolt of the crankcase 4 Place an oil pan under the engine to collect the used oil 5 Remove the engine oil filler cap and the drain bolt along with the O ring compression spring and engine oil strainer to drain the oil from the crankcase NOTICE When removing the engine oil drain bolt the O ring compres sion spring and oil strainer ...

Страница 55: ...eated 10 Install the engine oil strainer com pression spring O ring and the engine oil drain bolt and then tighten it to the specified torque NOTICE Before installing the engine oil drain bolt do not for get to install the O ring com pression spring and oil strainer in position ECA10422 1 Engine oil drain bolt 2 O ring 3 Compression spring 4 Strainer 5 Oil pan 1 Bolt 2 Oil filter element cover 1 O...

Страница 56: ...sary 14 Reset the oil change indicator See page 3 10 EAU20071 Coolant The coolant level should be checked before each ride In addition the cool ant must be changed at the intervals specified in the periodic maintenance and lubrication chart EAU20095 To check the coolant level 1 Place the vehicle on a level sur face and hold it in an upright posi tion TIP The coolant level must be checked on a cold...

Страница 57: ...se the cooling system will not be protected against frost and corrosion If water has been added to the coolant have a Yamaha dealer check the anti freeze content of the coolant as soon as possible otherwise the effectiveness of the coolant will be reduced ECA10473 EAU33032 Changing the coolant The coolant must be changed at the in tervals specified in the periodic main tenance and lubrication char...

Страница 58: ... or dusty areas In addition the air filter check hose must be frequently checked and cleaned if necessary To clean the air filter check hose 1 Check the hose on the side of the air filter case for accumulated dirt or water 2 If dirt or water is visible remove the hose clean it and then install it EAU44735 Checking the engine idling speed Check the engine idling speed and if necessary have it corre...

Страница 59: ... increase the throttle grip free play turn the adjusting nut in di rection a To decrease the throt tle grip free play turn the adjusting nut in direction b 4 Tighten the locknut and then slide the rubber cover to its original po sition EAU21402 Valve clearance The valve clearance changes with use resulting in improper air fuel mixture and or engine noise To prevent this from occurring the valve cl...

Страница 60: ...eed and with the total weight of rider passenger car go and accessories approved for this model WARNING EWA10512 Never overload your vehicle Opera tion of an overloaded vehicle could cause an accident Tire inspection The tires must be checked before each ride If the center tread depth reaches the specified limit if the tire has a nail or glass fragments in it or if the side wall is cracked have a ...

Страница 61: ...y have not been used or have only been used occasion ally Cracking of the tread and sidewall rubber sometimes accompanied by carcass deformation is an evidence of ageing Old and aged tires shall be checked by tire specialists to ascertain their suitability for further use WARNING EWA10902 The front and rear tires should be of the same make and de sign otherwise the handling characteristics of the ...

Страница 62: ...il ity and safe operation of your vehicle note the following points regarding the specified wheels The wheel rims should be checked for cracks bends warp age or other damage before each ride If any damage is found have a Yamaha dealer replace the wheel Do not attempt even the smallest repair to the wheel A de formed or cracked wheel must be replaced The wheel should be balanced whenever either the...

Страница 63: ...specified clutch lever free play could be obtained as described above skip steps 4 7 4 Fully turn the adjusting bolt at the clutch lever in direction a to loos en the clutch cable 5 Loosen the locknut at the crank case 6 To increase the clutch lever free play turn the clutch lever free play adjusting nut in direction a To decrease the clutch lever free play turn the adjusting nut in di rection b 7...

Страница 64: ...aha dealer adjust it WARNING EWAM1031 An incorrect brake pedal free play indicates a hazardous condition in the brake system Do not operate the motorcycle until the brake sys tem has been checked or repaired by a Yamaha dealer EAUM3541 Brake light switches For ABS models The brake light which is activated by the brake pedal and brake lever should come on just before braking takes effect If necessa...

Страница 65: ...n chart EAU22421 Front brake pads Each front brake pad is provided with a wear indicator groove which allows you to check the brake pad wear with out having to disassemble the brake To check the brake pad wear check the wear indicator groove If a brake pad has worn to the point that the wear indicator groove has almost disap peared have a Yamaha dealer replace the brake pads as a set EAU22501 Rear...

Страница 66: ...fill with the same type of brake fluid Adding a brake fluid other than DOT 4 may result in a harmful chemical reaction Be careful that water or dust does not enter the brake fluid reservoir when refilling Water will significantly lower the boil ing point of the fluid and may re sult in vapor lock and dirt may clog the ABS hydraulic unit valves NOTICE ECA17641 Brake fluid may damage painted surface...

Страница 67: ...er they are damaged or leaking Oil seals Replace every two years Brake hoses Replace every four years EAU22762 Drive chain slack The drive chain slack should be checked before each ride and adjusted if necessary EAUM3550 To check the drive chain slack 1 Place the motorcycle on the side stand TIP When checking and adjusting the drive chain slack there should be no weight on the motorcycle 2 Shift t...

Страница 68: ... well as other vital parts of the motorcycle and can lead to chain slippage or breakage To prevent this from occurring keep the drive chain slack within the specified limits ECA10572 TIP Using the alignment marks on each side of the swingarm make sure that both drive chain pullers are in the same position for proper wheel alignment 3 Tighten the axle nut then the lock nuts to their specified torqu...

Страница 69: ...rive chain dry 3 Thoroughly lubricate the drive chain with a special O ring chain lubricant NOTICE Do not use engine oil or any other lubri cants for the drive chain as they may contain substances that could damage the O rings ECA11112 EAU23098 Checking and lubricating the cables The operation of all control cables and the condition of the cables should be checked before each ride and the ca bles ...

Страница 70: ...talled correctly it does not completely protect the cable from wa ter entry Therefore use care not to pour water directly onto the cover or cable when washing the vehicle If the cable or cover becomes dirty wipe clean with a moist cloth EAU23144 Checking and lubricating the brake and clutch levers The operation of the brake and clutch levers should be checked before each ride and the lever pivots ...

Страница 71: ...cessary WARNING EWA10732 If the sidestand does not move up and down smoothly have a Yamaha dealer check or repair it Otherwise the sidestand could contact the ground and distract the operator re sulting in a possible loss of control EAUM1653 Lubricating the swingarm piv ots The swingarm pivots must be lubricat ed by a Yamaha dealer at the intervals specified in the periodic maintenance and lubrica...

Страница 72: ...rk compresses and re bounds smoothly NOTICE ECA10591 If any damage is found or the front fork does not operate smoothly have a Yamaha dealer check or re pair it EAU23284 Checking the steering Worn or loose steering bearings may cause danger Therefore the operation of the steering must be checked as fol lows at the intervals specified in the periodic maintenance and lubrication chart 1 Place a stan...

Страница 73: ...eather hose routing should be checked before each ride and at the in tervals specified in the periodic main tenance and lubrication chart WARNING EWA10771 Electrolyte is poisonous and dangerous since it contains sul furic acid which causes severe burns Avoid any contact with skin eyes or clothing and al ways shield your eyes when working near batteries In case of contact administer the fol lowing ...

Страница 74: ...re harmful to the battery ECA10612 4 Check and if necessary tighten the battery lead connections and correct the breather hose routing To store the battery 1 If the motorcycle will not be used for more than one month remove the battery fully charge it and then place it in a cool dry place NOTICE When removing the battery be sure the key is turned to OFF then discon nect the negative lead before di...

Страница 75: ...he key to OFF and turn off the electrical circuit in question 2 Remove the blown fuse and then install a new fuse of the specified amperage WARNING Do not use a fuse of a higher amperage rating than recommended to avoid causing extensive dam age to the electrical system and possibly a fire EWA15132 TIP Fuse tongs are included in the owner s tool kit Use the tongs to remove and install a fuse YZF R...

Страница 76: ...essary adjust the headlight beam 1 Headlight fuse 2 Signaling system fuse 3 Ignition fuse 4 Radiator fan motor fuse 5 Main fuse 6 ABS control unit fuse 7 Spare fuse 8 Backup fuse 9 ABS solenoid fuse 10 ABS motor fuse ZAUM1231 10 30 30 20 7 8 9 10 10 15 7 5 20 7 5 7 5 15 5 20 5 7 1 2 3 4 5 6 Specified fuses Main fuse 20 0 A Ignition fuse 7 5 A Signaling system fuse 7 5 A Headlight fuse 15 0 A Radia...

Страница 77: ... out 3 Insert a new bulb into the socket 4 Install the socket together with the bulb by pushing it in EAU24182 Tail brake light This model is equipped with an LED type tail brake light If the tail brake light does not come on have a Yamaha dealer check it EAU24205 Replacing a turn signal light bulb 1 Remove the turn signal light lens by removing the screw 2 Remove the burnt out bulb by pushing it ...

Страница 78: ...ed with a centerstand follow these precautions when removing the front and rear wheel or performing other mainte nance requiring the motorcycle to stand upright Check that the motorcy cle is in a stable and level position be fore starting any maintenance A strong wooden box can be placed un der the engine for added stability To service the front wheel 1 Stabilize the rear of the motorcy cle by usi...

Страница 79: ...t wheel WARNING EWA10822 To avoid injury securely support the vehicle so there is no danger of it falling over 1 Loosen the front wheel axle pinch bolts then the wheel axle and the brake caliper bolts 2 Lift the front wheel off the ground according to the procedure in the previous section Supporting the motorcycle 1 Axle bolt 2 Front wheel axle pinch bolt A 3 Front wheel axle pinch bolt B 1 Brake ...

Страница 80: ...wheel axle to the specified torque 6 Tighten the wheel axle pinch bolt A and pinch bolt B to the specified torques 7 Retighten the wheel axle pinch bolt A to the specified torque 8 Tighten the brake caliper bolts to the specified torques 9 Push down hard on the handlebar several times to check for proper fork operation EAU44802 Rear wheel for non ABS models WARNING EWA14841 For the ABS model have ...

Страница 81: ...rocket The drive chain cannot be disas sembled 7 While supporting the brake caliper bracket pull the wheel axle out and then remove the wheel NOTICE Do not apply the brake after the wheel and brake disc have been removed otherwise the brake pads will be forced shut ECA11073 To install the rear wheel 1 Install the wheel and the brake cal iper bracket by inserting the wheel axle from the left hand s...

Страница 82: ...ause poor starting and loss of power The following troubleshooting charts represent quick and easy procedures for checking these vital systems your self However should your motorcycle require any repair take it to a Yamaha dealer whose skilled technicians have the necessary tools experience and know how to service the motorcycle properly Use only genuine Yamaha replace ment parts Imitation parts m...

Страница 83: ...ODIC MAINTENANCE AND ADJUSTMENT 6 41 6 heaters or furnaces Gasoline or gasoline vapors can ignite or ex plode causing severe injury or prop erty damage U5D7E5E0 book Page 41 Thursday August 21 2014 9 30 AM ...

Страница 84: ...d check the electrodes 3 Ignition Wet Dry Wipe off with a dry cloth and correct the spark plug gap or replace the spark plug Have a Yamaha dealer check the vehicle The engine does not start Check the battery Operate the electric starter Operate the electric starter 4 Battery The engine turns over quickly The engine turns over slowly The battery is good Check the electrolyte and battery lead connec...

Страница 85: ...iss ing sound has stopped press down on the cap while turning it counterclockwise and then remove the cap TIP If coolant is not available tap water can be temporarily used instead provided that it is changed to the recommended cool ant as soon as possible Wait until the engine has cooled Check the coolant level in the reservoir and radiator The coolant level is OK The coolant level is low Check th...

Страница 86: ...tlet with a plastic bag after the engine has cooled down 2 Make sure that all caps and cov ers as well as all electrical cou plers and connectors including the spark plug cap are tightly in stalled 3 Remove extremely stubborn dirt like oil burnt onto the crankcase with a degreasing agent and a brush but never apply such prod ucts onto seals gaskets sprock ets the drive chain and wheel axles Always...

Страница 87: ...water Use a toothbrush or bottlebrush for hard to reach areas Stubborn dirt and insects will come off more easily if the area is covered with a wet cloth for a few minutes before cleaning Use the special sponge which is located under the tool kit to clean the muffler and to remove any discoloration from it After riding in the rain near the sea or on salt sprayed roads Since sea salt or salt spraye...

Страница 88: ... to any rubber and plastic parts but treat them with a suitable care product Avoid using abrasive polishing compounds as they will wear away the paint TIP Consult a Yamaha dealer for ad vice on what products to use Washing rainy weather or humid climates can cause the headlight lens to fog Turning the headlight on for a short period of time will help remove the moisture from the lens EAU43204 Stor...

Страница 89: ... engine over EWA10952 e Remove the spark plug cap from the spark plug and then install the spark plug and the spark plug cap 4 Lubricate all control cables and the pivoting points of all levers and pedals as well as of the side stand centerstand 5 Check and if necessary correct the tire air pressure and then lift the motorcycle so that both of its wheels are off the ground Alterna tively turn the ...

Страница 90: ... 84 Imp qt With oil filter element replacement 1 00 L 1 06 US qt 0 88 Imp qt Coolant quantity Coolant reservoir up to the maximum level mark 0 25 L 0 26 US qt 0 22 Imp qt Radiator including all routes 1 00 L 1 06 US qt 0 88 Imp qt Air filter Air filter element Dry element Fuel Recommended fuel Premium unleaded gasoline Gasohol E10 acceptable Fuel tank capacity 11 5 L 3 04 US gal 2 53 Imp gal Fuel ...

Страница 91: ...g 0 198 lb Front 180 kPa 1 80 kgf cm 26 psi Rear 200 kPa 2 00 kgf cm 29 psi Loading condition 90 180 kg 198 397 lb Front 180 kPa 1 80 kgf cm 26 psi Rear 225 kPa 2 25 kgf cm 33 psi Front wheel Wheel type Cast wheel Rim size 17xMT2 75 Rear wheel Wheel type Cast wheel Rim size 17 x MT3 75 Front brake Type Single disc brake Operation Right hand operation Specified brake fluid DOT 4 Rear brake Type Sin...

Страница 92: ...2 V 5 0 W 1 Meter lighting LED Neutral indicator light LED High beam indicator light LED Turn signal indicator light LED Fuel level warning light LED Engine trouble warning light LED ABS warning light YZF R125A LED Fuses Main fuse 20 0 A Headlight fuse 15 0 A Signaling system fuse 7 5 A Ignition fuse 7 5 A Radiator fan motor fuse 5 0 A ABS control unit fuse YZF R125A 10 0 A ABS motor fuse YZF R125...

Страница 93: ...tamped into the steering head pipe Record this number in the space pro vided TIP The vehicle identification number is used to identify your motorcycle and may be used to register your motorcy cle with the licensing authority in your area EAU26471 Model label The model label is affixed to the frame under the rider seat See page 3 18 Record the information on this label in the space provided This in...

Страница 94: ...ht 3 2 Fuel tank cap 3 15 Fuses replacing 6 33 H Handlebar switches 3 11 Headlight bulb replacing 6 34 High beam indicator light 3 2 Horn switch 3 12 I Identification numbers 9 1 Ignition circuit cut off system 3 19 Indicator lights and warning lights 3 2 Info switch 3 12 L License plate light bulb replacing 6 36 M Main switch steering lock 3 1 Maintenance and lubrication periodic 6 4 Maintenance ...

Страница 95: ...10 2 10 Vehicle identification number 9 1 W Wheel bearings checking 6 31 Wheel front for non ABS models 6 37 Wheel rear for non ABS models 6 38 Wheels 6 20 U5D7E5E0 book Page 2 Thursday August 21 2014 9 30 AM ...

Страница 96: ...A5 yoko_Blank fm Page 1 Thursday December 8 2011 2 18 PM ...

Страница 97: ...A5 yoko_Blank fm Page 1 Thursday December 8 2011 2 18 PM ...

Страница 98: ...PRINTED IN FRANCE 2014 09 E PANTONE285C MBK Industrie Z I de Rouvroy 02100 Saint Quentin Original instructions ...

Отзывы: