background image

3-3

3

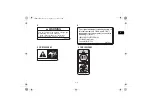
• Do not drive or ride as passenger after using drugs or alcohol.

Prepare your vehicle

Perform the pre-operation checks each time you use the vehicle to make sure it is in safe oper-
ating condition. Failure to inspect or maintain the vehicle properly increases the possibility of an
accident or equipment damage. See page 6-1 for a list of pre-operation checks.

Prepare your load or trailer

Carrying loads, towing a trailer, or pulling objects can affect handling, stability, and cause the risk
of overturns or other accidents.

Read Chapter 7 before loading, towing, or pulling objects.

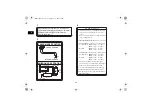
Do not overload the vehicle or trailer. Refer to label in cargo bed for cargo bed load limit. Refer
to label next to hitch for tongue weight and trailer load limits.

Keep weight in the cargo bed centered side to side, and as low and as far forward as possible.

Secure cargo so that it will not shift – a loose load could change handling unexpectedly or be
thrown forward and strike occupants.

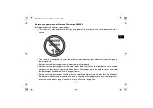
While using your Yamaha Wolverine RMAX2

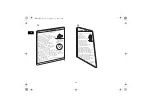
Keep your body completely inside the vehicle at all times. Keep both hands on the steering
wheel. Be sure the passenger is seated, belted, and holding onto the passenger handhold.
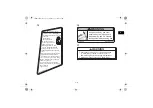
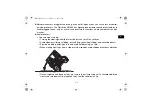
Close doors before driving. Any part of your body (arms, legs, and head) outside the vehicle
can be struck by objects your vehicle is passing or crushed by the vehicle cage/frame in a roll-
over accident.

Watch for branches, brush, or other hazards that could enter the vehicle.

UB4M10E0.book  Page 3  Friday, May 15, 2020  3:52 PM

Содержание Wolverine RMAX

Страница 1: ...M READ THIS MANUAL CAREFULLY It contains important safety information NOTICE The removal or modification of evaporative emission related parts on this OHRV is illegal Violators may be subject to civil and or criminal penalties as provided under California and federal law ...

Страница 2: ...er reproductive harm To minimize exposure avoid breathing exhaust do not idle the engine except as necessary service your vehicle in a well ventilated area and wear gloves or wash your hands frequently when servicing your vehicle For more information go to www P65Warnings ca gov passenger vehicle Read this manual carefully before operating this vehicle This manual should stay with this ve hicle if...

Страница 3: ...s basic maintenance and inspection procedures If you have any ques tions regarding the operation or maintenance of your vehicle please consult a Yamaha dealer WARNING EWB04330 Read this manual carefully before operating this vehicle Do not attempt to operate this vehicle until you have attained adequate knowledge of its controls and operating fea tures For YXE10WPZM Read the Winch Owner s Manual c...

Страница 4: ... safety alert symbol It is used to alert you to poten tial personal injury hazards Obey all safety messages that fol low this symbol to avoid possible injury or death A WARNING indicates a hazardous situation which if not avoided could result in death or serious injury A NOTICE indicates special precautions that must be taken to avoid damage to the vehicle or other property A TIP provides key info...

Страница 5: ...efore choosing where to operate this vehicle It is illegal to operate this vehicle on public lands where vehicles its size are prohibited This vehicle complies with all state off highway noise level and spark arrester laws and regulations EBU31111 YXE10WPZM YXE10WPAM OWNER S MANUAL 2021 by Yamaha Motor Corporation U S A 1st edition March 2020 All rights reserved Any reprinting or unauthorized use ...

Страница 6: ...inch switch YXE10WPZM 5 14 On Command drive knob 2WD 4WD DIFF LOCK 5 14 D mode knob SPORT TRAIL CRAWL YXE10WPZM 5 15 Accelerator pedal 5 16 Brake pedal 5 17 Parking brake lever 5 17 Drive select lever 5 18 Continuously Variable Transmission CVT 5 18 Fuel tank cap 5 19 Doors 5 19 Passenger seat cushion 5 20 Adjusting the driver seat position 5 21 Adjusting the steering wheel position 5 21 Rearview ...

Страница 7: ...celerator pedal 6 6 Seat belts 6 6 Passenger handhold 6 7 Steering 6 7 Fittings and fasteners 6 7 Instruments lights and switches 6 7 Control cables 6 7 Tires 6 7 OPERATION 7 1 Engine break in 7 1 Starting the engine 7 2 Drive select lever operation and reverse driving 7 3 On Command drive knob 7 6 Parking 7 8 Loading 7 8 BASIC GUIDE FOR SAFE USE 8 1 KNOW YOUR VEHICLE 8 1 LEARNING TO OPERATE YOUR ...

Страница 8: ...d replacement 9 42 Checking the brake pedal 9 43 Checking the accelerator pedal 9 43 Parking brake lever free play adjustment 9 44 Brake light switch adjustment 9 44 Cable inspection and lubrication 9 45 Pedal lubrication 9 46 Checking the stabilizer bushes 9 46 Rear knuckle upper and lower pivot lubrication left and right 9 46 Steering shaft lubrication 9 47 Wheel removal 9 47 Tire replacement 9 ...

Страница 9: ...ntrol Information label 12 1 Emission Regulation California 12 1 Vehicle data recording 12 1 NOISE REGULATION 12 3 MAINTENANCE RECORD 12 4 YAMAHA MOTOR CORPORATION U S A 2020 AND LATER MODEL SIDE BY SIDE LIMITED WARRANTY 12 5 YAMAHA EXTENDED SERVICE Y E S 12 7 INDEX 13 1 UB4M10E0 book Page 4 Friday May 15 2020 3 52 PM ...

Страница 10: ...EHICLE IDENTIFICATION NUMBER MODEL LABEL INFORMATION KEY IDENTIFICATION NUMBER EBU32800 Vehicle identification number The vehicle identification number is stamped into the frame The vehicle identification number is used to identify your vehicle EBU32811 Model label The model label is affixed at the location shown 1 Vehicle identification number 1 UB4M10E0 book Page 1 Friday May 15 2020 3 52 PM ...

Страница 11: ...bel EBU32790 Key identification number The key identification number is stamped on the key as shown in the following illustration This number can be used for ordering a new key 1 Model label 1 1 1 1 Model type code 2 Production code 3 Color code 1 3 2 UB4M10E0 book Page 2 Friday May 15 2020 3 52 PM ...

Страница 12: ...1 3 1 1 Key identification number 1 UB4M10E0 book Page 3 Friday May 15 2020 3 52 PM ...

Страница 13: ...2 1 2 EBU31130 LOCATION OF THE WARNING AND SPECIFICATION LABELS 1 2 1 3 4 3 3 3 5 5 6 5 6 7 8 7 8 9 9 10 10 10 11 11 12 12 11 12 UB4M10E0 book Page 1 Friday May 15 2020 3 52 PM ...

Страница 14: ...2 2 2 16 17 15 14 13 16 UB4M10E0 book Page 2 Friday May 15 2020 3 52 PM ...

Страница 15: ...y contain important information for safe and proper operation of your vehicle Never remove any labels from your vehicle If a label becomes difficult to read or comes off a replacement label is available from your Yamaha dealer UB4M10E0 book Page 3 Friday May 15 2020 3 52 PM ...

Страница 16: ...oid hills and rough terrain Secure cargo so that it will not shift a loose load could change handling unexpectedly or be thrown forward and strike occupants Keep weight in the cargo bed centered side to side and as low as possible Top heavy loads increase the risk of a rollover Read Owner s Manual before loading cargo bed Improper use of cargo bed or cage frame can result in severe injury or death...

Страница 17: ...4M F2259 00 YAMAHA MOTOR CORPORATION U S A 6555 Katella Avenue Cypress California 90630 5101 U S A B4M F4164 00 The original equipment overhead structure on this vehicle meets US OSHA and ISO 3471 requirements for rollover protection structures m 900Kg for ISO3471 B4J F847C 00 3 5 YXE10WPZM 6 YXE10WPZM 4 B4J F8459 00 UB4M10E0 book Page 5 Friday May 15 2020 3 52 PM ...

Страница 18: ... 1440 kg maximum including vehicle weight of operator passengers accessories cargo and if applicable trailer tongue weight OPERATING TIRE PRESSURE With tires cold set as follows VEHICLE LOAD of 441 lbs 200 kg 1256 lbs 570 kg Recommended FRONT REAR Minimum FRONT REAR 14 psi 32 psi 13 psi 30 psi 100 kPa 220 kPa 90 kPa 210 kPa B4J F1684 00 INTAKE MANIFOLD 1 PRESS SENSOR THROTTLE BODY SOLENOID VALVE 1...

Страница 19: ... or other accidents Secure load to prevent it from shifting Never load more than 620 N 63 kgf 141 lbf tongue weight on towing bracket Do not tow more than 8888 N 907 kgf 2000 lbf rolling weight trailer plus cargo Tow or pull only from hitch bracket Read Owner s Manual before loading towing or pulling objects B4J F151J 00 MAX 7 3 INCH 185MM 10 12 11 UB4M10E0 book Page 7 Friday May 15 2020 3 52 PM ...

Страница 20: ...not exceed seating capacity 1 passenger Read Owner s Manual Read Tips Guide for the Recreational Off Highway Vehicle Driver Follow All Instruction and Warnings Rollovers have caused severe injuries and death even on flat open areas B4M F1568 00 DRIVER DRIVER UNDER UNDER 16 16 DRIVER UNDER 16 WARNING Improper Use of Off Highway Vehicle Can Cause Severe Injury or Death Be Prepared Fasten seat belts ...

Страница 21: ...r roll reduce your risk to injury Keep a firm grip on the handhold and brace yourself Do not put any part of your body outside of the vehicle for any reason Do not hold the cage and door B4J F156E 00 WARNING Fuel vapors can be a fire or explosion hazard To avoid injury or death never store fuel or flammable liquids in this storage compartment Storage should not exceed 7 7 lbs 3 5 kg B4J F151F 00 K...

Страница 22: ...Also use these two chapters and the labels on the vehicle to instruct new op erators and passengers Do not allow anyone else to operate your vehicle or ride as a passenger if you are unsure that he she is willing and able to follow these instructions Get to know your vehicle This off road vehicle will handle and maneuver differently from cars ATVs go carts golf cars and grounds keeping vehicles Fo...

Страница 23: ...s properly Both driver and passenger must be able to put both feet flat on the floorboard while seated upright with their backs against the backrests Passenger must be able to reach and hold the passenger handhold within the cage frame Both driver and passenger should wear an approved motorcycle helmet that fits properly Both driver and passenger should also wear eye protection goggles or a face s...

Страница 24: ...or cargo bed load limit Refer to label next to hitch for tongue weight and trailer load limits Keep weight in the cargo bed centered side to side and as low and as far forward as possible Secure cargo so that it will not shift a loose load could change handling unexpectedly or be thrown forward and strike occupants While using your Yamaha Wolverine RMAX2 Keep your body completely inside the vehicl...

Страница 25: ...g Turning the steering wheel too far or too fast can result in a rollover Avoid sideways sliding skidding or fishtailing rear wheel sliding and never do donuts Slow down before entering a turn and avoid hard braking in a turn When making tight turns from a stop or at slow speeds avoid sudden or hard acceleration Drive straight up and down inclines not across them If crossing a hill is unavoidable ...

Страница 26: ...gravel Do not operate the vehicle in fast flowing water or water deeper than 42 cm 17 in If you must cross shallow slow moving water choose your path carefully to avoid sharp drop offs large rocks or slippery surfaces Operating this vehicle through deep or fast flowing water can lead to loss of control or overturn To reduce your risk of drowning or other injuries use care when crossing through wat...

Страница 27: ...of carbon monoxide poisoning leave the area immediately get fresh air and SEEK MED ICAL TREATMENT Do not run engine indoors Even if you try to ventilate engine exhaust with fans or open win dows and doors carbon monoxide can rapidly reach dangerous levels Do not run engine in poorly ventilated or partially enclosed areas such as barns garages or carports Do not run engine outdoors where engine exh...

Страница 28: ...accessories or modifications are not suitable because of potential safety hazards to you or others Installing aftermarket products or having other mod ifications performed to your Wolverine RMAX2 that change any of the vehicle s design or oper ation characteristics can put you and others at greater risk of serious injury or death You are responsible for injuries related to changes in the vehicle A...

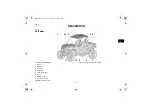
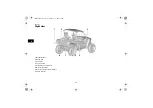
Страница 29: ...3 4 6 5 8 9 7 10 11 1 Winch YXE10WPZM 2 Fuses 3 Battery 4 Air filters 5 Seat belt 6 Shoulder bolster 7 Door 8 Engine oil tank 9 Coolant reservoir 10 Brake fluid reservoir 11 Front shock absorber assembly UB4M10E0 book Page 1 Friday May 15 2020 3 52 PM ...

Страница 30: ... 1 2 3 6 6 6 7 8 5 4 1 Brake tail light 2 Cargo bed 3 Seat belt 4 Fuel tank cap 5 Transmission oil dipstick 6 Oil filter cartridge 7 Rear shock absorber assembly 8 Spark arrester UB4M10E0 book Page 2 Friday May 15 2020 3 52 PM ...

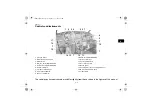
Страница 31: ... Multi function meter unit 3 Main switch 4 D mode knob YXE10WPZM 5 Winch switch YXE10WPZM 6 Auxiliary DC jack 7 Storage compartment 8 Passenger handhold 9 Glove compartment 10 USB jack YXE10WPZM 11 Drive select lever 12 Parking brake lever 13 Accelerator pedal 14 Brake pedal 15 Steering wheel position adjusting lever 16 On Command drive knob 17 Light switch UB4M10E0 book Page 3 Friday May 15 2020 ...

Страница 32: ...hts and the multi function meter can be confirmed at this time EBU31241 Off position All electrical circuits are switched off The key can be removed EBU31251 Start position The electric starter is engaged by turning and holding the key in this position Release the key when the engine starts 1 Main switch 2 Off position 3 On position 4 Start position 4 3 2 1 4 3 2 1 UB4M10E0 book Page 1 Friday May ...

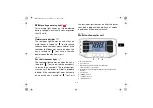
Страница 33: ...lever is in the R position EBU39330 Parking brake indicator light This indicator light comes on when the park ing brake is applied 1 Differential gear lock indicator light 2 Low range indicator light 3 High range indicator light 4 Neutral indicator light 5 Reverse indicator light 6 Parking brake indicator light 7 Drivetrain icon 8 High beam indicator light 9 Helmet reminder light 10 Seat belt remi...

Страница 34: ...turn off When 4WD is selected is displayed And when 4WD with differential lock is selected is dis played TIP See pages 5 14 and 7 6 for more informa tion on selecting the drive mode Due to the synchronizing mechanism in the differential gear case the drivetrain icon may not come on until the vehicle starts moving When using the On Command drive knob to change to from DIFF LOCK the drive train icon...

Страница 35: ...ne and allow it to cool See page 9 61 TIP When the coolant temperature is too cold engine power is restricted After the coolant temperature warning light goes off release the accelerator pedal and then the vehicle will switch to normal operating mode If you continue to drive the vehicle while the engine is overheating a buzzer will sound The coolant temperature warning light can be checked by turn...

Страница 36: ...aha dealer check the vehicle EBU39381 Electric Power Steering warning light This warning light comes on when the key is turned to on and then goes off once the engine is started If the warning light re mains on or comes on after the engine is started the EPS system may not be working correctly When this occurs the display will indicate an error code see page 5 12 Have a Yamaha dealer check the EPS...

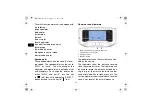
Страница 37: ...e key is turned to on to remind the occupants to fasten their seat belt The reminder light stays on until the driver seat belt is properly latched If the reminder light does not come on when the key is turned to on or if the reminder light remains on after the driver seat belt is properly latched have a Yamaha dealer check the electrical circuit EBU39731 Multi function meter unit 1 D mode indicato...

Страница 38: ...H and km h turn the key to off then while holding the SELECT button pushed turn the key to on Odometer and tripmeters The odometer shows the total distance trav eled by the vehicle The tripmeters show the distance traveled since they were last reset The tripmeters can be used to record the distance traveled on a single trip or to estimate the distance that can be traveled with a full tank of gas e...

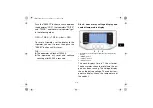
Страница 39: ...The tripmeters will reset and continue counting after 9999 9 is reached Clock hour meter voltage display and coolant temperature display The clock displays time in 12 hour format The hour meter shows the total time the en gine has been running The voltage display shows the battery voltage The coolant tem perature display shows the temperature of the coolant 1 Clock Hour meter Voltage display Coola...

Страница 40: ... the min ute digits will start flashing 5 Use the RESET button to set the min utes 6 Push the SELECT button and then re lease it to start the clock Voltage display This display shows the battery voltage If the battery voltage is less than 10 volts Lo is displayed and if the voltage is above 18 volts Hi is displayed NOTICE ECB03570 If the voltage display indicates Lo or Hi there may be trouble with...

Страница 41: ...l begin to flash If the coolant temperature con tinues to rise the message Hi will flash TIP The coolant temperature display can be set to C or F To switch the temperature units turn the key to off then while holding the RESET button pushed turn the key to on The radiator fan turns on and off automati cally according to the coolant temperature Fuel gauge 1 Coolant temperature display 1 1 Fuel gaug...

Страница 42: ... as possible TIP If the electrical circuit for the fuel gauge is not working correctly all display segments will flash repeatedly Have a Yamaha dealer check the vehicle D mode indicator The D mode indicator shows which mode is currently selected S SPORT T TRAIL or C CRAWL For more details on the modes and how to select them see page 5 15 TIP On vehicles not equipped with D mode the D mode indicato...

Страница 43: ...irm the selected brightness level and exit the brightness control mode Error code display This model is equipped with a self diagnostic device for various electrical circuits If a problem is detected in any of those cir cuits the warning lights will come on or flash and the display will indicate an error code If the display indicates an error code note the code number and have a Yamaha dealer chec...

Страница 44: ...switch to to turn on the high beam and the taillights Set the switch to to turn off the head lights and taillights NOTICE ECB02061 Do not use the headlights with the engine turned off for an extended period of time The battery may discharge to the point that the electric starter will not have enough power to crank the engine If this should happen remove the battery and re charge it 1 Light switch ...

Страница 45: ...he On Command drive knob to change the drive mode to two wheel drive four wheel drive or four wheel drive with differential lock Select the appro priate drive according to the terrain and driv ing conditions 2WD two wheel drive Power is sup plied to the rear wheels only 4WD four wheel drive Power is sup plied to the front and rear wheels 1 Winch switch YXE10WPZM 1 1 1 On Command drive knob 2WD 4WD...

Страница 46: ...ction TIP Maximum vehicle speed is limited to approx imately 65 km h 40 mi h when DIFF LOCK is selected EBU39740 D mode knob SPORT TRAIL CRAWL YXE10WPZM D mode is an electronically controlled engine performance system This model has three modes SPORT TRAIL and CRAWL Select the mode by turning the D mode knob according to the terrain and driving condi tions 1 D mode knob YXE10WPZM 1 1 UB4M10E0 book...

Страница 47: ...quicker engine response and smoother en gine braking compared to mode TRAIL This mode is suitable for high speed driving on wide open trails or dunes Mode CRAWL Mode CRAWL offers the most gentle en gine response This mode is suitable for situ ations that require sensitive throttle operation such as rock crawling or muddy trails EBU31413 Accelerator pedal Press the accelerator pedal to increase en ...

Страница 48: ...tomatically reduced TIP When the brake pedal is pressed and then the accelerator pedal is pressed the brake over ride system will not engage EBU35642 Parking brake lever Setting the parking brake lever will help keep the vehicle from moving while parked To engage the parking brake pull the lever firmly 1 Brake pedal 1 1 1 Parking brake lever 2 Release button 3 Pull to set 1 1 2 2 3 3 UB4M10E0 book...

Страница 49: ...his model s transmission includes a V belt which provides the luxury of an automatic transmission The V belt wears out naturally the more you drive However it will wear out more quickly from hard driving and incorrect gear selection For longer belt life remember that terrain conditions and your driving style directly affect the durability of the drive belt The V belt will wear more quickly when he...

Страница 50: ... Fuel tank cap Remove the fuel tank cap when refueling To open turn counterclockwise When finished refueling install the fuel tank cap by screwing it down clockwise EBU37390 Doors The door handle is located on the inside of each door To open a door pull the handle To close a door push or pull the door inward until it is securely latched Be sure the door is SE CURELY LATCHED AFTER CLOSING IT 1 Fuel...

Страница 51: ...s on the rear of the seat cushion under the seat frame and then insert the projection on the front of the cushion into the grommet while pushing the cushion downward Make sure the seat is properly secured before start ing off WARNING If the seat is loose the passenger could fall EWB04240 1 Handle 2 Door 1 2 1 Passenger seat cushion 1 1 1 UB4M10E0 book Page 20 Friday May 15 2020 3 52 PM ...

Страница 52: ...he driver seat position pull the driver seat position adjusting lever upward and move the seat to the desired position TIP Adjust the driver seat position and make sure it is locked in place before starting off EBU35002 Adjusting the steering wheel position The steering wheel position can be adjusted to suit the driver s preference WARNING Never adjust the steering wheel position 1 Driver seat pos...

Страница 53: ... pull the steering wheel position adjusting lever and move the steering wheel to the desired posi tion TIP Adjust the steering wheel position before starting off EBU36953 Rearview mirror YXE10WPZM TIP Adjust the rearview mirror before starting off 1 Steering wheel position adjusting lever 1 1 1 Rearview mirror YXE10WPZM 1 UB4M10E0 book Page 22 Friday May 15 2020 3 52 PM ...

Страница 54: ...ned a buzzer will sound If the vehicle is driven without the driver seat belt fastened engine power will be lim ited EBU31503 Glove compartment Store lightweight or frequently used items such as your driving gloves or vehicle docu ments in this compartment 1 Push and open Glove compartment load limit 5 0 kg 11 lb 1 1 1 UB4M10E0 book Page 23 Friday May 15 2020 3 52 PM ...

Страница 55: ...storing any documents in the storage compartments be sure to wrap them in a plastic bag so that they will not get wet When washing the vehicle be careful not to let any water enter the storage compartments NOTICE ECB02241 To protect from damage do not put metal items like tools or sharply edged items di rectly in the storage compartment If these items must be stored wrap them in appro priate cushi...

Страница 56: ...nts may spill and the glass contain ers may be thrown about and break and possibly injure people in the vehicle dur ing sudden braking or an accident Do not place any other items than seal able plastic containers in the cup hold ers otherwise they may be thrown about and possibly injure people in the vehicle during sudden braking or an ac cident 1 Storage compartment center console Maximum load li...

Страница 57: ...xceed the specified maximum load limits Heavier cargo could cause loss of control because of improper weight balance There are four cargo hooks in the cargo bed 1 Cup holder 1 1 1 1 Cargo hook 1 Cargo hook Maximum load limit 272 0 kg 600 lb 1 1 UB4M10E0 book Page 26 Friday May 15 2020 3 52 PM ...

Страница 58: ...en Pull the latch and then lower the tailgate To close Lift the tailgate to the original position and then push the tailgate to securely lock it in place Lifting and lowering the cargo bed To lift Pull up the cargo bed release lever on the left or right side of the vehicle and then slowly lift up the cargo bed until it stops 1 Tailgate 2 Latch 1 2 2 2 1 Cargo bed release lever 1 1 1 UB4M10E0 book ...

Страница 59: ...pression damping force adjuster or the oil reservoir with your bare hand or skin until suspension components have cooled Always adjust the shock absorber as semblies on the left and right side to the same setting Uneven adjustment can cause poor handling and loss of stability which could lead to an accident NOTICE ECB00091 Never turn an adjusting mechanism be yond the minimum and maximum settings ...

Страница 60: ...the lower the spring preload 1 Locknut 2 Spring preload adjusting nut 3 Special wrench 1 1 1 2 2 3 3 b b a a b a Front spring preload setting Minimum soft Distance A 429 7 mm 16 92 in Standard Distance A 419 7 mm 16 52 in Maximum hard Distance A 409 7 mm 16 13 in Rear spring preload setting Minimum soft Distance A 526 3 mm 20 72 in Standard Distance A 511 3 mm 20 13 in Maximum hard Distance A 496 ...

Страница 61: ...sion damping force and thereby harden the compression damp ing turn the compression damping force ad juster in direction a To decrease the compression damping force and thereby soften the compression damping turn the adjuster in direction b 1 Distance A Tightening torque Locknut 41 N m 4 1 kgf m 30 lb ft 1 1 Compression damping force adjuster 3 2 1 1 1 1 b b a a b a UB4M10E0 book Page 30 Friday Ma...

Страница 62: ...gh heat source This may cause the unit to explode due to excessive gas pressure Do not deform or damage the cylinders in any way Cylinder damage will result in poor damping performance Do not dispose of a damaged or worn out shock absorber assembly yourself Take the shock absorber assembly to a Yamaha dealer for any service EBU38930 Winch YXE10WPZM Compression damping force settings Minimum soft 1...

Страница 63: ...rope NOTICE ECBM0051 Prolonged winching can overheat the winch motor and can drain the vehicle s battery even when the engine is idling Al low the winch motor to cool and the bat tery to recharge between uses EBU31552 Trailer hitch bracket and receiver This vehicle is equipped with a trailer hitch bracket and a 2 5 cm receiver for a stan dard trailer hitch Trailer towing equipment can be obtained ...

Страница 64: ...console Accessories with the proper plug such as a radio or smartphone charger can be used To use an auxiliary DC jack 1 Start the engine See page 7 2 2 Turn the headlights off See page 5 13 3 Make sure the accessory is off 4 Open the auxiliary DC jack cap 1 Auxiliary DC jack 1 USB jack YXE10WPZM 1 1 1 1 DC jack maximum capacity 10 0 A 120 W USB jack maximum capacity 2 1 A 10 5 W UB4M10E0 book Pag...

Страница 65: ...discharge Do not use an automotive cigarette light er or other accessories with a plug that gets hot because the jack can be dam aged EBU39460 Auxiliary DC connectors This vehicle is equipped with auxiliary DC connectors Consult your Yamaha dealer be fore installing any accessories EBU39470 Yamaha Adventure Pro powered by Magellan YXE10WPAM This vehicle is equipped with a connector for a GPS and n...

Страница 66: ... the vehicle before operating the touchscreen or buttons Never take your hands off the steering wheel while driving Always concentrate on driving by keeping your eyes and mind on the road UB4M10E0 book Page 35 Friday May 15 2020 3 52 PM ...

Страница 67: ...n accident or equipment damage Do not operate the vehicle if you find any problem If a problem can not be corrected by the procedures provided in this manual have the vehicle inspected by a Yamaha dealer Pre operation checklist ITEM ROUTINE PAGE Brakes Check operation free play fluid level and fluid leakage Fill with DOT 4 brake fluid if necessary 6 3 9 40 9 44 Parking brake Check for proper opera...

Страница 68: ...dhold Check for stability and proper fastening 6 7 8 7 Steering Check for proper operation 6 7 Fittings and fasteners Check all fittings and fasteners 6 7 Instruments lights and switches Check for proper operation 4 3 5 2 6 7 9 56 9 57 Wheels and tires Check tire pressure and for wear and damage 6 7 9 47 9 49 Axle boots Check for damage 9 31 Winch if equipped Confirm winch hook and rope are not da...

Страница 69: ...1 Brake fluid leakage Check to see if any brake fluid is leaking out of the pipe joints or the brake fluid reservoir Apply the brakes firmly for one minute If there is any leakage have the vehicle inspected by a Yamaha dealer Brake operation Check the operation of the brakes at the start of every drive Test the brakes at slow speed after starting out to make sure they are work ing properly If the ...

Страница 70: ...immediately 4 Be sure the fuel tank cap is closed se curely WARNING EWB02532 Gasoline is poisonous and can cause inju ry or death Handle gasoline with care Never siphon gasoline by mouth If you should swallow some gasoline or inhale a lot of gasoline vapor or get some gasoline in your eyes see your doctor immediately If gasoline spills on your skin wash with soap and water If gasoline spills on yo...

Страница 71: ... with the cap tightened before driving the vehicle Always place a portable fuel container on the ground before filling it Before removing the container cap touch the container with the fuel dispenser nozzle Keep fuel dispenser nozzle in contact with container inlet when fill ing WARNING Never refill a fuel container in the bed of any vehicle Fire may result from a build up of static electricity Th...

Страница 72: ... back to the idle position when released Also check the accelerator pedal for excessive free play If the accelerator pedal is not in correct work ing order have the vehicle inspected before starting off EBU31800 Seat belts Make sure that the seat belts are not frayed torn stretched or damaged The seat belts must move smoothly when pulled out and re tract on its own when released The seat belts mus...

Страница 73: ...mal noises or a rough feeling Have a Yamaha dealer repair as necessary for proper operation EBU31832 Fittings and fasteners Always check the tightness of chassis fittings and fasteners before starting off Take the ve hicle to a Yamaha dealer or refer to the Ser vice Manual for correct tightening torque EBU31840 Instruments lights and switches Check that all instruments lights and switch es are wor...

Страница 74: ...tire pressure should be the same on both sides and must be adjust ed according to vehicle loading conditions Set the tire pressure as specified below WARNING Operation of this vehicle with improper tire pressure may cause severe injury or death from loss of control or roll over Tire pressure below the minimum specified could also cause the tire to dis lodge from the rim under severe driving condit...

Страница 75: ...14 0 psi Front Minimum 90 0 kPa 0 900 kgf cm 13 0 psi Rear Minimum 90 0 kPa 0 900 kgf cm 13 0 psi VEHICLE LOAD of 200 0 570 0 kg 441 1256 lb FRONT Recommended 100 0 kPa 1 000 kgf cm 14 0 psi REAR Recommended 220 0 kPa 2 200 kgf cm 32 0 psi Front Minimum 90 0 kPa 0 900 kgf cm 13 0 psi Rear Minimum 210 0 kPa 2 100 kgf cm 30 0 psi Vehicle load is total weight of all occupants accessories cargo and tr...

Страница 76: ...us parts in the engine wear and polish them selves to achieve the correct operating clear ances During this period prolonged full throttle op eration or any condition that might result in excessive engine heating must be avoided However momentary 2 3 seconds maxi mum full throttle operation under load does not harm the engine Each full throttle acceleration sequence should be followed with a subst...

Страница 77: ...be started in any gear if the brake pedal is applied However it is recommended to shift into neutral before starting the engine 5 With your foot off the accelerator pedal start the engine by turning the key to start If the engine fails to start release the key and then try starting it again Wait a few seconds before the next attempt Each attempt should be as short as possible to preserve battery e...

Страница 78: ...ccur Improper gear selection may shorten the life of V belt Shifting neutral to high and high to low 1 Stop the vehicle and take your foot off the accelerator pedal 2 Apply the brake pedal then shift by mov ing the drive select lever along the shift guide Make sure that the drive select le ver is completely shifted into position 3 Release the parking brake if applied 4 Release the brake pedal and ...

Страница 79: ... take your foot off the ac celerator pedal and check behind you 2 Apply the brake pedal 3 Shift from neutral to reverse by moving the drive select lever along the shift guide When in reverse the reverse indicator light should be on and the reverse light portion of each taillight should be on in white If the lights do not come on ask a Yamaha dealer to inspect the electri cal circuits Due to the sy...

Страница 80: ... people or obstacles and then release the brake pedal 6 Press the accelerator pedal gradually and continue to watch to the rear while back ing 1 Drive select lever 2 L Low range 3 H High range 4 N Neutral 5 R Reverse 1 1 2 5 4 3 UB4M10E0 book Page 5 Friday May 15 2020 3 52 PM ...

Страница 81: ... selected drive mode The drive train icon and the differential gear lock indicator light come on as follows Knob position Indication Drive mode 2WD two wheel drive Power is supplied to the rear wheels 4WD four wheel drive Power is supplied to the rear and front wheels DIFF LOCK four wheel drive with the differential gear locked Power is supplied to the rear and front wheels and the differential ge...

Страница 82: ...ck and forth will help the differential gear lock to engage or disengage Driving with the differential gear not properly engaged or disengaged e g when the differential gear lock indicator light and the drive train icon are flashing will cause the vehicle speed to be limited until the differential gear is completely engaged or disengaged To protect the drivetrain from damage maximum vehicle speed ...

Страница 83: ...ailer hitch drawbar designed for use with a 2 5 cm receiver See page 5 32 WARNING EWB04260 Improper loading or towing can increase the risk of loss of control an overturn or other accident Keep weight in the cargo bed centered side to side and as low and as far for ward as possible Top heavy loads in crease the risk of overturn Be sure cargo is secured a loose load could change handling unexpected...

Страница 84: ... you are carrying heavier loads or when towing a trailer WARNING EWB03320 Carrying loads or towing a trailer can in crease the risk of loss of control an over turn or other accident To reduce the risk of an accident Reduce speed operate in low gear only and allow more room to stop A heavier vehicle takes longer to stop Avoid hills and rough terrain Choose terrain carefully Use extreme caution when...

Страница 85: ...r that product and only attach to the hitch or hitch bracket of the Wolverine RMAX2 WARNING Improperly pulling can cause serious injury or death Never exceed the pulling load limit of the Wolverine RMAX2 Avoid pulling on in clines EWB03330 Pulling objects on the ground can be more hazardous than pulling a trailer It may be dif ficult to predict how the load will affect vehicle operation That effec...

Страница 86: ...OW YOUR VEHICLE This off road vehicle will handle and maneu ver differently from cars ATVs go carts golf cars and grounds keeping vehicles The Wolverine RMAX2 has higher ground clear ance and other features to handle rugged terrain and as a result can overturn in situ ations where some vehicles may not This would include vehicles made primarily for pavement roads improved paths or grounds keeping ...

Страница 87: ...ust be able to place both feet flat on the floorboard while seated upright with his her back against the backrest Do not drive after using drugs or alcohol Remove the ignition key when the vehicle is not in use to prevent unauthorized use of the machine Parents Many states have implemented new motor vehicle licensing requirements for young driv ers These requirements are in response to the disprop...

Страница 88: ... carry any other passengers Do not car ry passengers in the cargo bed Do not allow someone to ride as a passen ger who has been using drugs or alcohol Do not allow children who need child safety seats or booster seats in the Wolverine RMAX2 The seat belt is not designed to re strain automotive child safety seats Occupant protection system WARNING EWB03350 Do not make changes to the occupant pro te...

Страница 89: ...not protect occupants in all rollovers or accidents Body parts outside of vehicle can be struck by passing objects or crushed during vehicle rollover Do not put your hands or feet outside of the vehicle for any reason Do not hold onto the door cage frame or shoulder bolster Wear your seat belt and helmet If you think or feel that the vehicle may tip or roll do not put your hands or feet outside th...

Страница 90: ... operation You may also fall completely out or be partial ly ejected from the vehicle which may lead to being crushed between the ground and the vehicle Wearing the seat belt helps you re main in the vehicle the doors and passenger handhold are not a substitute for using a seat belt A crash can damage the restraint systems in your vehicle A damaged restraint system may not properly protect the per...

Страница 91: ...h plate into the buckle until it clicks Pull up on the latch plate to make sure it is secure 4 Put the lap portion of the belt low on your hips Pull up on the shoulder part so the belt is snug across your hips Be sure the seat belt is not caught on the shoulder bolster or other object 5 Position the shoulder belt over your shoulder and across your chest The shoulder belt should fit against your ch...

Страница 92: ...g out to stop the vehicle from tipping over or for any other reason in a rollover The doors may also re duce intrusion of objects into the occupant area Make sure the door is securely latched before operation Do not place your arm or hand on the door during operation Your hand or arm may be struck by objects or crushed against outside objects or the ground during a rollover Passenger handhold The ...

Страница 93: ...ust the handhold position push the le ver and slide the handhold to the desired po sition Make sure that the handhold is properly secured before starting off Seat and shoulder bolsters The seats and shoulder bolsters are designed to help keep you in the vehicle Do not put your hand or arm on or outside of the shoul der bolster during operation Your hand or arm may be struck by objects or crushed a...

Страница 94: ...r palms on the out side of the steering wheel Similar to other off road vehicles if the Wolverine RMAX2 hits a deep rut or large obstacle the steering wheel could briefly jerk in one direction or back and forth as the tires and vehicle respond to the obstacle This quick motion could injure your thumbs or wrist if your thumbs or hand s are inside the steering wheel Grip the steering wheel so that y...

Страница 95: ...ol lowing to reduce risk of injury in an accident Approved motorcycle helmet that fits prop erly CORRECT GRIP EXAMPLE INCORRECT GRIP EXAMPLE 1 Approved motorcycle helmet 2 Eye protection 3 Long sleeved shirt or jacket 4 Gloves 5 Long pants 6 Over the ankle boots 1 2 3 4 5 6 UB4M10E0 book Page 10 Friday May 15 2020 3 52 PM ...

Страница 96: ...on such as a face shield or goggles may reduce the risk of foreign material getting in your eyes and help prevent loss of vision Practice for new Yamaha Wolverine RMAX2 users You should become familiar with the perfor mance characteristics of the vehicle in a large flat area that is free of obstacles and other vehicles Practice controlling the accel erator pedal brakes steering and drive se lect l...

Страница 97: ...art the engine Turning Use care in turns turning the steering wheel too far or too fast can result in loss of control or a rollover Slow down before entering turns When making tight turns from a stand still or at slow speeds avoid sudden or hard acceleration Driving aggressively or making abrupt maneuvers even on flat open areas can cause side rollovers Avoid sideways slid ing skidding or fishtail...

Страница 98: ...amage to the engine or drive train may occur Then release the parking brake ECB02160 Press the accelerator pedal slowly and smoothly The centrifugal clutch will engage and the vehicle will begin to accelerate Avoid higher speeds and sudden or hard ac celeration until you are thoroughly familiar with the operation of your vehicle Avoid sud den or hard acceleration in any turn Braking When slowing d...

Страница 99: ...ed vehicle movement can cause seri ous injury or death and it may be dangerous to try to stop the vehicle Parking on a flat area When parking on a flat area stop the engine and shift the drive select lever into the neutral position Apply the parking brake to help pre vent the vehicle from rolling Parking on a slope The parking brake acts only on the rear wheels when in 2WD For the parking brake to...

Страница 100: ...ps or holes without enough time to react To avoid loss of control or rollover always be alert to changing surfaces or terrain when operating the vehicle Your Yamaha Wolverine RMAX2 has higher ground clearance and other features to han dle rugged terrain and as a result can over turn in situations where some vehicles may not Abrupt maneuvers or aggressive driving can cause loss of control including...

Страница 101: ...h increases your risk of roll over Practice first on gentle slopes before at tempting steeper hills Always check the terrain carefully before attempting any hill To climb a hill you need traction momentum and steady throttle For more traction and control for climbing steeper and or rougher slopes shift into low gear and select 4WD or DIFF LOCK Travel fast enough to main tain momentum but not so fa...

Страница 102: ... of the brakes which could cause the vehicle to slide If you are sliding or skidding try to steer in the direction the vehicle is sliding to regain con trol For example if you feel the back of the vehicle start to slide to your right steer to the right If you must turn on the hill to avoid an obsta cle do so slowly and carefully If the vehicle starts to tip immediately steer in the downhill direct...

Страница 103: ...ng or other injuries use care when crossing through water Wet brakes may have reduced effectiveness After leaving the water test the brakes If nec essary apply the brakes several times to let friction dry them out Water in the CVT case may cause the V belt to slip resulting in loss of drivetrain power Be sure to drain any trapped water NOTICE ECB02170 After driving your vehicle in water be sure to...

Страница 104: ...operation and remain hot after the engine has stopped To reduce the risk of fire during operation or after leaving the vehicle do not let brush grass and other materials collect under the vehicle near the muffler or exhaust pipe or next to other hot parts Check under the vehicle after operating in areas where combustible materials may have collected Do not idle or park the vehicle in long dry gras...

Страница 105: ...estion about your ability to maneuver safely over the obstacle you should turn around if the ground is flat and you have the room or back up until you find a less difficult path UB4M10E0 book Page 20 Friday May 15 2020 3 52 PM ...

Страница 106: ... while using the ve hicle If you are not familiar with vehicle service have a Yamaha dealer perform the service WARNING EWB02563 Turn off the engine when performing main tenance unless otherwise specified A running engine has moving parts that can catch on body parts or clothing and electrical parts that can cause shocks or fires Running the engine while servicing can lead to eye injury burns fire...

Страница 107: ... included in this manual is intended to provide you the owner with the necessary information for completing your own preventive maintenance and minor repairs The tools provided in the tool kit are sufficient for this purpose and should be kept on the vehicle in case of emergency repairs Other tools and equipment are required for certain service items If you do not have a torque wrench available du...

Страница 108: ...9 3 9 eration requiring one take your vehicle to a Yamaha dealer to check the torque settings and adjust them as necessary UB4M10E0 book Page 3 Friday May 15 2020 3 52 PM ...

Страница 109: ...trol system NO ITEM ROUTINE INITIAL EVERY Whichev er comes first month 1 3 6 6 12 km mi 240 150 1300 800 2500 1600 2500 1600 5000 3200 hours 20 80 160 160 320 1 Fuel line Check fuel hose for cracks or damage Replace if necessary 2 Valves Check valve clearance and adjust if neces sary Every 5000 km 3200 mi 3 Spark plugs Check condition Adjust gap and clean Replace if necessary 4 Breather system Che...

Страница 110: ...trol system for damage Replace if necessary 8 Air induction sys tem Check the air cut off valve reed valve and hose for damage Check condition and clean or replace if nec essary 9 Spark arrester Clean NO ITEM ROUTINE INITIAL EVERY Whichev er comes first month 1 3 6 6 12 km mi 240 150 1300 800 2500 1600 2500 1600 5000 3200 hours 20 80 160 160 320 UB4M10E0 book Page 5 Friday May 15 2020 3 52 PM ...

Страница 111: ...ant Every 2 years 2 Primary air filter foam Clean Replace if necessary Every 300 600 km 200 400 mi more often in wet or dusty condi tions Secondary air fil ter paper Replace Every 2000 5000 km 1200 3000 mi more often in wet or dusty condi tions 3 Engine oil Change warm engine before draining 4 Engine oil filter cartridge Replace 5 Transmission oil Check oil level and for leakage Change 6 Final gea...

Страница 112: ...rake pad wear Correct if necessary Replace pads if worn to the limit 11 Brake fluid Change Every 2 years 12 Accelerator pedal Check operation and free play 13 V belt Check operation Check for wear cracks or damage 14 Primary sheave spacer Clean and lubricate with polyurea grease Check for wear cracks or damage and re place if necessary NO ITEM ROUTINE INITIAL EVERY Whichev er comes first month 1 3...

Страница 113: ...Adjust if necessary 19 Stabilizer bushes Check for cracks or other damage and re place if necessary 20 Rear knuckle up per and lower piv ots Lubricate with lithium soap based grease 21 Engine mounts Check for cracks or damage Check bolt tightness 22 Front and rear axle boots Check for cracks or other damage and re place if necessary NO ITEM ROUTINE INITIAL EVERY Whichev er comes first month 1 3 6 ...

Страница 114: ...ter cylinder and calipers and change the brake fluid Replace the brake hoses every four years and if cracked or damaged Transmission service Have the V belt inspected regularly Replace when worn or sooner if damaged 23 Fittings and fas teners Check all chassis fittings and fasteners Correct if necessary NO ITEM ROUTINE INITIAL EVERY Whichev er comes first month 1 3 6 6 12 km mi 240 150 1300 800 25...

Страница 115: ...340 Hood To remove 1 Pull the tab on each hood lock up and then turn the hood locks 1 4 turn clock wise 2 Remove the hood 1 Tab 1 1 1 1 Tab 2 Hood lock 1 Hood 1 2 1 UB4M10E0 book Page 10 Friday May 15 2020 3 52 PM ...

Страница 116: ...nd oil filter Check the engine oil level regularly In addi tion the oil must be changed and the filter re placed at the intervals specified in the periodic maintenance chart NOTICE ECB03020 Do not use oils with a diesel specifica tion of CD or oils of a higher quality than specified In addition do not use oils labeled ENERGY CONSERVING II or higher Make sure that no foreign material en ters the oi...

Страница 117: ...wipe the dipstick with a clean rag 5 Insert the dipstick back into the oil tank without screwing it in and then remove it again to check the oil level TIP The engine oil level should be between the tip of the dipstick and the maximum level mark 6 If the oil level is not between the tip of the dipstick and the maximum level mark add sufficient oil of the recommended type to raise it to the correct ...

Страница 118: ...the used engine oil 5 Remove the engine oil tank filler cap and the cylinder head cap 6 Remove the engine oil tank drain bolt and its gasket to drain the engine oil from the oil tank Use a trough or a similar object as shown to prevent oil from spilling on the frame 1 Cylinder head cap 2 Engine oil tank filler cap 2 2 2 1 1 1 Engine oil tank drain bolt 2 Gasket 2 1 UB4M10E0 book Page 13 Friday May...

Страница 119: ...d their gaskets to drain the oil from the en gine 9 Place an oil pan under the oil cooler drain to collect the used engine oil 10 Remove the oil cooler drain bolts and their gaskets to drain the oil from the oil cooler 1 Trough 1 1 Engine oil drain bolt 2 Gasket 2 1 UB4M10E0 book Page 14 Friday May 15 2020 3 52 PM ...

Страница 120: ...d engine oil to the oil tank 14 Check the O rings for damage and re place them if necessary 15 Install and tighten the engine oil tank filler cap and the cylinder head cap 16 Start the engine warm it up for several minutes 1 Oil cooler drain bolt 2 Gasket Tightening torques Engine oil drain bolt 20 N m 2 0 kgf m 15 lb ft Engine oil tank drain bolt 9 N m 0 9 kgf m 6 6 lb ft Oil cooler drain bolt 10...

Страница 121: ...gine and then let it idle for several minutes while checking it for oil leakage If oil is leaking immediately turn the engine off and check for the cause 21 Turn the engine off and then check the oil level and correct it if necessary 22 Lower the cargo bed To change the engine oil and oil filter 1 Park the vehicle on a level surface 2 Lift the cargo bed up 3 Remove the right rear panel by removing...

Страница 122: ...e 5 Remove the oil filter cartridge with an oil filter wrench Make sure that the O ring is removed together with the oil filter car tridge If the O ring remains attached to the crankcase oil leakage may occur TIP An oil filter wrench is available from a Yamaha dealer 1 Bolt A 2 Bolt C 1 Bolt A 2 2 1 2 2 2 1 1 1 1 UB4M10E0 book Page 17 Friday May 15 2020 3 52 PM ...

Страница 123: ...is properly seated 7 Install the new oil filter cartridge with an oil filter wrench and then tighten it to the specified torque with a torque wrench 1 Oil filter wrench 2 Oil filter cartridge 1 1 2 1 2 1 O ring Tightening torque Oil filter cartridge 17 N m 1 7 kgf m 13 lb ft 1 UB4M10E0 book Page 18 Friday May 15 2020 3 52 PM ...

Страница 124: ... to steps 11 21 of the To change the engine oil section for the oil filling procedure 9 Install the right rear panel by installing the bolts and quick fastener screws and then tighten the bolts to the specified torque 1 Torque wrench 1 1 Right rear panel 2 Bolt A 3 Bolt B 4 Quick fastener screw 2 2 1 3 4 3 2 1 3 4 3 UB4M10E0 book Page 19 Friday May 15 2020 3 52 PM ...

Страница 125: ...ing and have them develop the engine together with the oil it will use Yamalube oils take full advantage of the base oil s qualities and blend in the ideal bal ance of additives to make sure the final oil clears our performance standards Thus Yamalube mineral semisynthetic and syn 1 Bolt A 2 Bolt C 1 Bolt A 2 2 1 2 2 2 1 1 1 1 Tightening torques Bolt A 7 N m 0 7 kgf m 5 2 lb ft Bolt B 7 N m 0 7 kg...

Страница 126: ...the periodic mainte nance chart NOTICE ECB02910 When checking or changing the transmis sion oil make sure that no foreign material enters the transmission If necessary clean the filler cap and surrounding area To check the transmission oil level 1 Park the vehicle on a level surface 2 Remove the passenger seat cushion 3 Pull the tab to lift up the rubber cover Recommended oil YAMALUBE SAE 80W 90 A...

Страница 127: ...an 5 With the arrow mark pointing outward fully insert the dipstick into the oil filler hole and then remove it again 1 Rubber cover 1 1 1 1 Transmission oil dipstick 2 Maximum level mark 3 Minimum level mark 2 1 3 UB4M10E0 book Page 22 Friday May 15 2020 3 52 PM ...

Страница 128: ...k but do not overfill 7 Install the dipstick 8 Install the rubber cover 9 Install the passenger seat cushion To change the transmission oil 1 Place an oil pan under the transmission case to collect the used oil 2 Remove the transmission oil dipstick 3 Remove the transmission oil drain bolt and gasket 1 Arrow mark 1 1 Transmission oil drain bolt 2 Gasket 2 1 UB4M10E0 book Page 23 Friday May 15 2020...

Страница 129: ...nstall the dipstick 8 Start the engine and let it idle while checking for oil leakage 9 Stop the engine and check the oil level one last time 10 Install the rubber cover and passenger seat cushion EBU39520 Continuously Variable Transmission CVT The V belt must be inspected at the intervals specified in the periodic maintenance chart This requires special skills and knowledge so Tightening torque T...

Страница 130: ...evel and change the final gear oil at the intervals specified in the periodic maintenance chart NOTICE ECB03590 When checking or changing the final gear oil make sure that no foreign material en ters the final gear case If necessary clean the final gear oil filler bolt and surrounding area Checking the final gear oil level 1 Park the vehicle on a level surface 2 Remove the final gear oil filler bo...

Страница 131: ...ue Changing the final gear oil 1 Park the vehicle on a level surface 2 Place an oil pan under the final gear case to collect the used oil 3 Remove the final gear oil filler bolt the fi nal gear oil drain bolt and their gasket to drain the oil 1 Final gear oil filler bolt 2 Gasket 3 Final gear oil 4 Correct oil level 1 2 3 4 Tightening torque Final gear oil filler bolt 23 N m 2 3 kgf m 17 lb ft 1 F...

Страница 132: ...e the differential gear oil at the intervals specified in the period ic maintenance chart NOTICE ECB03600 When checking or changing the differen tial gear oil make sure that no foreign ma terial enters the differential gear case If necessary clean the differential gear oil filler bolt and surrounding area Checking the differential gear oil level 1 Park the vehicle on a level surface Tightening tor...

Страница 133: ...and its gasket and then tighten the bolt to the specified torque Changing the differential gear oil 1 Park the vehicle on a level surface 2 Place an oil pan under the differential gear case to collect the used oil 3 Remove the differential gear oil filler bolt the differential gear oil drain bolt and their gasket to drain the oil 1 Differential gear oil filler bolt 2 Gasket 3 Differential gear oil...

Страница 134: ...nd check for the cause EBU39530 Coolant The coolant level should be checked regular ly In addition the coolant must be changed at the intervals specified in the periodic main tenance chart 1 Differential gear oil drain bolt 2 Gasket Tightening torque Differential gear oil drain bolt 20 N m 2 0 kgf m 15 lb ft 1 2 Tightening torque Differential gear oil filler bolt 23 N m 2 3 kgf m 17 lb ft Recommen...

Страница 135: ... use hard water or salt water since they are harmful to the engine To check the coolant level 1 Park the vehicle on a level surface 2 Wait for the engine to cool for an accurate reading 3 Look at the coolant level in the coolant reservoir 4 If the coolant is at or below the minimum level mark remove the hood to access the coolant reservoir cap See page 9 10 5 Remove the coolant reservoir cap and a...

Страница 136: ...t Have a Yamaha dealer change the coolant WARNING Never attempt to remove the radiator cap when the engine is hot EWB04250 EBU32400 Axle boots Check the axle boots for holes or tears If any damage is found have them replaced by a Yamaha dealer 1 Coolant reservoir cap 1 1 1 1 Front axle boot 1 Rear axle boot 1 1 1 1 UB4M10E0 book Page 31 Friday May 15 2020 3 52 PM ...

Страница 137: ...hould be a me dium to light tan color the ideal color when the vehicle is ridden normally and all spark plugs installed in the engine should have a similar color If any spark plug shows a dis tinctly different color the engine could be op erating improperly Do not attempt to diagnose such problems yourself Instead have a Yamaha dealer check the vehicle If a spark plug shows signs of electrode ero ...

Страница 138: ... coupler may be damaged The spark plug cap may be difficult to remove be cause the rubber seal on the end of the cap fits tightly To remove the spark plug cap simply twist it back and forth while pulling it out to install it twist it back and forth while pushing it in EBU37531 Air filter maintenance This model is equipped with two air filter ele ments a primary foam type air filter and a secondary...

Страница 139: ...nd from the throttle body for proper fit and sealing tighten all fittings securely to avoid the pos sibility of unfiltered air entering the engine NOTICE ECB02270 Never operate the engine with the air filter element removed Doing so would allow unfiltered air to enter causing rapid en gine wear and possible engine damage Additionally the fuel injection system would be affected resulting in poor en...

Страница 140: ... Using gasoline or other flammable solvents to clean the air fil ter element can cause a fire or explo sion which could lead to serious injury EWB03360 6 Squeeze out the excess solvent NOTICE Do not twist the foam materi al when squeezing it ECB02970 1 Foam air filter 1 1 1 1 Air filter element lock plate 2 Foam air filter element 3 Air filter frame 1 2 3 UB4M10E0 book Page 35 Friday May 15 2020 3...

Страница 141: ... other quality foam air filter oil Do not use a spray type product The foam air filter element should be wet but not dripping 11 Pull the foam air filter element over its frame and then install the lock plate 12 Insert the primary air filter into the air filter case and then install the air filter case cover by hooking the holders onto the air filter case 13 Install the hood To replace the seconda...

Страница 142: ...hose at the bottom of the air filter case and at the bottom of the air intake duct If dust or water collects in a check hose the air filter elements may be soiled Clean the check hose and air filter case and check the air filter elements 1 Secondary air filter 2 Screw 1 1 1 2 2 2 2 1 Air filter case check hose 1 1 1 UB4M10E0 book Page 37 Friday May 15 2020 3 52 PM ...

Страница 143: ... have a Yamaha dealer inspect the vehicle as the water may affect other engine parts EBU37511 Cleaning the spark arrester WARNING EWB03370 Hot exhaust system may cause burns To avoid burns or fires make sure that the en gine is stopped and the exhaust system is cool before cleaning the spark arrester Do not start the engine while cleaning the ex haust system 1 Remove the tailpipe bolts 1 Air intak...

Страница 144: ...s its from the spark arrester portion of the tailpipe and inside of the tailpipe housing 4 Install the gasket and then insert the tail pipe into the muffler and align the bolt holes TIP Make sure that the tailpipe is positioned at a 48 angle as shown 1 Tailpipe bolt 1 1 1 1 1 1 Tailpipe 2 Spark arrester 3 Gasket 1 2 3 UB4M10E0 book Page 39 Friday May 15 2020 3 52 PM ...

Страница 145: ...s requires professional knowledge Brake service should be performed by a Yamaha dealer WARNING EWB02572 Operating with improperly serviced or ad justed brakes could lead to a loss in brak ing ability and an accident EBU35150 Checking the front and rear brake pads Check each brake pad for damage and mea sure the lining thickness If a brake pad is damaged or if the lining thickness is less than 1 0 ...

Страница 146: ...m as a set EBU32501 Checking the brake fluid level Before starting off check that the brake fluid is above the minimum level mark Check the brake fluid level with the top of the reservoir level Replenish the brake fluid if necessary WARNING EWB02721 Improper maintenance can result in loss of braking ability Observe these precau tions 1 Lining thickness 1 1 Minimum level mark Specified brake fluid ...

Страница 147: ...1 Brake fluid may damage painted surfaces or plastic parts Always clean up spilled fluid immediately As the brake pads wear it is normal for the brake fluid level to gradually go down A low brake fluid level may indicate worn brake pads and or brake system leakage therefore be sure to check the brake pads for wear and the brake system for leakage If the brake fluid level goes down suddenly have a ...

Страница 148: ...es feel soft or spongy this could in dicate air in the brake system Have a Yamaha dealer check the brake system if necessary EBU35821 Checking the accelerator pedal The accelerator pedal should operate smoothly and spring back to position when released If the pedal free play is out of spec ification have a Yamaha dealer adjust or re place the throttle wire 1 Brake pedal 2 No brake pedal free play ...

Страница 149: ...the parking brake lever If the parking brake lever free play is out of specification have a Yamaha dealer ad just it EBU37480 Brake light switch adjustment The brake light switch which is activated by the brake pedal is properly adjusted when the brake light comes on just before braking takes effect 1 Accelerator pedal 2 Accelerator pedal free play 1 1 1 2 2 1 Parking brake lever free play 1 1 1 U...

Страница 150: ... brake light come on later EBU32561 Cable inspection and lubrication WARNING EWB03380 Damaged cables could restrict operation which may cause an accident or injury In spect control cables frequently and re place damaged cables Corrosion can result when the outer covering of control cables becomes damaged Cables can also become frayed or kinked Lubricate the cable ends If the cables do not operate ...

Страница 151: ... stabilizer bushes must be checked for cracks or damage at the intervals specified in the periodic maintenance chart Have a Yamaha dealer replace the stabilizer bushes if necessary EBU32590 Rear knuckle upper and lower pivot lu brication left and right Lubricate the knuckle upper and lower pivots with a grease gun Recommended lubricant Lithium soap based grease UB4M10E0 book Page 46 Friday May 15 ...

Страница 152: ...oval 1 Loosen the wheel nuts 2 Elevate the vehicle and place a suitable stand under the frame 3 Remove the nuts from the wheel 4 Remove the wheel Recommended lubricant Lithium soap based grease Recommended lubricant Lithium soap based grease UB4M10E0 book Page 47 Friday May 15 2020 3 52 PM ...

Страница 153: ...all four tires at the same time If that is not possible you must re place the tires in pairs front or rear with tires of the same size and type as the originals Never replace just one tire WARNING EWB03390 Installing improper tires on your Yamaha Wolverine RMAX2 can affect handling and stability This can cause a loss of control The tires listed below have been approved by Yamaha Motor Manufacturin...

Страница 154: ...ead acid battery There is no need to check the electrolyte or to add dis tilled water However the battery lead con nections need to be checked and tightened and the battery terminals cleaned if corroded If the battery seems to have discharged re charge it as soon as possible Front tire Size 30x10 00R14 NHS Manufacturer model GBC DIRT COMMANDER 2 0 YXE10WPAM MAXXIS ML1 CANIVORE YXE10WPZM Rear tire ...

Страница 155: ... of water or milk Follow with milk of magnesia beaten egg or vegetable oil Get prompt medical attention EYES Flush with water for 15 minutes and get prompt medical attention WARNING EWB03420 Batteries may produce explosive gases Ventilate when charging or using in a closed space Keep batteries away from sparks flames cigarettes or other sourc es of ignition To remove the battery 1 Turn the key to ...

Страница 156: ...er s instructions or have a Yamaha dealer charge it for you Keep in mind that the battery tends to dis charge more quickly if the vehicle is equipped with optional electrical accesso ries NOTICE ECB00933 To charge a VRLA valve regulated lead acid battery a special battery charger is required Using a conventional battery charger will damage the battery To store the battery If the vehicle will not b...

Страница 157: ...IP Be sure the battery is fully charged 1 Place the battery in its compartment 2 Connect the positive battery lead first then the negative battery lead by install ing their bolt NOTICE When installing the battery the main switch must be off and the positive lead must be con nected before the negative lead ECB01111 3 Install the battery holding plate by install ing the bolts 4 Install the hood TIP ...

Страница 158: ... not reverse the polarity of the jumper cables when connecting to the batteries 1 Turn the key to off 2 Remove the hood See page 9 10 3 Using a charged 12 volt battery connect the positive lead of the jumper cable to the positive terminal of the battery in the vehicle and the other end of the positive lead to the positive terminal of the charged battery 4 Connect the negative lead of the jumper ca...

Страница 159: ...then disconnect the positive lead of the jump er cable from the charged battery and the battery in the vehicle 7 Install the hood EBU32664 Fuse replacement The fuses are located under the hood If an electrical problem is suspected check the fuses and replace if necessary 1 Jumper cable negative lead 1 1 1 UB4M10E0 book Page 54 Friday May 15 2020 3 52 PM ...

Страница 160: ...oper fuse Using an improper fuse can cause damage to the electrical system and may lead to a fire EWB03440 1 Main fuse 2 EPS fuse 3 Fuel injection system spare fuse 4 Fuel injection system fuse 5 Spare fuse 6 Accessory fuse ACC 7 Electronic throttle valve fuse ETV 8 Auxiliary DC jack fuse TERMINAL 9 Radiator fan motor fuse FAN 10 Ignition fuse IGNITION 11 Backup fuse BACK UP for clock 12 Four whee...

Страница 161: ...loose connection check the headlight fuse and then have a Yamaha dealer check the ve hicle TIP When the headlights are set to low beam the outer two headlights come on When the headlights are set to high beam all four headlights come on Specified fuses Main fuse 50 0 A Fuel injection system fuse 10 0 A Headlight fuse 7 5 A Ignition fuse 15 0 A Auxiliary DC jack fuse 10 0 A Signaling system fuse 7 ...

Страница 162: ...hood See page 9 10 2 Remove the headlight cover by removing the quick fastener screws 3 To raise the beam turn the headlight beam adjusting bolt in direction a To lower the beam turn the headlight beam adjusting bolt in direction b 1 Quick fastener screw 1 1 1 1 Headlight cover 2 Quick fastener screw 1 2 2 2 2 2 UB4M10E0 book Page 57 Friday May 15 2020 3 52 PM ...

Страница 163: ... LED brake tail light there are no replaceable bulbs If a light does not come on check for a loose connection check the fuses and then have a Yamaha dealer check the vehicle TIP When the transmission is shifted into reverse a white reverse light should come on EBU36961 Interior lights YXE10WPZM This model is equipped with LED interior lights There are no user replaceable bulbs If one or more inter...

Страница 164: ...t a Yamaha dealer ship have the tools experience and know how to properly service your vehicle Use only genuine Yamaha parts on your vehicle Imita tion parts may look like Yamaha parts but they are often inferior Consequently they have a shorter service life and can lead to ex pensive repair bills WARNING EWB03450 When checking the fuel system do not smoke and make sure there are no open flames or...

Страница 165: ...Yamaha dealer check the vehicle Remove the spark plugs and check the electrodes 3 Ignition Wipe off with a dry cloth and correct the spark plug gaps or replace the spark plugs Have a Yamaha dealer check the vehicle The engine does not start Check the compression Operate the electric starter 2 Battery The engine turns over quickly The engine turns over slowly The battery is good Dry Wet Operate the...

Страница 166: ...ecommended coolant as soon as possible The engine will tend to overheat if the radiator is caked with mud or if air was not properly bled from the cooling system Wait until the engine has cooled Check the coolant level in the coolant reservoir and or radiator Level is OK Level is low check the cooling system for leakage No leakage Leakage Ask a Yamaha dealer to inspect and repair the cooling syste...

Страница 167: ...rakes several times at slow speeds to let friction dry the brakes Wet brakes may have reduced stopping ability in creasing the chance of an accident EWB03471 NOTICE Excessive water pres sure may cause water seepage and deterioration of wheel bearings brakes transmission seals and electri cal devices Many expensive repair bills have resulted from improper high pressure detergent applications such a...

Страница 168: ...ler or equivalent product Follow the instruc tions on the product label Operate the vehicle for at least 5 minutes to distribute treated fuel through the fuel system 2 Remove the spark plugs and pour one ta blespoon of fresh engine oil into each cyl inder and then re install the spark plugs Remove the spark plug wires and ground them Operate the electric starter to turn the engine over several tim...

Страница 169: ...e the battery in an ex cessively warm or cold place more than 30 C 90 F or less than 0 C 32 F Use of Fuel Med Rx or another high quality fuel stabilizer eliminates the need to drain the fuel system Consult a Yamaha dealer if the fuel system needs to be drained UB4M10E0 book Page 3 Friday May 15 2020 3 52 PM ...

Страница 170: ... cm 17 in Weight Curb weight 837 0 kg 1845 lb YXE10WPAM 851 0 kg 1876 lb YXE10WPZM Engine Combustion cycle 4 stroke Cooling system Liquid cooled Valve train DOHC Cylinder arrangement Inline Number of cylinders 2 cylinder Displacement 999 cm Bore stroke 93 0 73 5 mm 3 66 2 89 in Compression ratio 11 2 1 Starting system Electric starter Lubrication system Dry sump Engine oil Recommended brand SAE vi...

Страница 171: ... US qt 0 27 Imp qt Coolant quantity Coolant reservoir up to the maximum level mark 0 45 L 0 48 US qt 0 40 Imp qt Radiator including all routes 4 35 L 4 60 US qt 3 83 Imp qt Air filter Air filter element Wet element Air filter oil grade Foam air filter oil Secondary air filter element Oil coated paper element Fuel Recommended fuel Premium unleaded gasoline Gasohol E10 acceptable Minimum research oc...

Страница 172: ... model GBC DIRT COMMANDER 2 0 YXE10WPAM MAXXIS ML1 CANIVORE YXE10WPZM Rear tire Size 30x10 00R14 NHS Manufacturer model GBC DIRT COMMANDER 2 0 YXE10WPAM MAXXIS ML1 CANIVORE YXE10WPZM Loading Maximum load 570 0 kg 1256 lb Total weight of all occupants cargo accessories and tongue Tire air pressure measured on cold tires Vehicle load 0 0 200 0 kg 0 441 lb Recommended Front 100 0 kPa 1 000 kgf cm 14 ...

Страница 173: ...uspension Type Double wishbone Spring Coil spring Shock absorber Gas hydraulic damper Wheel travel 361 mm 14 3 in Rear suspension Type Double wishbone Spring Coil spring Shock absorber Gas hydraulic damper Wheel travel 429 mm 16 9 in Electrical system System voltage 12 V Ignition system TCI Charging system AC magneto Battery Model U1 H11L Voltage capacity 12 V 28 0 Ah Lights Headlight LED Brake ta...

Страница 174: ...ntial gear lock indicator light LED EPS warning light LED Helmet reminder light LED Seat belt reminder light LED Battery voltage warning light LED Fuses Main fuse 50 0 A Fuel injection system fuse 10 0 A EPS fuse 40 0 A Headlight fuse 7 5 A Signaling system fuse 7 5 A Ignition fuse 15 0 A Auxiliary DC jack fuse 10 0 A Backup fuse 7 5 A Four wheel drive motor fuse 7 5 A Radiator fan motor fuse 30 0...

Страница 175: ...h applicable ARB evaporative emission control standards A violation of this require ment is punishable by civil and or criminal punishment EBU39280 Vehicle data recording This model s control unit s store certain vehi cle data to assist in the diagnosis of malfunc tions and for research statistical analysis and development purposes Although the sensors and recorded data will vary by model the main...

Страница 176: ...se this data to a third party except in the following cases In addi tion Yamaha may provide vehicle data to a contractor in order to outsource services re lated to the handling of vehicle data Even in this case Yamaha will require the contractor to properly handle the vehicle data we provid ed and Yamaha will appropriately manage the data With the consent of the vehicle owner Where obligated by la...

Страница 177: ...urpose of noise control prior to its sale or delivery to the ultimate purchaser or while it is in use or 2 the use of the vehicle after such device or element of design has been removed or rendered inoperative by any person AMONG THOSE ACTS PRESUMED TO CONSTITUTE TAMPERING ARE THE ACTS LISTED BELOW These acts include tampering with the following systems i e modification removal etc Exhaust system ...

Страница 178: ...t the maintenance work is required It is not acceptable proof of maintenance work MAINTENANCE INTERVAL DATE OF SERVICE MILEAGE SERVICING DEALER NAME AND ADDRESS REMARKS month km mi hours 1 240 150 20 3 1300 800 80 6 2500 1600 160 12 5000 3200 320 18 7500 4800 480 24 10000 6400 640 30 12500 8000 800 36 15000 9600 960 42 17500 11200 1120 48 20000 12800 1280 54 22500 14400 1440 60 25000 16000 1600 UB...

Страница 179: ...r inspection and repairs at such dealer s place of business 2 EMISSION CONTROL SYSTEM WARRANTY Yamaha Motor Corporation U S A also warrants to the ultimate purchaser and each subsequent purchaser of each Yamaha Side by Side vehicle covered by this warranty that the vehicle is designed built and equipped so as to conform at the time of sale with all U S emissions standards applicable at the time of...

Страница 180: ...t any later date 3 Each Yamaha Side x Side dealer is held responsible for his setup service and war ranty repair work Q Is the warranty transferable to second owners A Yes The remainder of the existing warranty can be transferred upon request The unit has to be inspected and re registered by an authorized Yamaha Side x Side dealer for the policy to remain effective CUSTOMER SERVICE If your machine...

Страница 181: ...to pay and repairs aren t pro rated You don t have any out of pocket expenses for covered repairs In addition Travel and Recreation Interruption Protection TRIP is included at no extra cost TRIP gives you up to 250 reimbursement per occurrence for any reasonable expenses you incur because your Yamaha needs covered service replacement vehicle rental emergency towing phone calls even food and lodgin...

Страница 182: ...a Limited Warranty expires You can also save money Y E S costs less within the first 90 days after you buy your Yamaha See your dealer today A special note If visiting your dealer isn t convenient contact Yamaha with your Vehicle Identification Number We ll be happy to help you get the Y E S coverage you need Yamaha Service Marketing P O Box 6555 Cypress CA 90630 UB4M10E0 book Page 8 Friday May 15...

Страница 183: ...re operation check 6 6 Coolant temperature warning light 5 4 Cup holders 5 25 D Data recording vehicle 12 1 Differential gear lock indicator light 5 3 Differential gear oil Periodic maintenance 9 27 Differential gear Pre operation check 6 6 D mode knob YXE10WPZM 5 15 Doors 5 19 Driver seat position 5 21 Drive select lever 5 18 Drive select lever operation and reverse driving 7 3 Drivetrain icon 5 ...

Страница 184: ...1 1 Multi function meter unit 5 6 N Neutral indicator light 5 2 Noise regulation 12 3 O On Command drive knob operation 7 6 Owner s Manuals and Tool kit 9 2 P Parking 7 8 Parking brake indicator light 5 2 Parking brake lever 5 17 Parking brake lever free play adjusting 9 44 Parking brake pads checking 9 41 Passenger handhold Pre operation check 6 7 Passenger seat cushion 5 20 Pedal lubrication 9 4...

Страница 185: ...tion check 6 6 Troubleshooting 9 59 Troubleshooting charts 9 60 V Valve clearance 9 40 V belt case drain plug 9 38 Vehicle Emission Control Information label 12 1 Vehicle identification number 1 1 W Warranty extended 12 7 Warranty limited 12 5 Wheel installation 9 49 Wheel removal 9 47 Winch switch YXE10WPZM 5 14 Winch YXE10WPZM 5 31 Y Yamaha Adventure Pro powered by Magellan 5 34 Yamalube 9 20 UB...

Страница 186: ...UB4M10E0 book Page 4 Friday May 15 2020 3 52 PM ...

Страница 187: ...rm right right out of the box Yamalube Take care of your Yamaha with legendary Yamalube oils lubricants and care products They re formulated and approved by the toughest judges we know the Yamaha engineering teams that know your Yamaha from the inside out Genuine Yamaha Service Manuals Get the same factory manual for your vehicle that the technicians at your authorized Yamaha dealer use Service ma...

Страница 188: ...DIC183 PRINTED IN USA 2020 06 1 4 1 CR E ...

Отзывы: