


4-14
4
5
6
7
8
9
10
11
12
13
14
●
“4WD” (four-wheel drive): Power is sup-
plied to the rear and front wheels.
●
“DIFF LOCK” (four-wheel drive with the dif-
ferential gear locked): Power is supplied to
the rear and front wheels with the differen-
tial gear locked. Unlike the “4WD” mode, all
wheels turn at the same speed regardless
of traction.
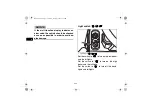
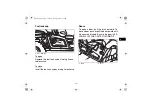
Horn switch “
”
Press the switch to sound the horn.
1. Horn switch “
”
1
1XP7B_EE.book Page 14 Tuesday, February 4, 2014 3:40 PM