background image

6-30

PERIODIC MAINTENANCE AND MINOR REPAIR

1

2

3

4

5

6

7

8

9

Battery storage
When the motorcycle is not used for
a month or longer, remove the bat-
tery, fully charge it and store it in a
cool, dry place.

EC000102

c

C

8

8

Completely recharge the bat-
tery before storing. Storing a
discharged battery can cause
permanent battery damage.

8

8

Use a battery charger
designed for a sealed-type
(MF) battery. Using a conven-
tional battery charger will
cause battery damage. If you
do not have a sealed-type bat-
tery charger, contact your
Yamaha dealer.

8

8

Always make sure the connec-
tions are correct when rein-
stalling the battery.

1

2

EAU00806

Fuse replacement

The fuse box is located under the
seat.
If the fuse is blown, turn off the main
switch and the switch of the circuit in
question. Install a new fuse of speci-
fied amperage. Turn on the switches
and see if the electrical device oper-
ates. If the fuse immediately blows
again, consult a Yamaha dealer.

1.

Main fuse

2.

Spare fuse

EC000103

c

C

Do not use fuses of higher amper-
age rating than those recommend-
ed. Substitution of a fuse of
improper rating can cause exten-
sive electrical system damage and
possibly a fire.

Specified fuse:

20A

5AE-9-E3 (ENG)  4/11/0 11:06 AM  Page 73

Содержание TDR125

Страница 1: ...TDR125 5AE 28199 E3 WNER S MANUAL ...

Страница 2: ...siro page 4 6 0 3 58 AM Page 1 ...

Страница 3: ...oroughly so as to enjoy all your TDR125 s advantages The owner s manual does not only instruct you in how to operate inspect and maintain your motorcy cle but also in how to safeguard yourself and others from trouble and injury In addition the many tips given in this manual will help to keep your motorcycle in the best possible condition If you have any further questions do not hesitate to contact...

Страница 4: ...ken to avoid damage to the motorcycle A NOTE provides key information to make procedures easier or clearer Q w cC NOTE NOTE 8 This manual should be considered a permanent part of this motorcycle and should remain with it even if the motorcycle is subsequently sold 8 Yamaha continually seeks advancements in product design and quality Therefore while this manual contains the most current product inf...

Страница 5: ...IMPORTANT MANUAL INFORMATION 1 2 4 5 6 7 8 9 EW000002 w PLEASE READ THIS MANUAL CAREFULLY AND COMPLETELY BEFORE OPERATING THIS MOTORCYCLE 5AE 9 E3 ENG 4 11 0 11 06 AM Page 3 ...

Страница 6: ...99 by Yamaha Motor Co Ltd 1st Edition August 1999 All rights reserved Any reprinting or unauthorized use without the written permission of Yamaha Motor Co Ltd is expressly prohibited Printed in Japan EAU00008 5AE 9 E3 ENG 4 11 0 11 06 AM Page 4 ...

Страница 7: ...RUMENT AND CONTROL FUNCTIONS 4 PRE OPERATION CHECKS 5 OPERATION AND IMPORTANT RIDING POINTS 6 PERIODIC MAINTENANCE AND MINOR REPAIR 7 MOTORCYCLE CARE AND STORAGE 8 SPECIFICATIONS 9 CONSUMER INFORMATION INDEX 9 8 7 6 5 4 3 2 1 EAU00009 5AE 9 E3 ENG 4 11 0 11 06 AM Page 5 ...

Страница 8: ...5AE 9 E3 ENG 4 11 0 11 06 AM Page 6 ...

Страница 9: ...GIVE SAFETY THE RIGHT OF GIVE SAFETY THE RIGHT OF WAY 1 1 1 5AE 9 E3 ENG 4 11 0 11 06 AM Page 7 ...

Страница 10: ...endency to take dangerous risks Protective clothing is as essential for the motorcycle rider as seat belts are for car drivers and passen gers Always wear a complete motorcycle suit whether made of leather or tear resistant synthetic materials with protectors sturdy boots motorcycle gloves and a properly fitting helmet Optimum pro tective wear however should not encourage carelessness Though full ...

Страница 11: ...DESCRIPTION Left view 2 1 Right view 2 2 Controls Instruments 2 3 2 5AE 9 E3 ENG 4 11 0 11 06 AM Page 9 ...

Страница 12: ...7 8 9 2 1 1 Dual headlight page 3 6 2 Fuel cock page 3 12 3 Engine oil tank page 3 12 4 Helmet holder page 3 12 5 Starter 1 page 3 13 6 Y E I S page 3 15 7 Y P V S page 3 16 1 2 3 4 5 6 7 Left view 5AE 9 E3 ENG 4 11 0 11 06 AM Page 10 ...

Страница 13: ...e page 6 32 10 Air filter page 6 15 11 Radiator cap page 6 11 12 Rear brake pedal page 3 9 6 22 13 Coolant reservoir tank page 6 10 14 Rear shock absorber spring preload adjusting ring page 3 14 8 9 10 11 12 13 14 Right view 5AE 9 E3 ENG 4 11 0 11 06 AM Page 11 ...

Страница 14: ...age 3 4 18 Engine temperature gauge page 3 5 19 Tachometer page 3 5 20 Right handlebar switches page 3 6 21 Front brake lever page 3 9 6 21 22 Throttle grip page 6 17 23 Fuel tank cap page 3 9 24 Main switch Steering lock page 3 1 15 16 17 18 19 20 21 22 23 24 Controls Instruments 5AE 9 E3 ENG 4 11 0 11 06 AM Page 12 ...

Страница 15: ... pedal 3 8 Front brake lever 3 8 Rear brake pedal 3 9 Fuel tank cap 3 9 Fuel 3 10 Catalyzer for Switzerland and Austria 3 11 Two stroke engine oil 3 12 Fuel cock 3 12 Starter choke 1 3 13 Seat 3 13 Helmet holder 3 14 Rear shock absorber adjustment 3 14 Note on handling of the Yamaha Energy Induction System Y E I S 3 15 Y P V S Yamaha Power Valve System 3 16 Sidestand 3 16 Sidestand clutch switch o...

Страница 16: ... OFF push it into the main switch and release it turn it counter clockwise to LOCK and remove it To release the lock turn the key to OFF EW000016 w Never turn the key to OFF or LOCK when the motorcycle is moving The electrical circuits will be switched off which may result in loss of control or an accident Be sure the motorcycle is stopped before turning the key to OFF or LOCK EAU00048 Parking The...

Страница 17: ... is used EAU01313 Oil level indicator light 7 7 This indicator comes on when the oil level is low This light circuit can be checked by the procedure on page 3 3 EC000000 cC Do not run the motorcycle until you know it has sufficient engine oil NOTE Even if the oil is filled to the specified level the indicator light may flicker when riding on a slope or during sud den acceleration or deceleration b...

Страница 18: ...ly the Oil level indicator light Oil level indicator light Oil level Oil level Engine oil level and Ask a Yamaha dealer Supply Turn the main switch to ON and the engine stop switch to does not come on comes on clutch lever then push the start switch comes on does not come on is OK is low engine oil to inspect electrical circuit electrical circuit are OK Go ahead with riding 5AE 9 E3 ENG 4 11 0 11 ...

Страница 19: ... Speedometer 2 Odometer 3 Trip odometer 4 Reset knob INSTRUMENT AND CONTROL FUNCTIONS 1 2 3 4 5 6 7 8 9 0 1 2 3 4 5 6 7 8 9 10 11 12 1000r min C H 1 2 NOTE for German model equipped with speed limiter only This motorcycle is equipped with a speed limiter which prevents it from exceeding a top speed of 80 km h 1 Tachometer 2 Red zone EAU00102 Tachometer This model is equipped with a tachometer so t...

Страница 20: ...U00118 Handlebar switches EAU00134 Lights switch Turning the light switch to turns on the auxiliary light meter lights and taillight Turning the light switch to turns the headlight on also EAU00121 Dimmer switch Turn the switch to for the high beam and to for the low beam EAU00127 Turn signal switch To signal a right hand turn push the switch to 6 To signal a left hand turn push the switch to 4 On...

Страница 21: ...Spain Greece Belgium Germany Switzerland Finland Austria England Ireland 3 High beam light on 2 Low beam light on Auxiliary light on 12V 60 55W 12V 60 55W 12V 35 35W 12V 35 35W EAU00136 Headlight beam variation NOTE Right and left directions are those assumed from the position of a person facing the front of the motorcycle 5AE 9 E3 ENG 4 11 0 11 06 AM Page 19 ...

Страница 22: ... overturns or if trouble occurs in the throttle sys tem Turn the switch to to start the engine In case of emergency turn the switch to to stop the engine 1 Engine stop switch 2 Start switch EAU00143 Start switch The starter motor cranks the engine when pushing the start switch EC000005 cC See starting instructions prior to starting the engine 5AE 9 E3 ENG 4 11 0 11 06 AM Page 20 ...

Страница 23: ...ng procedures for a description of the ignition circuit cut off system EAU00158 Front brake lever The front brake lever is located on the right handlebar Pull it toward the handlebar to apply the front brake 1 Front brake lever INSTRUMENT AND CONTROL FUNCTIONS 1 2 3 4 5 6 7 8 9 1 1 Clutch lever 6 5 4 3 2 1 N 1 EAU00157 Shift pedal This motorcycle is equipped with a constant mesh 6 speed transmissi...

Страница 24: ...removed if the cap is not locked properly EW000023 w Be sure the cap is properly installed and locked in place before riding the motorcycle 2 1 EAU02935 Fuel tank cap To open Open the lock cover Insert the key and turn it 1 4 turn clockwise The lock will be released and the cap can be opened To close Push the tank cap into position with the key inserted To remove the key turn it counterclockwise t...

Страница 25: ...nd and Austria Make sure there is sufficient fuel in the tank Fill the fuel tank to the bot tom of the filler tube as shown in the illustration EW000130 w Do not overfill the fuel tank Avoid spilling fuel on the hot engine Do not fill the fuel tank above the bot tom of the filler tube or it may overflow when the fuel heats up later and expands 2 1 3 4 1 Filler tube 2 Filling nozzle 3 Leaf valve 4 ...

Страница 26: ...before making any adjustment to or lubricating the motorcycle EC000114 cC The following must be observed to prevent a fire hazard or other dam ages 8 8 Use only unleaded gasoline Use of leaded gasoline will cause unrepairable damage to the catalytic converter 8 8 Never park this motorcycle in an area that would cause a fire hazard such as grass or other materials that may easily burn 8 8 Do not al...

Страница 27: ...is position when the engine is not running ON With the lever in this position fuel flows to the carburetor Normal riding is done with the lever in this position 1 OFF 1 Arrow mark pointing to OFF EAU02956 Two stroke engine oil Make sure the two stroke engine oil is at the specified level Fill with oil as necessary 1 1 Filler cap Recommended oil Yamalube 2 or 2 stroke engine oil JASO FC grade or IS...

Страница 28: ...gine requires a rich er air fuel mixture A separate starter circuit supplies this mixture Move in direction a to turn on the starter choke Move in direction b to turn off the starter choke EAU01619 Seat To remove Insert the key into the lock and turn it clockwise 1 Starter choke 1 1 Unlock 3 13 INSTRUMENT AND CONTROL FUNCTIONS 1 2 3 4 5 6 7 8 9 1 RES 1 Arrow mark pointing to RES RES reserve positi...

Страница 29: ... shock absorber is equipped with a spring preload adjusting ring Adjust spring preload as follows Turn the adjusting ring in direction a to increase spring preload and in direction b to decrease spring pre load Make sure that the appropriate notch in the adjusting ring is aligned with the position indicator on the rear shock absorber To install Insert the projection on the front of the seat into t...

Страница 30: ...lode due to excessive gas pres sure 8 8 Do not deform or damage the cylinder in any way Cylinder damage will result in poor damping performance 8 8 Take your shock absorber to a Yamaha dealer for any service EAU00325 Note on handling of the Yamaha Energy Induction System Y E I S Handle the air chamber and hose with special care Improper installa tion or damaged parts will result in poor performanc...

Страница 31: ...damage may result The Y P V S operation can be heard in the following instances 8 When the main switch is turned on and the engine is started 8 When the engine stalls while the main switch is on EC000024 cC If the Y P V S does not operate ask a Yamaha dealer to inspect the vehicle EAU00330 Sidestand This model is equipped with an igni tion circuit cut off system The motor cycle must not be ridden ...

Страница 32: ...any indication of a malfunction return the motor cycle to a Yamaha dealer immedi ately for repair EAU00331 Sidestand clutch switch operation check Check the operation of the sidestand switch and clutch switch against the information below EW000045 w If improper operation is noted consult a Yamaha dealer immedi ately INSTRUMENT AND CONTROL FUNCTIONS 1 2 3 4 5 6 7 8 9 TURN THE MAIN SWITCH TO ON AND ...

Страница 33: ...PRE OPERATION CHECKS Pre operation check list 4 1 4 5AE 9 E3 ENG 4 11 0 11 06 AM Page 31 ...

Страница 34: ...uid if necessary 3 8 3 9 6 21 6 24 Rear brake 9 Check operation free play fluid level and vehicle for fluid leakage 9 Fill with DOT 4 brake fluid if necessary Clutch 9 Check operation condition and free play 3 8 6 20 6 21 9 Adjust if necessary 9 Check for smooth operation Throttle grip and housing 9 Lubricate 6 17 6 18 6 27 9 Adjust throttle cable free play if necessary Engine oil 9 Check oil leve...

Страница 35: ...and screws are properly tightened 9 Tighten if necessary Fuel tank 9 Check fuel level 3 9 3 10 9 Fill with fuel if necessary Lights signals and 9 Check for proper operation 6 32 6 34 switches NOTE Pre operation checks should be made each time the motorcycle is used Such an inspection can be accomplished in a very short time and the added safety it assures is more than worth the time involved w If ...

Страница 36: ...1 2 3 4 5 6 7 8 9 5AE 9 E3 ENG 4 11 0 11 06 AM Page 34 ...

Страница 37: ... POINTS Starting the engine 5 1 Starting a warm engine 5 4 Shifting 5 4 Recommended shift points for Switzerland only 5 5 Tips for reducing fuel consumption 5 5 Engine break in 5 5 Parking 5 6 5 5AE 9 E3 ENG 4 11 0 11 06 AM Page 35 ...

Страница 38: ...re the sidestand is up Failure to retract the sidestand completely can result in a seri ous accident when you try to turn a corner EAU00381 Starting the engine NOTE This motorcycle is equipped with an ignition circuit cut off system The engine can be started only under the following conditions 8 8 The transmission is in neutral 8 8 The sidestand is up the trans mission is in gear and the clutch is...

Страница 39: ...WITCH ENGINE WILL START RETRACT SIDESTAND AND PUT TRANSMISSION IN GEAR MOTORCYCLE CAN BE RIDDEN MOTORCYCLE CAN BE RIDDEN IF TRANSMISSION IS IN GEAR AND SIDESTAND IS UP PULL IN THE CLUTCH LEVER AND PUSH THE START SWITCH ENGINE WILL START TURN THE MAIN SWITCH TO ON AND THE ENGINE STOP SWITCH TO 5AE 9 E3 ENG 4 11 0 11 06 AM Page 37 ...

Страница 40: ...ome on when the start switch is pushed and should go off when the start switch is released If the indicator light flickers or remains on immediately stop the engine and check the engine oil level and for oil leakage If necessary fill the engine with oil and check to see that the oil level indicator light goes off If the light does not go off even with sufficient oil in the crankcase or the light d...

Страница 41: ...til it reaches the end of its travel then raise the pedal slightly EC000048 cC 8 8 Do not coast for long periods with the engine off and do not tow the motorcycle a long dis tance Even with gears in neu tral the transmission is only properly lubricated when the engine is running Inadequate lubrication may damage the transmission 8 8 Always use the clutch when changing gears The engine transmission...

Страница 42: ... in the life of your motorcycle than the period between zero and 1 000 km For this reason we ask that you carefully read the following material Because the engine is brand new you must not put an excessive load on it for the first 1 000 km The vari ous parts in the engine wear and pol ish themselves to the correct operat ing clearances During this period prolonged full throttle operation or any co...

Страница 43: ...let engine speeds enter the red zone 8 8 If any engine trouble should occur during the break in peri od consult a Yamaha dealer immediately EAU00458 Parking When parking the motorcycle stop the engine and remove the ignition key Turn the fuel cock to OFF whenever stopping the engine EW000058 w The exhaust system is hot Park the motorcycle in a place where pedestrians or children are not likely to ...

Страница 44: ...1 2 3 4 5 6 7 8 9 5AE 9 E3 ENG 4 11 0 11 06 AM Page 42 ...

Страница 45: ...ing the brake fluid level 6 22 Brake fluid replacement 6 23 Drive chain slack check 6 23 Drive chain slack adjustment 6 24 Drive chain lubrication 6 25 Cable inspection and lubrication 6 25 Throttle cable and grip lubrication 6 26 Autolube pump adjustment 6 26 Brake and shift pedal lubrication 6 26 Brake and clutch lever lubrication 6 27 Sidestand lubrication 6 27 Rear suspension lubrication 6 27 ...

Страница 46: ...e most important points of motorcycle inspection adjustment and lubrication are explained in the following pages EW000060 w If you are not familiar with motor cycle service this work should be done by a Yamaha dealer EAU00462 PERIODIC MAINTENANCE AND MINOR REPAIR 1 2 3 4 5 6 7 8 9 1 EAU00469 Tool kit The service information included in this manual is intended to provide you the owner with the nece...

Страница 47: ...to a Yamaha dealer for service EW000063 w Modifications to this motorcycle not approved by Yamaha may cause loss of performance and render it unsafe for use Consult a Yamaha dealer before attempting any changes PERIODIC MAINTENANCE AND MINOR REPAIR 1 2 3 4 5 6 7 8 9 5AE 9 E3 ENG 4 11 0 11 06 AM Page 45 ...

Страница 48: ... NOTE on page 6 5 5 Front brake 9 Correct accordingly 9 Replace brake pads if necessary 9 Check operation fluid level and vehicle for fluid leakage See NOTE on page 6 5 6 Rear brake 9 Correct accordingly 9 Replace brake pads if necessary 7 Wheels 9 Check balance runout and for damage 9 Rebalance or replace if necessary 9 Check tread depth and for damage 8 Tires 9 Replace if necessary 9 Check air p...

Страница 49: ...9 Correct accordingly 9 Lubricate with lithium soap base grease every 24 000 km or 24 months whichever comes first 13 Chassis fasteners 9 Make sure that all nuts bolts and screws are properly tightened 9 Tighten if necessary 14 Sidestand 9 Check operation 9 Lubricate and repair if necessary 15 Sidestand switch 9 Check operation 9 Replace if necessary 16 Front fork 9 Check operation and for oil lea...

Страница 50: ...lant leakage 22 Cooling system 9 Correct if necessary 9 Change coolant every 24 000 km or 24 months whichever comes first Since these items require special tools data and technical skills they should be serviced by a Yamaha dealer EAU02970 NOTE 8 The air filter needs more frequent service if you are riding in unusually wet or dusty areas 8 Hydraulic brake system 9 When disassembling the master cyl...

Страница 51: ...9 Cowling and panel removal and installation The cowlings and panels illustrated need to be removed to perform some of the maintenance described in this chapter Refer to this section each time a cowling or panel has to be removed or reinstalled 1 1 Cowling A 5AE 9 E3 ENG 4 11 0 11 06 AM Page 49 ...

Страница 52: ...he cowling in the original position and install the screws 2 Place the radiator cover in the original position and install the screws 3 Install the seat EAU01691 Panel A To remove 1 Remove the seat See page 3 13 for removal and installation procedures 2 Remove the screw To install 1 Place the panel in the original position and install the screw 2 Install the seat PERIODIC MAINTENANCE AND MINOR REP...

Страница 53: ...on and other deposits are exces sive the spark plug should be replaced with the specified plug Before installing the spark plug mea sure the electrode gap with a wire thickness gauge and adjust it to specification When installing the plug the gasket surface should always be cleaned and a new gasket used Any grime should be wiped off from the threads and the spark plug tightened to the specified to...

Страница 54: ...sion oil replacement 1 Warm up the engine for several minutes 2 Stop the engine Place an oil pan under the engine and remove the oil filler cap PERIODIC MAINTENANCE AND MINOR REPAIR 1 2 3 4 5 6 7 8 9 1 2 EAU01080 Transmission oil Oil level measurement 1 Place the motorcycle on a level place and hold it an upright posi tion Warm up the engine for several minutes NOTE Be sure the motorcycle is posit...

Страница 55: ...e 1 Drain bolt PERIODIC MAINTENANCE AND MINOR REPAIR 1 2 3 4 5 6 7 8 9 Tightening torque Drain bolt 15 Nm 1 5 m0kg Recommended oil See page 8 1 Oil quantity Total amount 0 8 L Periodic oil change 0 75 L 1 2 1 Maximum level mark 2 Minimum level mark EAU01621 Cooling system 1 Check the coolant level in the reservoir tank when the engine is cold as the coolant level will vary with engine temperature ...

Страница 56: ...page 6 7 for removal and installation procedures 6 11 PERIODIC MAINTENANCE AND MINOR REPAIR 1 2 3 4 5 6 7 8 9 4 Remove the radiator cap EW000067 w Do not remove the radiator cap when the engine is hot EC000080 cC Hard water or salt water is harmful to the engine You may use dis tilled water if you can t get soft water 1 1 Radiator cap 5AE 9 E3 ENG 4 11 0 11 06 AM Page 54 ...

Страница 57: ...aged and tight en the coolant drain bolt to the specified torque 1 Reservoir tank hose Tightening torque Coolant drain bolt 8 Nm 0 8 m0kg 9 Install the reservoir tank hose 10 Pour the recommended coolant into the radiator until it is full EC000080 cC Hard water or salt water is harmful to the engine You may use dis tilled water if you can t get soft water Recommended antifreeze High quality ethyle...

Страница 58: ...reservoir tank cap and check for coolant leakage NOTE If any leakage is found ask a Yamaha dealer to inspect the cooling sytem 15 Install the cowling radiator cover and the seat 1 EAU01476 Air filter The air filter should be cleaned at the specified intervals It should be cleaned more frequently if you are riding in unusually wet or dusty areas 1 Remove the seat 2 Remove cowling A and B See page 6...

Страница 59: ... and the screws holding the air filter case cover 1 1 Air filter 6 Remove the air filter element from its case and clean it with solvent After cleaning remove the remaining solvent by squeez ing the air filter 7 Apply recommended oil to the entire surface of the air filter and squeeze out the excess oil The air filter should be wet but not dripping 8 Install the air filter element in its case 9 Re...

Страница 60: ...dealer who has the professional knowledge and experience to do so However the following may be serviced by the owner as part of routine mainte nance EC000094 cC The carburetor was set at the Yamaha factory after many tests If the settings are changed poor engine performance and damage may result b a 1 EAU00632 Idle speed adjustment 1 Start the engine and warm it up for a few minutes at approxi mat...

Страница 61: ...ay adjustment NOTE Before checking the throttle cable free play the engine idling speed should be adjusted Adjust the throttle cable by turning the adjusting nut so that specified free play at the throttle grip is obtained a Free play a Free play 3 5 mm 2 1 b a 1 Loosen the locknut 2 Turn the adjusting nut in direc tion a to increase free play and in direction b to decrease free play 3 Tighten the...

Страница 62: ...00 kPa Up to 90 kg load 1 75 kg cm2 2 00 kg cm2 1 75 bar 2 00 bar 90 kg load 175 kPa 225 kPa Maximum load 1 75 kg cm2 2 25 kg cm2 1 75 bar 2 25 bar EW000083 w Proper loading of your motorcycle is important for several character istics of your motorcycle such as handling braking performance and safety Do not carry loosely packed items that can shift Securely pack your heaviest items close to the ce...

Страница 63: ...ountry If so conform to the limits specified by the regulations of your own country Manufacturer Size Type BRIDGESTONE 100 90 18 56P TW53 DUNLOP 100 90 18 56P D602F FRONT Manufacturer Size Type BRIDGESTONE 130 80 17 65P TW54 DUNLOP 130 80 17 65P D602 REAR Minimum tire tread depth 0 8 mm front and rear EAU00683 w Operating the motorcycle with excessively worn tires decrease riding stability and can...

Страница 64: ... broken in for it to develop its optimal character istics a b 1 2 3 EAU00694 Clutch lever free play adjustment The clutch lever free play should be adjusted to 10 15 mm 1 Loosen the locknut at the clutch lever 2 Turn the adjusting bolt at the clutch lever in direction a to increase free play or in direction b to decrease free play 3 Tighten the locknut at the clutch lever If the specified free pla...

Страница 65: ...the brake is working properly 8 8 A soft or spongy feeling in the brake lever can indicate the presence of air in the brake system This air must be removed by bleeding the brake system before the motorcycle is operated Air in the system will cause greatly diminished braking capability and can result in loss of control and an accident Have a Yamaha dealer inspect and bleed the system if necessary a...

Страница 66: ... adjusted when the brake light comes on just before braking takes effect To adjust the rear brake light switch hold the switch body so it does not rotate while turning the adjusting nut Turn the adjusting nut in direction a to make the brake light come on earli er Turn the adjusting nut in direction b to make the brake light come on later b a 1 2 1 Brake light switch 2 Adjusting nut EAU00721 Check...

Страница 67: ...king the fluid level make sure the top of the master cylinder is level by turning the handlebars 1 1 Minimum level mark FRONT 1 1 Minimum level mark 8 Use only the designated quality brake fluid Otherwise the rub ber seals may deteriorate caus ing leakage and poor brake per formance NOTE If DOT 4 is not available DOT 3 can be used for the front brake only REAR Recommended fluid DOT 4 EAU00730 Rear...

Страница 68: ...clean up spilled fluid immediately 8 Have a Yamaha dealer check the cause if the brake fluid level goes down EAU00742 Brake fluid replacement The brake fluid should be replaced only by trained Yamaha service per sonnel Have the Yamaha dealer replace the following components during periodic maintenance or when they are damaged or leaking 8 oil seals every two years 8 brake hoses every four years EA...

Страница 69: ...usting nuts in direc tion a To loosen the chain turn the adjusting nuts in direction b and push the wheel forward 3 4 1 2 a b 1 Locknut 2 Adjusting nut 3 Axle nut 4 Alignment marks Turn each adjusting nut exactly the same amount to maintain correct axle alignment There are marks on each side of the swingarm Use these marks to align the rear wheel EC000096 cC Too little chain slack will overload th...

Страница 70: ...00097 cC Be sure to oil the chain after wash ing the motorcycle or riding in the rain EAU02962 Cable inspection and lubrication EW000112 w Damage to the outer housing of cables may lead to internal rusting and interfere with the cable move ment Replace damaged cables as soon as possible to prevent unsafe conditions Lubricate the cables and cable ends If a cable does not operate smoothly ask a Yama...

Страница 71: ...i cated adjustment Adjusting should be left to a Yamaha dealer who has the professional knowledge and experience to do so EAU02984 Brake and shift pedal lubrication Lubricate the pivoting parts Recommended lubricant Engine oil EAU02985 Brake and clutch lever lubrication Lubricate the pivoting parts Recommended lubricant Engine oil 5AE 9 E3 ENG 4 11 0 11 06 AM Page 69 ...

Страница 72: ...es not move smoothly consult a Yamaha deal er Recommended lubricant Engine oil EAU00791 Rear suspension lubrication Lubricate the pivoting parts Recommended lubricant Lithium soap base grease EAU02939 Front fork inspection Visual check EW000115 w Securely support the motorcycle so there is no danger of it falling over Check for scratches or damage on the inner tube and excessive oil leak age from ...

Страница 73: ...ult a Yamaha dealer EAU00794 Steering inspection Periodically inspect the condition of the steering Worn out or loose steer ing bearings may be dangerous Place a stand under the engine to raise the front wheel off the ground Hold the lower end of the front forks and try to move them forward and backward If any free play can be felt ask a Yamaha dealer to inspect and adjust the steering Inspection ...

Страница 74: ... sure to recharge it periodically EC000101 cC Never try to remove the sealing caps of the battery cells The bat tery will be damaged EW000116 w Battery electrolyte is poisonous and dangerous causing severe burns etc It contains sulfuric acid Avoid contact with skin eyes or clothing ANTIDOTE 8 8 EXTERNAL Flush with water 8 8 INTERNAL Drink large quanti ties of water or milk Follow with milk of magn...

Страница 75: ...ger contact your Yamaha dealer 8 8 Always make sure the connec tions are correct when rein stalling the battery 1 2 EAU00806 Fuse replacement The fuse box is located under the seat If the fuse is blown turn off the main switch and the switch of the circuit in question Install a new fuse of speci fied amperage Turn on the switches and see if the electrical device oper ates If the fuse immediately b...

Страница 76: ...b EW000119 w Keep flammable products and your hands away from a bulb while it is on as it is hot Do not touch a bulb until it cools down Type 1 Type 2 Type 3 Type 4 Turn Unhook Unhock Turn 5 Put a new bulb into position and secure it in place with the bulb holder EC000105 cC Avoid touching the glass part of a bulb Keep it free from oil other wise the transparency of the glass life of the bulb and ...

Страница 77: ...ckwise 1 Screw 2 2 Panel A 1 4 To remove the defective bulb turn it counterclockwise 5 Push a new bulb into the socket and turn it clockwise 6 Install the socket and turn it clockwise 7 Install the panel and the seat 1 Socket 1 2 EAU01095 Turn signal light bulb replacement 1 Remove the screw and the lens 2 Remove the defective bulb by pushing it inward and turning it counterclockwise 1 Lens 2 Scre...

Страница 78: ...emove the speedometer cable from the front wheel side 2 1 1 Pinch bolt 2 Wheel axle 2 Loosen the pinch bolt and wheel axle 3 Elevate the front wheel by plac ing a suitable stand under the engine 4 Remove the wheel axle and the front wheel NOTE Do not depress the brake lever when the disc and caliper are separated 1 1 Bulb 3 Install a new bulb by pushing it inward and turning it clockwise 4 Install...

Страница 79: ...val EW000122 w 8 8 It is advisable to have a Yamaha dealer service the wheel 8 8 Securely support the motorcy cle so there is no danger of it falling over 1 Loosen the axle nut 1 Locknut 2 Adjusting nut 3 Axle nut EAU01394 Front wheel installation 1 Install the speedometer gear unit into the wheel hub Make sure the wheel hub and the speedometer gear unit are installed with the projections meshed i...

Страница 80: ...t depress the brake pedal when the disc and caliper are separated 8 You do not have to disassemble the chain in order to remove or install the rear wheel EAU01620 Rear wheel installation 1 Install the rear brake caliper Make sure the slot in the caliper bracket is fit over the stopper on the swingarm 2 Install the rear wheel and chain Guide the brake disc between the brake pads Make sure there is ...

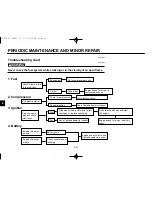
Страница 81: ...the fuel compres sion or ignition systems can cause poor starting and loss of power The troubleshooting chart describes a quick easy procedure for making checks If your motorcycle requires any repair bring it to a Yamaha dealer The skilled technicians at a Yamaha dealership have the tools experi ence and know how to properly ser vice your motorcycle Use only gen uine Yamaha parts on your motorcycl...

Страница 82: ...t Wet Dry Wipe clean with dry cloth and correct Open throttle half way and start Ask a Yamaha dealer to inspect Check if there is fuel Enough fuel No fuel Go to compression check Supply fuel in the fuel tank electrodes plug and check Engine doesn t start go to battery check the engine spark gap or replace spark plug Engine turns over Engine turns over Battery good Check connections or quickly slow...

Страница 83: ...y residual pressure to escape When the hissing sound has stopped press down on the cap while turning counterclock wise and remove it NOTE If it is difficult to get the recommended coolant tap water can be temporarily used provided that it is changed to the rec ommended coolant as soon as possible Level is OK Wait until the engine has cooled Restart the engine If the engine overheats again ask a Ya...

Страница 84: ...1 2 3 4 5 6 7 8 9 5AE 9 E3 ENG 4 11 0 11 06 AM Page 82 ...

Страница 85: ...MOTORCYCLE CARE AND STORAGE Care 7 1 Storage 7 4 7 5AE 9 E3 ENG 4 11 0 11 06 AM Page 83 ...

Страница 86: ...k plug cap are tightly installed 3 Remove extremely stubborn dirt like oil burnt onto the crankcase with a degreasing agent and a tooth or bottle brush but never apply such products onto seals gaskets sprockets the drive chain and wheel axles Always rinse the dirt and degreaser off with water Cleaning After normal use Remove dirt with warm water a neu tral detergent and a soft clean sponge then ri...

Страница 87: ... cleaners or hard sponges as they will cause dulling or scratching Some cleaning compounds for plas tic may leave scratches on the windshield Test the product on a small hidden part of the windshield to make sure they do not leave any marks If the windshield is scratched use a quality plastic polishing com pound after washing After riding in the rain near the sea or on salt sprayed roads Since sea...

Страница 88: ...d by stones etc 7 Wax all painted surfaces 8 Let the motorcycle dry complete ly before storing it or covering it EWA00001 w Make sure that there is no oil or wax on the brakes and tires If necessary clean the brake discs and linings with a regular brake disc cleaner or acetone and wash the tires with warm water and mild soap Then carefully test the motorcycle for its braking perfor mance and corne...

Страница 89: ...equipped with a fuel cock which has an OFF position Turn the fuel cock to OFF 4 Fill up the fuel tank and add fuel stabilizer if available to prevent the fuel tank from rusting and the fuel from deteriorating 5 Perform the following steps to protect the cylinder piston rings etc from corrosion a Remove the spark plug cap and spark plug b Pour a teaspoonful of engine oil into the spark plug bore c ...

Страница 90: ...he tires from becoming degraded in one spot 8 Cover up the muffler outlet with a plastic bag to prevent moisture from entering 9 Remove the battery and fully charge it Store it in a cool dry place and recharge it once a month Do not store the battery in an excessively cold or warm place less than 0 C or more than 30 C For more informa tion see Battery storage in the chapter PERIODIC MAINTE NANCE A...

Страница 91: ...SPECIFICATIONS Specifications 8 1 How to use the conversion table 8 5 8 5AE 9 E3 ENG 4 11 0 11 06 AM Page 89 ...

Страница 92: ...nder Displacement 125 cm3 Bore Stroke 56 0 50 7 mm Compression ratio 6 6 1 Starting system Electric starter Lubrication system Separate lubrication Yamaha Autolube Engine oil 2 cycle Type Yamaha oil 2T or equivalent 2 stroke engine oil Capacity Total amount 1 2 L Transmission oil Type SAE 10W30 SE motor oil Capacity Periodic oil change 0 75 L Total amount 0 8 L Radiator capacity Including all rout...

Страница 93: ... 1 412 4th 1 143 5th 0 957 6th 0 818 Chassis Frame type Semi double cradle Caster angle 26 Trail 116 mm Tire Type Tubeless Front Size 100 90 18 56P Manufacturer BRIDGESTONE TW53 model DUNLOP D602F Rear Size 130 80 17 65P Manufacturer BRIDGESTONE TW54 model DUNLOP D602 Maximum load 180 kg 179 kg CH A Air pressure cold tire up to 90 kg load Front 175 kPa 1 75 kg cm2 1 75 bar Rear 200 kPa 2 00 kg cm2...

Страница 94: ...ront Type Telescopic fork Rear Type Swingarm Monocross Shock absorber Front Type Coil spring oil damper Rear Type Coil gas spring oil damper Wheel travel Front 180 mm Rear 180 mm Electrical Ignition system C D I Charging system Type C D I magneto Standard output 14 V 12A 5 000 r min Battery Type YTX5L BS Voltage capacity 12 V 4 AH Headlight bulb type Halogen bulb Bulb voltage wattage quantity Head...

Страница 95: ...Rear flasher light 12 V 21W 2 Auxiliary light 12 V 4W 2 12 V 3 4W 2 GB IRL only Meter light 12 V 3 4W 3 Neutral indicator light 12 V 3 4W 1 High beam indicator light 12 V 3 4W 1 Oil level indicator light 12 V 3 4W 1 Turn indicator light 12 V 3 4W 1 Fuse Main 20A 5AE 9 E3 ENG 4 11 0 11 06 AM Page 93 ...

Страница 96: ...L Metric unit Multiplier Imperial unit m kg 7 233 ft lb Torque m kg 86 794 in lb cm kg 0 0723 ft lb cm kg 0 8679 in lb Weight kg 2 205 lb g 0 03527 oz Speed km hr 0 6214 mph km 0 6214 mi m 3 281 ft Distance m 1 094 yd cm 0 3937 in mm 0 03937 in cc cm3 0 03527 oz IMP liq Volume cc cm3 0 06102 cu in Capacity lt liter 0 8799 qt IMP liq lt liter 0 2199 gal IMP liq kg mm 55 997 lb in Misc kg cm2 14 223...

Страница 97: ...CONSUMER INFORMATION Identification number records 9 1 Key identification number 9 1 Vehicle identification number 9 1 Model label 9 2 9 5AE 9 E3 ENG 4 11 0 11 06 AM Page 95 ...

Страница 98: ...number The key identification number is stamped on the key tag Record this number in the space pro vided and use it for reference when obtaining a new key EAU01043 Vehicle identification number The vehicle identification number is stamped into the steering head pipe Record this number in the space pro vided NOTE The vehicle identification number is used to identify your motorcycle and may be used ...

Страница 99: ...el label is affixed to the frame under the seat See page 3 13 for seat removal procedures Record the information on this label in the space provided This informa tion will be needed to order spare parts from your Yamaha dealer 1 Model label 5AE 9 E3 ENG 4 11 0 11 06 AM Page 97 ...

Страница 100: ...al indicator light 3 2 Note on handling of the Yamaha Energy Induction System Y E I S 3 15 O Oil level indicator circuit check 3 3 Oil level indicator light 3 2 P Panel A 6 7 Parking 5 6 Periodic maintenance and lubrication 6 3 Pre operation check list 4 1 R Rear brake pedal 3 9 Rear brake pedal height adjustment 6 20 Rear shock absorber adjustment 3 14 Rear suspension lubrication 6 27 Rear wheel ...

Страница 101: ...ng inspection 6 28 Storage 7 4 T Tachometer 3 4 Taillight bulb replacement 6 32 Throttle cable and grip lubrication 6 25 Throttle cable free play adjustment 6 16 Tips for reducing fuel consumption 5 5 Tires 6 17 Tool kit 6 1 Transmission oil 6 9 Troubleshooting 6 36 Troubleshooting chart 6 37 Turn indicator light 3 2 Turn signal light bulb replacement 6 32 Turn signal switch 3 5 Two stroke engine ...

Страница 102: ...5AE 9 E3 ENG 4 11 0 11 06 AM Page 100 ...

Страница 103: ...siro page 4 6 0 3 58 AM Page 1 ...

Страница 104: ...PRINTED IN JAPAN 99 8 0 1 1 E A MOTOR CO LTD ...

Отзывы: