background image

PLAYBACK

Selecting the input source and favorite settings with one touch (SCENE)

En

35

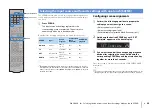
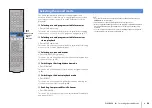
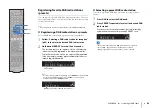
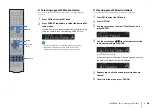
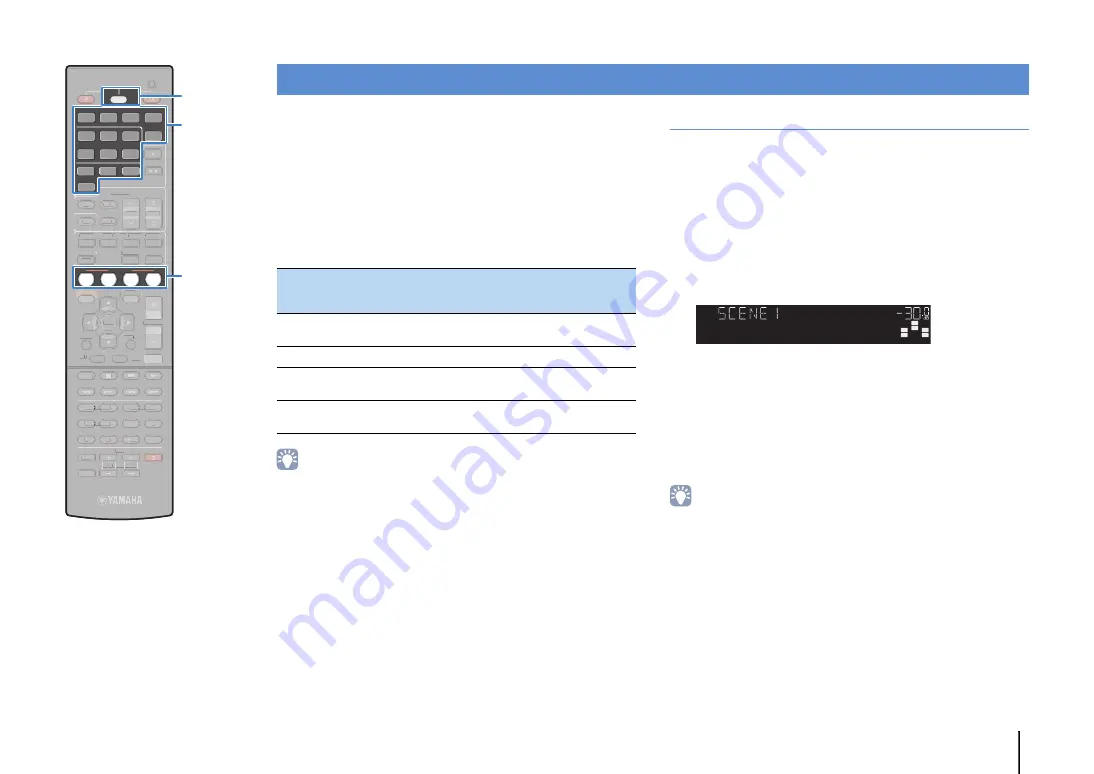
The SCENE function allows you to select the assigned input source, 
sound program, and Compressed Music Enhancer on/off with just 
one touch.

1

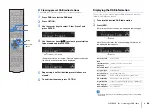
Press SCENE.

The input source and settings registered to the 
corresponding scene are selected. The unit turns on 
automatically when it is in standby mode.

By default, the following settings are registered for each scene.

• The SCE

N

E link playback function allows you to automatically turn on the TV or 

start playback of an external device connected to the unit via HDMI, in conjunction 
with a scene selection. To enable SCE

N

E link playback, set “SCE

N

E” (p.76) in the 

“Setup” menu to “On”.

Configuring scene assignments

1

Perform the following operations to prepare the 
settings you want to assign to a scene.

• Select an input source (p.34)

• Select a sound program (p.36)

• Enable/disable Compressed Music Enhancer (p.41)

2

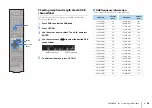
Hold down the desired SCENE key until “SET 
Complete” appears on the front display.

3

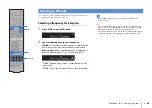
If you want to control the corresponding playback 
device after selecting the scene, hold down the 
corresponding SCENE key and input selection key 
together for more than 3 seconds.

Once the setting is completed successfully, SOURCE/RECEIVER 
blinks twice.

• If you have not registered the remote control code of the playback device yet, see 

“Registering the remote control codes for playback devices” (p.87) to register it.

Selecting the input source and favorite settings with one touch (SCENE)

SCENE

Input

Sound 
program

Compressed 
Music 
Enhancer

SCENE link 
playback

BD/DVD

HDMI 1

MOVIE 
(Sci-Fi)

Off

On

TV

AV 4

STRAIGHT

On

On

NET

NET RADIO

MUSIC 
(5ch Stereo)

On

Off

RADIO

TUNER (FM)

MUSIC 
(5ch Stereo)

On

Off

SW
C

L
SL

SR

R

SETComplete

VOL.

SCENE

RETURN

VOLUME

ENHANCER

DIRECT

HDMI

MHL

AV

TUNER

FM

INFO

MEMORY

DAB

PRESET

MOVIE

MUSIC

BD

DVD

MUTE

ENTER

TV

TV VOL

TV CH

TOP

MENU

POP-UP

MENU

DISPLAY

SOURCE

RECEIVER

CODE SET

OPTION

SETUP

TUNING

STRAIGHT

SUR. DECODE

INPUT

MUTE

9

0

10

ENT

5

6

8

7

1

2

3

4

MODE

TV

NET

RADIO

AUDIO

1

2

3

NET

USB

V-AUX

5

4

5

1

2

3

4

SLEEP

6

RETURN

VOLUME

ENHANCER

DIRECT

TUNER

FM

INFO

MEMORY

DAB

PRESET

MOVIE

MUSIC

MUTE

ENTER

TV

TV VOL

TV CH

TOP

MENU

POP-UP

MENU

DISPLAY

CODE SET

OPTION

SETUP

TUNING

STRAIGHT

SUR. DECODE

INPUT

MUTE

9

0

10

ENT

6

5

8

7

1

2

3

4

MODE

SLEEP

SCENE

SOURCE/RECEIVER

Input selection keys

Содержание RX-V500D

Страница 1: ...English Read the supplied booklet Safety Brochure before using the unit AV Receiver Owner s Manual ...

Страница 2: ...O 30 Error messages 32 Warning messages 33 PLAYBACK 34 Basic playback procedure 34 Selecting the input source and favorite settings with one touch SCENE 35 Configuring scene assignments 35 Selecting the sound mode 36 Enjoying sound field effects CINEMA DSP 37 Enjoying unprocessed playback 39 Enjoying pure high fidelity sound direct playback 40 Enjoying compressed music with enhanced sound Compress...

Страница 3: ...UP menu 84 ADVANCED SETUP menu items 84 Selecting the remote control ID REMOTE ID 84 Switching the video signal type TV FORMAT 84 Restoring the default settings INIT 85 Updating the firmware UPDATE 85 Checking the firmware version VERSION 85 Controlling external devices with the remote control 86 Registering the remote control code for a TV 86 Registering the remote control codes for playback devi...

Страница 4: ...sensor on the unit and remain within the operating range shown below Some features are not available in certain regions Due to product improvements specifications and appearance are subject to change without notice This manual explains operations using the supplied remote control This manual describes all the iPod iPhone and iPad as the iPod iPod refers to iPod iPhone and iPad unless otherwise spe...

Страница 5: ...y of supported content iPod iPhone iPad p 50 USB p 54 Media server PC NAS p 57 Internet radio p 60 AirPlay p 62 iPod iPhone iPad USB device Audio Network contents Supports 2 to 5 1 channel speaker system Allows you to enjoy your favorite acoustic spaces in various styles Automatically optimizing the speaker settings to suit your room YPAO p 30 Reproducing stereo or multichannel sounds with the sou...

Страница 6: ...e view information or easily configure the settings using the on screen menu Low power consumption The ECO mode power saving function reduces the unit s power consumption and helps to create an eco friendly home theater system p 79 BD DVD player Game console Camcorder TV Set top box HDMI Control TV audio Video from external device Useful tips The combination of video audio input jacks does not mat...

Страница 7: ... p 42 or an FM radio frequency p 46 0 Front display Displays information p 8 A DIRECT key Enables disables the direct playback mode p 40 B PHONES jack For connecting headphones C INPUT keys Select an input source D TONE CONTROL key Adjusts the high frequency range and low frequency range of output sounds p 66 E SCENE keys Select the registered input source and sound program with one touch Also tur...

Страница 8: ...Lights up when the unit is receiving an FM radio station signal 6 SLEEP Lights up when the sleep timer is on 7 MUTE Blinks when audio is muted 8 Volume indicator Indicates the current volume 9 Cursor indicators Indicate the remote control cursor keys currently operational 0 Information display Displays the current status such as input name and sound mode name You can switch the information by pres...

Страница 9: ...ting video audio signals p 22 9 AV OUT jacks For outputting video audio to a recording device such as a VCR p 28 0 AUDIO jacks For connecting to an audio playback device and inputting audio signals p 25 A SUBWOOFER PRE OUT jack For connecting to a subwoofer with built in amplifier p 14 B MONITOR OUT jacks COMPONENT VIDEO jacks For connecting to a TV that supports component video and outputting vid...

Страница 10: ...f 8 SCENE keys Select the registered input source and sound program with one touch Also turns on the unit when it is in standby mode p 35 9 SETUP key Displays the setup menu p 69 0 Menu operation keys Cursor keys Select a menu or a parameter ENTER Confirms a selected item RETURN Returns to the previous screen A MODE key Switches between Stereo and Mono for FM radio reception p 46 Switches the iPod...

Страница 11: ...eo devices such as BD DVD players and audio devices such as CD players to the unit 5 Connecting the DAB FM antenna p 26 Connect the supplied DAB FM antenna to the unit 6 Connecting to a network p 27 Connect the unit to a network 7 Connecting recording devices p 28 Connect recording devices to the unit 8 Connecting the power cable p 28 After all the connections are complete plug in the power cable ...

Страница 12: ...at least 6 Speaker type Abbr Function Speaker system the number of channels 5 1 4 1 3 1 2 1 Front L 1 Produce front right left channel sounds stereo sounds Front R 2 Center 3 Produces center channel sounds such as movie dialogue and vocals Surround L 4 Produce surround right left channel sounds Surround R 5 Subwoofer 9 Produces LFE low frequency effect channel sounds and reinforces the bass parts ...

Страница 13: ...NS Placing speakers En 13 5 1 channel system 4 1 channel system 3 1 channel system 2 1 channel system 4 5 1 2 3 9 10 to 30 10 to 30 4 5 1 2 9 10 to 30 10 to 30 1 2 3 9 1 2 9 1 Speaker placement 2 3 4 5 6 7 8 9 10 ...

Страница 14: ...nnecting a subwoofer 5 1 channel system 2 Connecting speakers Caution Remove the unit s power cable from an AC wall outlet and turn off the subwoofer before connecting the speakers Ensure that the core wires of the speaker cable do not touch one another or come into contact with the unit s metal parts Doing so may damage the unit or the speakers If the speaker cables short circuit Check SP Wires w...

Страница 15: ...the speaker cable and twist the bare wires of the cable firmly together b Loosen the speaker terminal c Insert the bare wires of the cable into the gap on the side upper right or bottom left of the terminal d Tighten the terminal Using a banana plug Australia model only a Tighten the speaker terminal b Insert a banana plug into the end of the terminal Connecting the subwoofer with built in amplifi...

Страница 16: ... the jack use an HDMI cable For details on an MHL connection see MHL connection p 22 Video jacks COMPONENT VIDEO jacks Transmit video signals separated into three components luminance Y chrominance blue PB and chrominance red PR Use a component video cable with three plugs VIDEO jacks Transmit analog video signals Use a video pin cable Audio jacks OPTICAL jacks Transmit digital audio signals Use a...

Страница 17: ...atch TV Connect the set top box to the unit in the same way as playback devices p 22 If you will receive TV broadcasts only from the set top box you do not need to make an audio cable connection between the TV and the unit or configure the ARC setting Does your TV support Audio Return Channel ARC Does your TV support HDMI Control Does your TV have an HDMI input jack Connection Method 3 p 20 Connec...

Страница 18: ...r adjusting the TV volume with the TV remote control This completes the necessary settings If you select a TV program with the TV remote control the input source of the unit will be automatically switched to AV 4 and the TV audio will be played back on the unit If you cannot hear the TV s audio check that ARC p 76 in the Setup menu is set to On If HDMI Control does not work properly try turning of...

Страница 19: ...put to display video from the unit b Press SETUP c Use the cursor keys to select HDMI and press ENTER d Press ENTER again e Use the cursor keys q w to select HDMI Control and the cursor keys e r to select On as shown below f Press SETUP AV 1 AV 2 AV 3 AV 5 AV 6 OPTICAL COAXIAL COAXIAL OPTICAL TV COMPONENT VIDEO PB Y VIDEO A O AV 4 PR ANTENNA DAB FM 75 HDMI 1 BD DVD HDMI 2 HDMI 3 HDMI OUT ARC RADIO...

Страница 20: ...o input at the factory If you have connected any external device to the AV 4 jacks or if you want to use another input jack other than OPTICAL for connecting the TV use TV Audio Input p 75 in the Setup menu to change the TV audio input assignment To use the SCENE function p 35 you also need to change the input assignment for SCENE TV Connection Method 3 TV with HDMI input jacks Connect the TV to t...

Страница 21: ...ks To use the SCENE function p 35 you also need to change the input assignment for SCENE TV COMPONENT VIDEO connection with a component video cable VIDEO composite video connection with a video pin cable AV 2 AV 3 AV 5 AV 6 COAXIAL COAXIAL OPTICAL TV COMPONENT VIDEO VIDEO AV MONITOR OUT OUT AUDIO AV 4 PB Y PR ANTENNA DAB FM 75 HDMI 1 BD DVD HDMI 2 HDMI 3 HDMI 4 UT RADIO SUBWOOFER PRE OUT HDMI 5 MH...

Страница 22: ...5 the video audio played back on the mobile device will be output from the unit To watch videos input to the HDMI 5 MHL jack you need to connect your TV to the HDMI OUT jack of the unit p 17 to 20 You need to prepare an MHL cable that match the jack on your mobile device You can operate the mobile device using the menu operation keys external device operation keys and numeric keys on the remote co...

Страница 23: ...he unit p 21 Output jacks on video device Input jacks on the unit Video Audio Component video Digital optical AV 1 COMPONENT VIDEO OPTICAL Digital coaxial AV 2 COMPONENT VIDEO COAXIAL AV 1 AV 2 AV 3 AV 5 OPTICAL COAXIAL COAXIAL OPTICAL TV COMPONENT VIDEO PB Y VIDEO AV 4 PR D HDMI 1 BD DVD HDMI 2 HDMI OUT ARC COAXIAL OPTICAL PR PB Y COMPONENT VIDEO OPTICAL COAXIAL COMPONENT VIDEO PR PB Y AV 1 AV 2 ...

Страница 24: ... settings If you select AV 2 as the input source by pressing AV 2 the video audio played back on the video device will be output from the unit Output jacks on video device Input jacks on the unit Video Audio Video Audio HDMI Digital optical HDMI 1 5 AV 1 OPTICAL AV 4 OPTICAL Digital coaxial HDMI 1 5 AV 2 3 COAXIAL Analog stereo HDMI 1 5 AV 5 6 AUDIO AUDIO Component video Analog stereo AV 1 2 COMPO...

Страница 25: ... p 21 You need to prepare the video audio cables that match the output jacks on your device For details on how to connect an iPod or a USB storage device see Connecting an iPod p 50 or Connecting a USB storage device p 54 When USB is selected as the input source video signals input to the VIDEO AUX VIDEO jack are output from the MONITOR OUT VIDEO jack Audio output jacks on audio device Audio outpu...

Страница 26: ...ion or placement of the DAB FM antenna 5 Connecting the DAB FM antenna FRONT CENTER SURROUND AV 1 AV 2 AV 3 AV 5 AV 6 OPTICAL COAXIAL COAXIAL OPTICAL TV COMPONENT VIDEO COMPONENT VIDEO PB Y VIDEO AV MONITOR OUT OUT AUDIO AV 4 PR PB Y PR NETWORK ANTENNA DAB FM 75 SPEAKERS HDMI 1 BD DVD HDMI 2 HDMI 3 HDMI 4 HDMI OUT ARC RADIO SUBWOOFER PRE OUT HDMI 5 MHL DC OUT 5V 0 5A 5V 1A NET DAB FM antenna The u...

Страница 27: ... assigned to the unit in Information p 81 in the Setup menu Some security software installed on your PC or the firewall settings of network devices such as a router may block the access of the unit to the network devices or the Internet In these cases configure the security software or firewall settings appropriately Each server must be connected to the same subnet as the unit To use the service v...

Страница 28: ...use the AV OUT jacks only for connecting recording devices After all the connections are complete plug in the power cable 7 Connecting recording devices AV 2 AV 3 AV 5 AV 6 COAXIAL COAXIAL OPTICAL TV COMPONENT VIDEO VIDEO AV MONITOR OUT OUT AUDIO AV 4 PB Y PR ANTENNA DAB FM 75 HDMI 1 BD DVD HDMI 2 HDMI 3 HDMI 4 RADIO SUBWOOFER PRE OUT HDMI 5 MHL 5V 1A R L AUDIO AV OUT VIDEO V V L R L R The unit re...

Страница 29: ...g e E n g l i s h 日 本 語 F r a n ç a i s D e u t s c h E s p a ñ o l Р у с с к и й I t a l i a n o 中 文 S e t u p S p e a k e r H D M I S o u n d E C O F u n c t i o n N e t w o r k L a n g u a g e E n g l i s h 日 本 語 F r a n ç a i s D e u t s c h E s p a ñ o l Р у с с к и й I t a l i a n o 中 文 1 2 3 4 5 6 7 8 9 Language setting 10 SCENE RETURN VOLUME ENHANCER DIRECT HDMI MHL AV TUNER FM INFO MEMORY...

Страница 30: ...adjustable set it to maximum 4 Place the YPAO microphone at your listening position same height as your ears and connect it to the YPAO MIC jack on the front panel The following screen appears on the TV 10 Optimizing the speaker settings automatically YPAO VOLUME HIGH CUT CROSSOVER MIN MAX MIN MAX 9 1 2 3 9 4 5 YPAO microphone Listening position Ear height Place the YPAO microphone at your listeni...

Страница 31: ...ngs are given when operating with the front display use the cursor keys q w to check the other warning messages 6 To save the measurement results use the cursor keys e r to select SAVE and press ENTER The adjusted speaker settings are applied To finish the measurement without saving the result select CANCEL 7 Disconnect the YPAO microphone from the unit This completes optimization of the speaker s...

Страница 32: ...y E 1 No Front SP E 1 NO FRNT SP Front speakers are not detected Exit YPAO turn off the unit and then check the speaker connections E 2 No Sur SP E 2 NO SUR SP One of the surround speakers cannot be detected E 5 Noisy E 5 NOISY The noise is too loud Keep the room quiet and retry YPAO If you select PROCEED YPAO takes the measurement again and ignores any noise detected E 7 No MIC E 7 NO MIC The YPA...

Страница 33: ...rs on the front display Warning message Cause Remedy W 1 Out of Phase W 1 PHASE A speaker cable may be connected with the reverse polarity Check the cable connections of the problem speaker If the speaker is connected incorrectly exit YPAO turn off the unit and then reconnect the speaker cable Depending on the type of speakers or room environment this message may appear even if the speakers are co...

Страница 34: ...work AirPlay p 62 4 Press VOLUME to adjust the volume To mute the audio output press MUTE Press MUTE again to unmute To adjust the treble bass settings use the Option menu or TONE CONTROL on the front panel p 66 Basic playback procedure SCENE RETURN VOLUME ENHANCER DIRECT HDMI MHL AV TUNER FM INFO MEMORY DAB PRESET MOVIE MUSIC BD DVD MUTE ENTER TV TVVOL TV CH TOP MENU POP UP MENU DISPLAY SOURCE RE...

Страница 35: ...e after selecting the scene hold down the corresponding SCENE key and input selection key together for more than 3 seconds Once the setting is completed successfully SOURCE RECEIVER blinks twice If you have not registered the remote control code of the playback device yet see Registering the remote control codes for playback devices p 87 to register it Selecting the input source and favorite setti...

Страница 36: ...nabling Compressed Music Enhancer Press ENHANCER This mode lets you enjoy compressed music with additional depth and breadth p 41 You can also switch the sound programs and surround decoder by pressing PROGRAM on the front panel The sound mode can be applied separately to each input source When you play back audio signals with a sampling rate of higher than 96 kHz or playing back DTS Express the s...

Страница 37: ...ed widely to the left and right The restrained depth creates a clear and powerful space while also maintaining the articulation of the sounds and the separation of the channels SW C L SL SR R Sci Fi VOL Sound program category Sound program CINEMA DSP lights up Drama This program features stable reverberations that match a wide range of movie genres from serious dramas to musicals and comedies The ...

Страница 38: ...s if you are sitting in the front row in front of a small stage The Roxy Theatre This program creates the sound field of a 460 seat rock music concert venue in Los Angeles The listener s virtual seat is at the center left of the hall The Bottom Line This program creates the sound field at stage front in The Bottom Line a famous New York jazz club once The floor can seat 300 people to the left and ...

Страница 39: ...decode mode is enabled the unit produces stereo sound from the front speakers for 2 channel sources such as CDs and produces unprocessed multichannel sounds for multichannel sources 1 Press STRAIGHT Each time you press the key the straight decode mode is enabled or disabled SW C L SL SR R 3 Hall in Vienna VOL CINEMA DSP n lights up SW C L SL SR R STRAIGHT VOL SCENE RETURN VOLUME ENHANCER DIRECT HD...

Страница 40: ...g the tone control Operating the on screen and Option menus Viewing information on the front display when not in operation bPro Logic Uses the Dolby Pro Logic decoder suitable for all sources bPLII Movie Use the Dolby Pro Logic II decoder suitable for movies bPLII Music Use the Dolby Pro Logic II decoder suitable for music bPLII Game Use the Dolby Pro Logic II decoder suitable for games Neo 6 Cine...

Страница 41: ...MA You can enjoy surround or sound field effects like a multichannel speaker system with stereo headphones by connecting the headphones to the PHONES jack and selecting a sound program or a surround decoder SW C L SL SR ENHANCER R Enhancer On VOL ENHANCER lights up SCENE RETURN VOLUME ENHANCER DIRECT HDMI MHL AV TUNER FM INFO MEMORY DAB PRESET MOVIE MUSIC BD DVD MUTE ENTER TV TVVOL TV CH TOP MENU ...

Страница 42: ...adio stations are stored select Init Scan p 65 in the Option menu If you perform an initial scan again the DAB radio stations currently registered to the preset numbers will be cleared Selecting a DAB radio station for reception You can select a DAB radio station from the stations stored by the initial scan 1 Press DAB to select the DAB band 2 Press TUNING repeatedly to select a DAB radio station ...

Страница 43: ...Tune into a registered DAB radio station by selecting its preset number 1 Press DAB to select the DAB band 2 Press PRESET repeatedly to select the desired DAB radio station You can also enter a preset number 01 to 40 directly by using the numeric keys after pressing PRESET once No Presets appears when no DAB radio stations are registered Wrong Num appears when an invalid number is entered Empty ap...

Страница 44: ...tation to be cleared VOL SW L SL C SR R 01 Cleared Service Label Station name DLS Dynamic Label Segment Information on the current station Ensemble Label Ensemble name Program Type Station genre Date And Time Current date and time Audio Mode Audio mode monaural stereo and bit rate CH Label Freq Channel label and frequency Signal Quality Signal reception quality 0 none to 100 best DSP Program Sound...

Страница 45: ...2 MHz 11C 188 928 MHz 7A 222 064 MHz 11D 190 640 MHz 7B 223 936 MHz 12A 192 352 MHz 7C 225 648 MHz 12B 194 064 MHz 7D 227 360 MHz 12C 195 936 MHz 8A 229 072 MHz 12D 197 648 MHz 8B 230 784 MHz 13A 199 360 MHz 8C 232 496 MHz 13B 201 072 MHz 8D 234 208 MHz 13C 202 928 MHz 9A 235 776 MHz 13D 204 640 MHz 9B 237 488 MHz 13E 206 352 MHz 9C 239 200 MHz 13F SCENE RETURN VOLUME ENHANCER DIRECT HDMI MHL AV T...

Страница 46: ... signal reception for an FM radio station is unstable switching to monaural may improve it You can watch videos input from external devices while listening to radio by selecting the video input jack in Video Out p 68 in the Option menu Listening to FM radio SW C L SL SR R VOL SBL SBR FM 87 50MHz VOL STEREO TUNED SW C L SL SR R FM 98 50MHz SCENE RETURN VOLUME ENHANCER DIRECT HDMI MHL AV TUNER FM IN...

Страница 47: ...ng a frequency for reception p 46 to tune into the desired FM radio station 2 Hold down MEMORY for more than 2 seconds The first time that you do register an FM radio station the selected radio station will be registered to the preset number 01 Thereafter each radio station you select will be registered to the next empty unused preset number after the most recently registered number To select a pr...

Страница 48: ...eset station is cleared Cleared appears and then the next in use preset number is displayed 5 Repeat step 4 until all desired preset stations are cleared 6 To exit from the menu press OPTION STEREO VOL TUNED SW C L R SL SR 01 FM 98 50MHz PRESET VOL Clear Preset STEREO TUNED VOL SW L SL C SR R 01 FM 98 50MHz Preset station to be cleared VOL SW L SL C SR R 01 Cleared SCENE RETURN VOLUME ENHANCER DIR...

Страница 49: ... provide the Radio Data System service Program Service Program service name Program Type Current program type Radio Text Information on the current program Clock Time Current time DSP Program Sound mode name Audio Decoder Decoder name Frequency Frequency STEREO VOL TUNED SW C L R SL SR Program Type INFO Item name STEREO VOL TUNED SW C L R SL SR CLASSICS 9850 Information SCENE RETURN VOLUME ENHANCE...

Страница 50: ...de p 52 Connecting an iPod Connect your iPod to the unit with the USB cable supplied with the iPod 1 Connect the USB cable to the iPod 2 Connect the USB cable to the USB jack The iPod charges while it is connected to the unit If you set the unit to standby mode while the iPod is charging the iPod continues to charge up to 4 hours If Network Standby p 82 in the Setup menu is set to On it continues ...

Страница 51: ... 4 Status indicators Display the current repeat shuffle settings p 53 and playback status such as play pause 5 Operation menu Press the cursor key r and then use the cursor keys q w to select an item Press ENTER to confirm the selection 1 2 M u s i c V i d e o s i P o d T o p A r t i s t N a m e A l b u m N a m e S o n g T i t l e 2 3 0 i P o d N o w P l a y i n g 5 1 0 D I S P L A Y t o L i s t B...

Страница 52: ...m N a m e S o n g T i t l e 2 3 0 5 1 0 D I S P L A Y t o L i s t B r o w s e Operational remote control keys Function Cursor keys Select an item ENTER Confirms the selection RETURN Returns to the previous screen External device operation keys a Starts playback or stops playback temporarily d s Stops playback f Skips forward backward g h Searches forward backward while holding down j SCENE RETURN ...

Страница 53: ...c appears in the TV screen All All Plays back all songs repeatedly v appears in the TV screen Shuffle Shuffle Off Off Turns off the shuffle function Songs Songs Plays back songs in random order x appears in the TV screen Albums Albums Plays back albums in random order x appears in the TV screen SCENE RETURN VOLUME ENHANCER DIRECT HDMI MHL AV TUNER FM INFO MEMORY DAB PRESET MOVIE MUSIC BD DVD MUTE ...

Страница 54: ...and start playback You can control the USB memory device with the menu displayed on the TV screen Operations with TV screen are available only when your TV is connected to the unit via HDMI If not carry out operations while viewing the front display _ underscore will be displayed for characters not supported by the unit 1 Press USB to select USB as the input source The browse screen is displayed o...

Страница 55: ...0 U S B N o w P l a y i n g D I S P L A Y t o L i s t B r o w s e Icon Function Moves 10 pages backward Moves to the previous page of the list Moves to the next page of the list Moves 10 pages forward Moves to the playback screen 1 4 5 2 3 D I S P L A Y t o N o w P l a y i n g 1 1 2 B l u e s C l a s s i c a l E l e c t r o n i c a J a z z P o p R o c k S o u n d t r a c k S p e a k i n g U S B T ...

Страница 56: ... y i n g A r t i s t N a m e A l b u m N a m e S o n g T i t l e 2 3 0 D I S P L A Y t o L i s t B r o w s e Item Setting Function Repeat Repeat Off Off Turns off the repeat function One One Plays back the current song repeatedly c appears on the TV screen All All Plays back all songs in the current album folder repeatedly v appears on the TV screen Shuffle Shuffle Off Off Turns off the shuffle fu...

Страница 57: ...settings Playback of PC music contents Follow the procedure below to operate the PC music contents and start playback You can control the PC NAS with the menu displayed on the TV screen Operations with TV screen are available only when your TV is connected to the unit via HDMI If not carry out operations while viewing the front display _ underscore will be displayed for characters not supported by...

Страница 58: ... o w P l a y i n g D I S P L A Y t o L i s t B r o w s e Icon Function Moves 10 pages backward Moves to the previous page of the list Moves to the next page of the list Moves 10 pages forward Moves to the playback screen 1 4 5 2 3 D I S P L A Y t o N o w P l a y i n g 1 1 4 B l u e s C l a s s i c a l E l e c t r o n i c a J a z z P o p R o c k S o u n d t r a c k S p e a k i n g S E R V E R N A S...

Страница 59: ...arily f Skips forward backward g 1 2 S E R V E R N o w P l a y i n g A r t i s t N a m e A l b u m N a m e S o n g T i t l e 2 3 0 D I S P L A Y t o L i s t B r o w s e Item Setting Function Repeat Repeat Off Off Turns off the repeat function One One Plays back the current song repeatedly c appears on the TV screen All All Plays back all songs in the current album folder repeatedly v appears on th...

Страница 60: ...ons to the Bookmarks folder by selecting NET RADIO as the input source on the unit and then accessing the following website with the web browser on your PC To use this feature you need the vTuner ID of the unit and your e mail address to create your personal account You can check the vTunerID MAC address of the unit in Information p 81 in the Setup menu http yradio vtuner com Listening to Internet...

Страница 61: ... 3 D I S P L A Y t o N o w P l a y i n g 1 7 B o o k m a r k s L o c a t i o n s G e n r e s N e w S t a t i o n s P o p u l a r S t a t i o n s P o d c a s t s H e l p N E T R A D I O T o p 1 2 S t a t i o n N a m e A l b u m N a m e S o n g T i t l e 2 3 0 N E T R A D I O N o w P l a y i n g D I S P L A Y t o L i s t B r o w s e SCENE RETURN VOLUME ENHANCER DIRECT HDMI MHL AV TUNER FM INFO MEMOR...

Страница 62: ...unit the AirPlay icon appears If the icon does not appear check whether the unit and PC iPod are connected to the router properly 2 On the iTunes iPod click tap the AirPlay icon and select the unit network name of the unit as the audio output device 3 Select a song and start playback The unit automatically selects AirPlay as the input source and starts playback The playback screen is displayed on ...

Страница 63: ...en you use iTunes iPod controls to adjust volume the volume may be unexpectedly loud This could result in damage to the unit or speakers If the volume suddenly increases during playback stop playback on the iTunes iPod immediately 2 1 A r t i s t N a m e A l b u m N a m e S o n g T i t l e 2 3 0 A i r P l a y N o w P l a y i n g 5 3 0 External device operation keys Function a Resumes playback from...

Страница 64: ...me DSP Program sound mode name Audio Decoder decoder name NET RADIO Song song title Album album name Station station name DSP Program sound mode name Audio Decoder decoder name TUNER DAB See Displaying the DAB information p 44 for details TUNER FM Frequency frequency DSP Program sound mode name Audio Decoder decoder name U K and Europe models only Radio Data System data is also available when the ...

Страница 65: ...ontrol Adjusts the high frequency range and low frequency range of sounds 66 DSP Surround DSP Surround DSP Level DSP Level Adjusts the sound field effect level 66 Adaptive DRC A DRC Sets whether the dynamic range from maximum to minimum is automatically adjusted when the volume is adjusted 66 Enhancer Enhancer Enables disables Compressed Music Enhancer 66 Volume Trim Volume Trim Input Trim In Trim...

Страница 66: ...hen the volume level is adjusted When it is set to On it is useful for listening to playback at a low volume at night Settings If On is selected the dynamic range becomes narrow at a low volume and wide at a high volume Enhancer Enhancer Enables disables Compressed Music Enhancer p 41 This setting is applied separately to each input source You can also use ENHANCER on the remote control to enable ...

Страница 67: ...d in Lipsync p 77 in the Setup menu This setting is applied separately to each input source Settings Default AirPlay Off Off Others On On Signal Info Signal Info Displays information about the video audio signal Choices To switch the information on the front display press the cursor keys q w repeatedly Off Off Disables the Lipsync adjustment On On Enables the Lipsync adjustment Format FORMAT Audio...

Страница 68: ...input audio through a digital coaxial jack Select AV 2 or AV 3 and connect the device to the unit s corresponding audio jacks with a digital coaxial cable To input audio through analog audio jacks Select AV 5 AV 6 or AUDIO and connect the device to the unit s corresponding audio jacks with a stereo pin cable Video Out Video Out Selects a video to be output with radio sounds Settings Volume Interlo...

Страница 69: ...eys to select an item and press ENTER To return to the previous screen during menu operations press RETURN 4 Use the cursor keys e r to select a setting and press ENTER 5 To exit from the menu press SETUP Configuring various functions Setup menu S e t u p S p e a k e r H D M I S o u n d E C O F u n c t i o n N e t w o r k L a n g u a g e C o n f i g u r a t i o n D i s t a n c e L e v e l E q u a ...

Страница 70: ...s whether to output videos audio input through HDMI jacks to the TV when the unit is in standby mode 75 TV Audio Input Selects an audio input jack of the unit to be used for TV audio input 75 Standby Sync Selects whether to use HDMI control to link the standby behavior of the TV and the unit 76 ARC Enables disables ARC 76 SCENE Enables disables SCENE link playback 76 Sound DSP Parameter CINEMA DSP...

Страница 71: ...Information Displays the network information on the unit 81 IP Address Configures the network parameters such as IP address 81 MAC Address Filter Sets the MAC address filter to limit access to the unit from other network devices 82 DMC Control Selects whether to allow a DLNA compatible Digital Media Controller DMC to control playback 82 Network Standby Selects whether to enable disable the functio...

Страница 72: ...o u n d E C O F u n c t i o n N e t w o r k L a n g u a g e C o n f i g u r a t i o n D i s t a n c e L e v e l E q u a l i z e r T e s t T o n e Small default Select this option for small speakers The subwoofer will produce front channel low frequency components configurable in Crossover Large Select this option for large speakers The front speakers will produce all of the front channel frequency...

Страница 73: ...r set the volume to half and crossover frequency to maximum Subwoofer Phase Sets the phase of the subwoofer When the bass sound is lacking or unclear switch the subwoofer phase Settings Extra Bass Sets the speakers to produce the front channel low frequency components Settings This setting is not available when Subwoofer is set to None or when Front is set to Small Normal default Does not reverse ...

Страница 74: ...e YPAO has been performed p 30 By using test tones you can make an adjustment while confirming its effect Manual equalizer adjustment 1 Set EQ Select to GEQ 2 Use the cursor keys q w to select Channel and the cursor keys e r to select the desired speaker channel 3 Use the cursor keys q w to select the desired band frequency and the cursor keys e r to adjust the gain Setting range 6 0 dB to 6 0 dB ...

Страница 75: ...Settings This setting is available only when HDMI Control is set to Off TV Audio Input Selects an audio input jack of the unit to be used for TV audio input when HDMI Control is set to On The unit s input source automatically switches to TV audio when the TV input is switched to its built in tuner Settings AV 1 6 AUDIO Default AV 4 When using ARC to input TV audio to the unit you cannot use the in...

Страница 76: ...igures the audio output settings DSP Parameter Configures the surround decoder settings CINEMA DSP 3D Mode Enables disables CINEMA DSP 3D p 39 If this function is set to On CINEMA DSP 3D functions with the selected sound programs except 2ch Stereo and 5ch Stereo Settings Panorama Enables disables the broadening effect of the front sound field When this function is enabled you can wrap front right ...

Страница 77: ... when Neo 6 Music is selected Setting range 0 0 to 1 0 Default 0 3 Lipsync Adjusts the delay between video and audio output You can enable disable the Lipsync function by input sources in Lipsync p 67 in the Option menu Select Selects the method to adjust the delay between video and audio output Setting range Select is automatically set to Manual depending on the TV connected to the unit Adjustmen...

Страница 78: ...down starts in the front display Maximum default Produces audio without adjusting the dynamic range Standard Optimizes the dynamic range for regular home use Min Auto Sets the dynamic range for clear sound even at night or at low volumes When playing back Dolby TrueHD signals the dynamic range is automatically adjusted based on the input signal information Off default Sets the level to the volume ...

Страница 79: ...splayed on the front display Input sources HDMI 1 5 AV 1 6 AUDIO USB V AUX Procedure 1 Use the cursor keys q w to select an input source to be renamed and press ENTER To select a name from the presets use the cursor keys q w to select an input source and the cursor keys e r to select a preset name 2 Use the cursor keys e r to move the edit position and the cursor keys q w to select a character 3 T...

Страница 80: ...en Memory Guard is set to On the lock icon o is displayed on the menu screen DC OUT Configures the DC OUT jack setting Power Mode Selects how to supply power to the Yamaha AV accessory connected to the DC OUT jack Settings Off default Does not protect the settings On Protects the settings until Off is selected o M e m o r y G u a r d M e m o r y G u a r d O n B a c k R E T U R N Icon Continuous de...

Страница 81: ...The IP address of the primary DNS server DNS Server S The IP address of the secondary DNS server vTuner ID The ID of the Internet radio vTuner S e t u p S p e a k e r H D M I S o u n d E C O F u n c t i o n N e t w o r k L a n g u a g e I n f o r m a t i o n I P A d d r e s s M A C A d d r e s s F i l t e r D M C C o n t r o l N e t w o r k S t a n d b y N e t w o r k N a m e N e t w o r k U p d a...

Страница 82: ...control playback of the unit from DMCs such as Windows Media Player 12 on the same network Network Standby Selects whether the unit can be turned on from other network devices network standby Settings Network Name Edits the network name the unit s name on the network displayed on other network devices Procedure 1 Press ENTER to enter the name edit screen 2 Use the cursor keys e r to move the edit ...

Страница 83: ... system ID number Language Select an on screen menu language Settings Japanese and Chinese characters used in content information such as song titles cannot be displayed The information on the front display is provided in English only English default English 日本語 Japanese French German Spanish Russian Italian Chinese S e t u p E n g l i s h 日 本 語 F r a n ç a i s D e u t s c h E s p a ñ o l Р у с с ...

Страница 84: ...ing down the cursor key e hold down SCENE BD DVD for more than 3 seconds To select ID2 while holding down the cursor key e hold down SCENE TV for more than 3 seconds The registered remote control codes p 86 are not cleared even if you change the remote control ID Switching the video signal type TV FORMAT Switch the video signal type of HDMI output so that it matches to the format of your TV Since ...

Страница 85: ...fore updating the firmware 1 Press STRAIGHT repeatedly to select USB or NETWORK and press INFO to start firmware update Choices If the unit detects newer firmware over the network the envelope icon p will appear in the Network Update screen In this case you can also update the unit s firmware by following the procedure in Updating the unit s firmware via the network p 89 Checking the firmware vers...

Страница 86: ...iple remote control codes register the first code in the list If that does not work try the other codes 2 Press CODE SET using a pointed object such as the tip of a ballpoint pen SOURCE RECEIVER blinks twice Perform each of the following steps within 1 minute Otherwise the setting will be canceled If this happens repeat from Step 2 3 Press TV z 4 Use the numeric keys to enter the 4 digit remote co...

Страница 87: ...it using the following keys after selecting the input source or scene By pressing SOURCE RECEIVER you can switch the devices the unit or external device that are operated by the menu operation keys DISPLAY and numeric keys You can operate the unit when SOURCE RECEIVER lights up in orange and an external device when SOURCE RECEIVER lights up in green For example if you register the remote control c...

Страница 88: ...peat from Step 1 To reset the remote control to factory default settings a Press CODE SET using a pointed object such as the tip of a ballpoint pen b Press SOURCE RECEIVER c Use the numeric keys to enter 9981 SCENE RETURN VOLUME ENHANCER DIRECT HDMI MHL AV TUNER FM INFO MEMORY DAB PRESET MOVIE MUSIC BD DVD MUTE ENTER TV TVVOL TV CH TOP MENU POP UP MENU DISPLAY SOURCE RECEIVER CODE SET OPTION SETUP...

Страница 89: ...bout 20 minutes or more depending on your Internet connection speed If the unit is connected to the wireless network via a wireless network adapter network update may not be possible depending on the condition of the wireless connection In this case update the firmware using the USB memory device p 85 To perform the following procedure your TV must be connected to the unit via HDMI If not perform ...

Страница 90: ...he HDMI Control link setup This setup is required every time you add a new HDMI Control compatible device to your system For information on how HDMI Control works between your TV and playback devices refer to the instruction manuals for each device I want to display a device name or a manufacture name on the front display when selecting an input source By default input source names such as HDMI 1 ...

Страница 91: ...ctric shock such as lightning or excessive static electricity or to a drop in the power supply voltage Hold down z power on the front panel for more than 10 seconds to initialize and reboot the unit If the problem persists disconnect the power cable from the AC wall outlet and plug it again The power turns off standby mode immediately The unit was turned on while a speaker cable was shorted Twist ...

Страница 92: ... control ID of the unit or the remote control p 84 External devices cannot be controlled using the remote control The remote control is set to control the unit Press SOURCE RECEIVER to set the remote control to control external devices the key lights up in green The corresponding remote control code is not set properly Set the remote control code again p 86 Even if the remote control code is regis...

Страница 93: ... The volume of the speaker is set too low Perform YPAO p 30 or use Level in the Setup menu to adjust the speaker volume p 74 The speaker cable connecting the unit and the speaker is defective If there is no problem with the connection replace with another speaker cable The speaker is malfunctioning To check it replace with another speaker If the problem persists the unit may be malfunctioning No s...

Страница 94: ...urn on all devices connected to the unit s output jacks Problem Cause Remedy No video Another input source is selected on the unit Select an appropriate input source with the input selection keys Another input source is selected on the TV Switch the TV input to display the video from the unit The video signal output from the unit is not supported by the TV Check the video output setting of the pla...
Страница 95: ...r area is too far from the DAB station transmitter Use an outdoor antenna We recommend using a sensitive multi element antenna DAB information is not available or is inaccurate The selected DAB radio station may be temporarily out of service or may not provide information Contact the DAB broadcaster No DAB radio sound The selected DAB radio station may be temporarily out of service Try the station...

Страница 96: ...cess to the unit p 82 The files in the PC cannot be viewed or played back The files are not supported by the unit or the media server Use the file format supported by both the unit and the media server For information about the file formats supported by the unit see Playing back music stored on media servers PCs NAS p 57 The Internet radio cannot be played The selected Internet radio station is cu...

Страница 97: ...mobile device No content There are no playable files in the selected folder Select a folder that contains files supported by the unit No device The unit cannot detect the USB device Turn off the unit and reconnect your USB device If the problem persists try another USB device The unit cannot detect the iPod Turn off the iPod and then turn it on again Please wait The unit is preparing for connectin...

Страница 98: ...on the Internet and secondary audio on BD Blu ray discs DTS HD High Resolution Audio DTS HD High Resolution Audio is a compressed digital audio format developed by DTS Inc that supports 7 1 channel and 96 kHz 24 bit audio DTS HD High Resolution Audio remains fully compatible with the existing multichannel audio systems that support DTS Digital Surround This technology is used for audio on BD Blu r...

Страница 99: ...eo signal With the component video signal system the video signal is separated into the Y signal for luminance and the Pb and Pr signals for chrominance Color can be reproduced more faithfully with this system because each of these signals is independent Composite video signal With the composite video signal system color brightness and synchronization data signals are combined and transmitted with...

Страница 100: ...ensive 3D sound fields in a listening room Compressed Music Enhancer The Compressed Music Enhancer feature compensates for missing harmonics in compression music formats such as MP3 As a result this technology provides improved performance for the overall sound system SILENT CINEMA Yamaha has developed a natural realistic sound effect DSP algorithm for headphones Parameters for headphones have bee...

Страница 101: ...g mute Switching to input audio from the TV when the TV input is switched to its built in tuner Switching to input video audio from the selected playback device Switching between audio output devices the unit or TV speaker Example Operations available from the unit s remote control Starting playback on the playback device and turning on the TV with a scene selection p 35 Switching the TV input to ...

Страница 102: ...e unit 6 Check the followings On the unit The input to which the playback device is connected is selected If not select the input source manually On the TV The video from the playback device is displayed 7 Check that the unit is properly synchronized with the TV by turning off the TV or adjusting the TV volume with the TV remote control If HDMI Control does not work properly try unplugging the TV ...

Страница 103: ...bitstream audio signals directly does not decode the bitstream signals on the playback device For details refer to the instruction manual for the playback device Audio signal type Audio signal format Compatible media example 2ch Linear PCM 2ch 32 to 192 kHz 16 20 24 bit CD DVD Video DVD Audio Multichannel Linear PCM 8ch 32 to 192 kHz 16 20 24 bit DVD Audio BD Blu ray disc HD DVD DSD 2 to 5 1ch 2 8...

Страница 104: ...r connections Reference diagram rear panel FRONT CENTER SURROUND AV 1 AV 2 AV 3 AV 5 AV 6 OPTICAL COAXIAL COAXIAL OPTICAL TV COMPONENT VIDEO COMPONENT VIDEO PB Y VIDEO AV MONITOR OUT OUT AUDIO AV 4 PR PB Y PR NETWORK ANTENNA DAB FM 75 SPEAKERS HDMI 1 BD DVD HDMI 2 HDMI 3 HDMI 4 HDMI OUT ARC RADIO SUBWOOFER PRE OUT HDMI 5 MHL DC OUT 5V 0 5A 5V 1A NET ...

Страница 105: ...e iPod iPod nano and iPod touch are trademarks of Apple Inc registered in the U S and other countries MPEG Layer 3 audio coding technology licensed from Fraunhofer IIS and Thomson This receiver supports network connections HDMI the HDMI Logo and High Definition Multimedia Interface are trademarks or registered trademarks of HDMI Licensing LLC in the United States and other countries MHL and the MH...

Страница 106: ... Digital Plus Dolby Digital DTS HD Master Audio DTS HD High Resolution Audio DTS Express DTS DSD 2 ch to 6 ch PCM 2 ch to 8 ch Max 192 kHz 24 bit Content Protection HDCP compatible Link Function CEC supported MHL Video Format Repeater Mode VGA 480i 60 Hz 576i 50 Hz 480p 60 Hz 576p 50 Hz 720p 60 Hz 50 Hz 1080i 60 Hz 50 Hz 1080p 30 Hz 25 Hz 24 Hz Audio Format PCM 2 ch to 8 ch Max 192 kHz 24 bit Curr...

Страница 107: ...le Boost Cut 6 dB 0 5 dB Step at 20 kHz Treble Turnover 3 5 kHz Filter Characteristics fc 40 60 80 90 100 110 120 160 200 Hz H P F Front Center Surround 12 dB oct L P F Subwoofer 24 dB oct Video Section Video Signal Type PAL Video Signal Level Composite 1 Vp p 75 Component Y 1 Vp p 75 Pb Pr 0 7 Vp p 75 Video Maximum Input Level 1 5 Vp p or more Video Signal to Noise Ratio 50 dB or more Monitor Out...

Страница 108: ...Chamber sound program 38 CHAN Signal Info Option menu 67 Channel Signal Info Option menu 67 Check SP Wires error indication 97 CINEMA DSP 37 CINEMA DSP 3D 39 CINEMA DSP 3D Mode DSP Parameter Setup menu 76 Clear Preset DAB radio Option menu 44 Clear Preset FM radio Option menu 48 Clock Time Radio Data System 49 COAXIAL jack 16 Component video cable 16 Component video connection video device 23 COMP...

Страница 109: ...enu 75 HDMI signal compatibility 103 Headphones 41 High definition audio 103 High speed HDMI cable 16 I In Trim Volume Trim Option menu 67 Indicator part names and functions 8 INFO key 7 10 Information Network Setup menu 81 Information display front display 8 Information switching front display 64 INIT ADVANCED SETUP menu 85 Init Scan DAB radio Option menu 42 Initial Volume Volume Setup menu 78 In...

Страница 110: ...e connection 28 RemID Mismatch error indication 97 Remote control part names and functions 10 Remote control code registration playback device 87 Remote control code registration TV 86 Remote Control Code Search 86 87 Remote control ID setting 84 Remote control ID setting remote control 84 Remote control sensor 7 Remote control signal transmitter remote control 10 REMOTE ID ADVANCED SETUP menu 84 ...

Страница 111: ...V connection TV without HDMI input jacks 21 TV FORMAT ADVANCED SETUP menu 84 TV operation remote control 86 TV operation key remote control 10 U Unable to play error indication 97 UPDATE ADVANCED SETUP menu 85 USB jack 7 USB mass storage class device 54 USB storage device connection 54 USB storage device content playback 54 User Cancel YPAO error message 32 V V IN Signal Info Option menu 67 V OUT ...

Страница 112: ... 2013 Yamaha Corporation YF215A0 EN ...

Отзывы: