background image

51

ADDITIONAL

INFORMA

TION

English

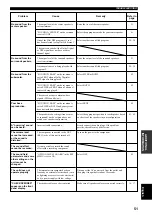
Problem

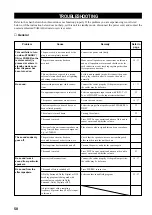
No sound from the
center speaker.

No sound from the
surround speakers.

No sound from the
subwoofer.

Poor bass
reproduction.

A “humming” sound
can be heard.

The volume level
cannot be increased,
or the sound is
distorted.

The sound effect
cannot be recorded.

The sound field
parameters and some
other settings on the
unit cannot be
changed.

The unit does not
operate properly.

“CHECK SP WIRES”
appears on the front
panel display.

Cause

The output level of the center speaker is
set to minimum.

“SOUND 1A CENTER” on the set menu
is set to NONE.

One of the HiFi DSP programs (1 to 4)
has been selected (except for 5ch Stereo).

The source encoded with a Dolby Digital
or DTS signal does not have a center
channel signal.

The output level of the surround speakers
is set to minimum.

A monaural source is being played with
program 9.

“SOUND 1D BASS” on the set menu is
set to FRNT when a Dolby Digital or
DTS signal is being played.

“SOUND 1D BASS” on the set menu is
set to SWFR or FRNT when a 2-channel
source is being played.

The source does not contain low bass
signals (90 Hz and below).

“SOUND 1D BASS” on the set menu is
set to SWFR or BOTH and your system
does not include a subwoofer.

The speaker mode settings (front, center
or surround) on the set menu does not
match your speaker configuration.

Incorrect cable connections.

The component connected to the OUT
(REC) jacks of this unit is turned off.

It is not possible to record the sound
effect with a recording component.

“OPTION 2 MEM. GUARD” in the SET
MENU is set to ON.

The internal microcomputer has been
frozen by an external electric shock (such
as lightning or excessive static electricity)
or by a power supply with low voltage.

The speaker cables are short circuited.

Remedy

Raise the level of the center speaker.

Select the appropriate mode for your center speaker.

Select another sound field program.

Raise the output level of the surround speakers.

Select another sound field program.

Select SWFR or BOTH.

Select BOTH.

Select FRNT.

Select the appropriate position for each speaker based
on the size of the speakers in your configuration.

Firmly connect the audio plugs. If the problem
persists, the cables may be defective.

Turn on the power to the component.

Select OFF.

Disconnect the AC power cord from the outlet and
then plug it in again after about 30 seconds.

Make sure all speaker cables are connected correctly.

Refer to

page

21

41

28 – 30

21

28 – 30

42

42

42

41 – 42

45

16 – 17

TROUBLESHOOTING
Содержание RX-V357

Страница 1: ...BOURG 77312 MARNE LA VALLEE CEDEX02 FRANCE YAMAHA ELECTRONICS UK LTD YAMAHA HOUSE 200 RICKMANSWORTH ROAD WATFORD HERTS WD18 7GQ ENGLAND YAMAHA SCANDINAVIA A B J A WETTERGRENS GATA 1 BOX 30053 400 43 VÄSTRA FRÖLUNDA SWEDEN YAMAHA MUSIC AUSTRALIA PTY LTD 17 33 MARKET ST SOUTH MELBOURNE 3205 VIC AUSTRALIA Printed in China WE59660 2005 All rights reserved OWNER S MANUAL MODE D EMPLOI BEDIENUNGSANLEITU...

Страница 2: ...tlet until all connections are complete 8 Do not operate this unit upside down It may overheat possibly causing damage 9 Do not use force on switches knobs and or cords 10 When disconnecting the power cord from the wall outlet grasp the plug do not pull the cord 11 Do not clean this unit with chemical solvents this might damage the finish Use a clean dry cloth 12 Only voltage specified on this uni...

Страница 3: ...EMA DSP 29 CINEMA DSP Programs 29 Sound field effects 31 TUNING 32 Presetting stations 33 Selecting preset stations 35 RECEIVING RADIO DATA SYSTEM 36 Description of Radio Data System data 36 Changing the Radio Data System mode 36 PTY SEEK function 37 EON function 37 SLEEP TIMER 38 RECORDING 39 ADVANCED OPERATION SET MENU 40 Set menu list 40 Adjusting the items on the set menu 40 SOUND 1 SPEAKER SE...

Страница 4: ...FM Tuner 40 Station random access preset tuning Automatic preset tuning Preset station shifting capability Preset editing About this manual y indicates a tip for your operation Some operations can be performed by using either the buttons on the main unit or on the remote control In cases when the button names differ between the main unit and the remote control the button name on the remote control...

Страница 5: ... VOLUME POWER 3 Insert the two batteries supplied AA R06 UM 3 according to the polarity markings on the inside of the battery compartment 4 Put the cover back into place Notes on batteries Change all of the batteries if you notice a decrease in the operating range of the remote control Do not use old batteries together with new ones Do not use different types of batteries such as alkaline and mang...

Страница 6: ...m the remote control 3 Front panel display Shows information about the operational status of the unit 4 PRESET TUNING Switches the function of PRESET TUNING l h between selecting a preset station number and tuning the colon turns on or off EDIT This button is also used to exchange the assignment of two preset stations with each other 5 FM AM Switches the reception band between FM and AM 6 A B C D ...

Страница 7: ... to 10 dB y PROGRAM l h Use to select sound field programs u INPUT MODE Sets the priority for the types of input signals AUTO DTS ANALOG received when one component is connected to two types of input jacks You cannot set priority for an audio sources if you have selected 6CH INPUT as the input source i INPUT l h Selects the input source you want to listen to or watch o 6CH INPUT Selects the audio ...

Страница 8: ...ress again to restore the audio output to the previous volume level 8 LEVEL Selects the effect speaker channel to adjust 9 PROG Use to select sound filed programs 0 Multi control section Use to select and adjust sound field program parameters or SET MENU items q POWER Turns the unit on or sets it in standby mode w 6CH IN Selects the audio source connected to the 6CH IN jacks e PRESET Select preset...

Страница 9: ...pill water or other liquids on the remote control Do not drop the remote control Do not leave or store the remote control in the following types of conditions high humidity such as near a bath high temperature such as near a heater or stove extremely low temperature dusty places CONTROLS AND FUNCTIONS Approximately 6 m r SLEEP Sets the sleep timer t NIGHT Sets the unit in night listening mode y ST...

Страница 10: ... changing settings w SP A B indicator Lights up to indicate which set of front speakers is selected e NIGHT indicator Lights up when the unit is set to night listening mode r SLEEP indicator Lights up while the sleep timer is on t HiFi DSP indicator Lights up when you select a HiFi DSP sound field program y CINEMA DSP indicator Lights up when you select a CINEMA DSP sound field program u Radio Dat...

Страница 11: ...the left channel L right channel R red and black properly Some components require different connection methods and have different jack names Refer to the operation instructions for each component you wish to connect to this unit After you have completed all connections check them again to make sure they are correct The jack names correspond to the names on the input selector Connecting to digital ...

Страница 12: ...nitor DVD player digital TV and cable TV to this unit using the COMPONENT VIDEO connections see page 11 Connecting another video component Connect the video signal output jack on your component to the VIDEO jack on this unit Connect the audio signal output jacks on the component to the AUDIO jacks on this unit Connecting a recording component Connect the audio signal input jacks on your video comp...

Страница 13: ...g your video monitor and video source components to this unit using COMPONENT VIDEO connections Note If you connect your video monitor to this unit using a COMPONENT VIDEO connection connect your video source components such as a DVD player or digital TV to this unit using COMPONENT VIDEO connections indicates component video cables DVD player Digital TV cable TV Video monitor CONNECTIONS ...

Страница 14: ...his unit to connect to a CD player that does not have a COAXIAL DIGITAL OUTPUT jack or to record from CD players Connecting a CD recorder or MD recorder Connect the input jacks on your CD recorder or MD recorder to the MD CD R OUT REC jacks Connect the output jacks on your CD recorder or MD recorder to the MD CD R IN PLAY jacks to play a source from your recording component CD player CD recorder o...

Страница 15: ...one If you experience poor reception quality an outdoor antenna may improve the quality Consult the nearest authorized YAMAHA dealer or service center about the outdoor antennas Ground GND terminal For maximum safety and minimum interference connect the antenna GND terminal to a good earth ground A good earth ground is a metal stake driven into moist earth Indoor FM antenna included AM loop antenn...

Страница 16: ...CD player Notes When you select 6CH INPUT as the input source this unit automatically turns off the digital sound field processor and you cannot select sound field programs When headphones are used only front L R channels are output DIGITAL INPUT AUDIO VIDEO 6CH INPUT L DVD R FRONT SURROUND SUB WOOFER CENTER CD DTV CBL COAXIAL OPTICAL CD DTV CBL V AUX IN VCR 2 3 TUNER AM ANT FM ANT GND Y L R L R S...

Страница 17: ... the center speaker with the front face of your video monitor Place the speaker centrally between the front speakers and as close to the monitor as possible such as directly over or under it Surround speakers SR and SL The surround speakers are used for effect and surround sounds Place these speakers behind your listening position facing slightly inwards about 1 8 m above the floor CONNECTIONS Sub...

Страница 18: ...way from the monitor Connecting to the FRONT A SPEAKERS terminals A speaker cord is actually a pair of insulated cables running side by side One cable is colored or shaped differently perhaps with a stripe groove or ridges Connect the striped grooved etc cable to the red terminals on this unit and your speaker Connect the plain cable to the black terminals Connecting to the FRONT B CENTER and SURR...

Страница 19: ... menu to FRONT Use the control on the subwoofer to adjust its volume level You can also adjust the volume level by using this unit s remote control see SETTING THE SPEAKER LEVELS on page 47 Right Left Front A speaker Right Left Left FRONT SPEAKERS terminals You can connect up to two speaker systems to these terminals When using only one speaker system connect it to either of the FRONT A or the FRO...

Страница 20: ...T FM AM A B C D E NEXT PRESET TUNING INPUT MODE 6CH INPUT SET MENU MEMORY MAN L AUTO FM TUNING MODE AUTO MAN L MONO FREQ TEXT EON PTY SEEK MODE START VOLUME STEREO PROGRAM INPUT EFFECT TONE CONTROL BASS TREBLE STANDBY ON PHONES SILENT CINEMA SPEAKERS A B OFF 1 TEST PROG PROG STEREO TUNER CD MD CD R V AUX 6CH IN q DTS 6 1 5 1 NIGHT SLEEP DVD D TV CBL VCR PRESET A B C D E VOLUME POWER POWER STANDBY ...

Страница 21: ...our listening environment use the more detailed parameters from the SOUND menu instead of those under the BASIC menu see page 41 to 44 Altering any parameters in the BASIC menu will reset all parameters in the SOUND menu LEVEL SET MENU MUTE VOLUME 1 2 4 6 3 Press u d to change the display to the setting you want to alter 1 SETUP Changes the speaker and amplifier settings to suit the size of the ro...

Страница 22: ...f YES NO 1 FL R Adjust the balance between the front left and right speakers 2 C Adjust the balance between the front left and center speakers 3 SL Adjust the balance between the front left and surround left speakers 4 SR Adjust the balance between the surround left and surround right speakers SET BASIC SYSTEM SETTINGS NO YES After altering the 1 SETUP parameters readjust the output levels of the ...

Страница 23: ...test tone is output at the same volume from all of the speakers select CHECK OK YES Press d to exit from the SETUP menu If the volume of the test tone varies between speakers press to change the display to NO Note The indicator of the speaker currently outputting the test tone flashes on the front panel display SP LEVEL Setting speaker output levels Use this menu to compare and adjust the test ton...

Страница 24: ...nd to an extreme level the tonal quality from the center and surround speakers may not match that of the front left and right speakers If you have connected a recording component to the VCR OUT or MD CD R OUT jacks and you notice distortion or low volume during playback from other components try turning on the recording component STANDBY ON POWER or or Remote control Remote control Front panel Fro...

Страница 25: ... indicator in the front panel display lights up Press NIGHT once more to return to normal reproduction y You can use night listening mode with any of the sound field programs Night listening mode may vary in effectiveness depending on the input source and surround sound settings you use When you have finished using this unit Press STANDBY ON POWER on the remote control to set this unit in standby ...

Страница 26: ... y You can adjust the default input mode on this unit see page 44 Notes When you play DTS encoded CD LDs with the input mode set to AUTO This unit automatically switches to the DTS decoding mode The unit remains in DTS mode and the t indicator may flash for up to 30 seconds after playback of the DTS source is complete To manually release the DTS mode press INPUT MODE to reselect AUTO The DTS decod...

Страница 27: ...ield programs Minimize sound reflections in your room to maximize the effect created by the program When you select an input source this unit automatically selects the last sound field program used with that source When you set this unit in standby mode it stores the current source and sound field program in memory and automatically selects them when you turn on the power again If the unit receive...

Страница 28: ...ed to the 6CH INPUT jacks is being played When the unit is reproducing a Dolby Digital KARAOKE source When headphones are connected to the PHONES jack The 6 1 5 1 setting resets to AUTO when you turn the unit power off Selecting PRO LOGIC or PRO LOGIC II You can listen to 2 channel sources decoded into four discrete channels by selecting PRO LOGIC or five discrete channels by selecting PRO LOGIC I...

Страница 29: ...automatically switch to the appropriate decoder for playback Virtual CINEMA DSP With Virtual CINEMA DSP you can enjoy all sound field programs without surround speakers It creates virtual speakers to reproduce a natural sound field You can listen to virtual CINEMA DSP by setting 1C SURR in the set menu to NONE Sound field processing changes to Virtual CINEMA DSP automatically Note Virtual CINEMA D...

Страница 30: ...ing list gives you a brief description of the sound fields produced by each of the sound field programs Keep in mind that most of these are precise digital recreations of actual acoustic environments No 1 2 3 4 Program CONCERT HALL except China model HALL IN CHINA China model only JAZZ CLUB ROCK CONCERT ENTERTAINMENT Disco ENTERTAINMENT 5ch Stereo Features A large round concert hall with a rich su...

Страница 31: ... Logic II decoder for Dolby Surround and 2 channel sources Dolby Digital DTS decoder for multi channel sources and Dolby Digital Matrix 6 1 or DTS Matrix 6 1 decoder for adding a surround back channel the surround back channel is outputted from virtual surround back speaker You can select CINEMA DSP programs to optimize these decoders and the DSP sound patterns depending on the input source CINEMA...

Страница 32: ...oward the screen restraining the echo effect of conversations without losing clarity The built in decoder reproduces source sounds and sound effects precisely No DSP effect is applied in this program This program ideally simulates the multi surround speaker systems of the 35 mm film theaters Dolby Pro Logic decoding Dolby Digital decoding or DTS decoding and digital sound field processing create p...

Страница 33: ...S equipped movie theater without sacrificing the clear separation of all channels Dolby Digital DTS Matrix 6 1 DSP sound field effect These programs provide you with the maximum experience of the spacious surround effects by adding an extra surround back DSP sound field created from the virtual surround back speaker Dolby Pro Logic DSP sound field effect Most movie material has 4 channel left cent...

Страница 34: ...and manual Automatic tuning is effective when station signals are strong and there is no interference Automatic tuning 1 Press INPUT l h or TUNER on the remote control to select TUNER as the input source 2 Press FM AM to select the reception band FM or AM appears on the front panel display 3 Press TUNING MODE AUTO MAN L MONO so that the AUTO indicator lights up on the front panel display If the co...

Страница 35: ...ore is weak in signal strength tune in to it manually in the monaural mode and store it by following the procedure described in Manually presetting stations on page 34 Automatic preset tuning options You can select the preset number from which this unit will store FM stations and or begin tuning toward lower frequencies After pressing MEMORY in step 3 1 Press A B C D E then PRESET TUNING l h to se...

Страница 36: ...ning instructions When tuned in to a station the front panel display shows the frequency of the station received 2 Press MEMORY MAN L AUTO FM The MEMORY indicator flashes for about 5 seconds 3 Press A B C D E repeatedly to select a preset station group A to E while the MEMORY indicator is flashing The group letter appears Check that the colon is showing on the front panel display Flashes TUNING Pr...

Страница 37: ...s A B C D E 2 Press PRESET TUNING l h or PRESET on the remote control to select a preset station number 1 to 8 The preset group and number appear on the front panel display along with the station band frequency and the TUNED indicator lights up Shows the exchange of stations has been completed Front panel Remote control or Front panel Remote control or TUNING V AUX VCR DTV CBL DVD MD CD R TUNER CD...

Страница 38: ...button prior to this This is because this unit has not finished receiving all of the Radio Data System data on the station Radio Data System data not offered by the station cannot be selected This unit cannot utilize the Radio Data System data service if the signal received is not strong enough In particular the RT mode requires a large amount of data so it is possible that the RT mode may not be ...

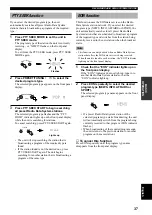
Страница 39: ...he Radio Data System station network If you select the desired program type NEWS INFO AFFAIRS or SPORT the unit automatically searches for all preset Radio Data System stations that are scheduled to broadcast a program of the required type and switches from the station being currently received to the new station when the broadcast starts Note This function can only be used when an Radio Data Syste...

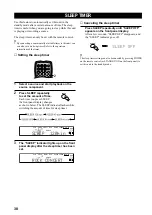
Страница 40: ... shown below The SLEEP indicator flashes while switching the amount of time for sleep timer 3 The SLEEP indicator lights up on the front panel display after the sleep timer has been set SLEEP TIMER Canceling the sleep timer Press SLEEP repeatedly until SLEEP OFF appears on the front panel display After a few seconds SLEEP OFF disappears and the SLEEP indicator goes off y The sleep timer setting ca...

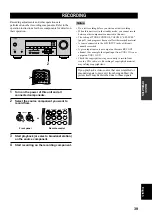
Страница 41: ...annot record between other components connected to this unit The setting of TONE CONTROL VOLUME SP LEVEL page 21 and programs does not affect the recorded material A source connected to the 6CH INPUT jacks of this unit cannot be recorded A given input source is not output on the same REC OUT channel For example the signal input from VCR 1 IN is not output on VCR 1 OUT Check the copyright laws in y...

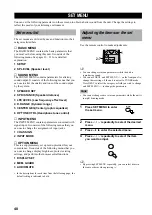
Страница 42: ...wing menus See pages 19 21 for a detailed explanation 1 SETUP 2 SP LEVEL Speaker level SOUND MENU The SOUND MENU contains parameters for altering sound output It consists of the following menus that you can use to alter the quality and tone of the sound output by the system 1 SPEAKER SET 2 SP DISTANCE Speaker distance 3 LFE LEVEL Low frequency effect level 4 D RANGE Dynamic range 5 CENTER GEQ Cent...

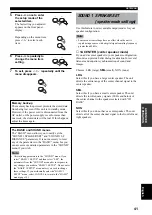
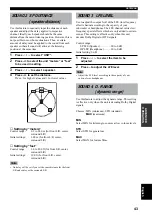
Страница 43: ...SOUND menu alter in response to any changes you make in BASIC 1 SETUP Do not enter the BASIC 1 SETUP menu unless you wish to change these settings If you accidentally enter the BASIC 1 SETUP menu select CANCEL to return to the BASIC menu page 19 SOUND 1 SPEAKER SET speaker mode settings Use this feature to select suitable output modes for your speaker configuration Note Some menu item settings hav...

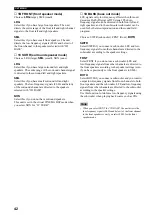
Страница 44: ...nit decodes a Dolby Digital or DTS signal The Low frequency signals can be directed to both front left and right speakers and to the subwoofer subwoofer can be used for both stereo reproduction and the sound field program Choices SWFR subwoofer FRNT front BOTH SWFR Select SWFR if you connect a subwoofer LFE and low frequency signals from other channels are directed to the subwoofer according to th...

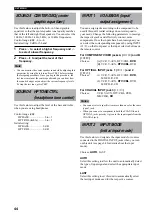
Страница 45: ...r general use MAX Select MAX for feature films SET MENU SOUND 2 SP DISTANCE speaker distance Use this feature to manually input the distance of each speaker and adjust the delay applied to respective channel Ideally each speaker should be the same distance from the main listening position However this is not possible in most home situations Thus a certain amount of delay must be applied to the sou...

Страница 46: ... if this unit s initial settings do not correspond to your needs Change the following parameters to reassign the respective jacks and effectively connect more components Once the inputs have been reassigned you can select the corresponding component by using INPUT l h on the front panel or the input selector buttons on the remote control For COMPONENT VIDEO jacks A 1A A and B 1A B Choices A VCR V ...

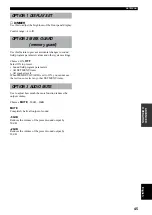
Страница 47: ...s Choices ON OFF Select ON to protect Sound field program parameters All SET MENU items All speaker levels When MEMORY GUARD is set to ON you cannot use the test tone or select any other SET MENU items OPTION 3 AUDIO MUTE Use to adjust how much the mute function reduces the output volume Choices MUTE 50dB 20dB MUTE Completely halts all output of sound 50dB Reduces the volume of the present sound o...

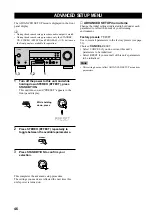
Страница 48: ...his unit s power is turned on ADVANCED SETUP menu items Change the initial settings indicated in bold under each parameter to reflect the needs of your listening environment Factory presets PRESET Use to reset all parameters to the factory presets see page 53 Choices CANCEL RESET Select CANCEL if you do not want this unit s parameters to be initialized Select RESET if you want all of this unit s p...

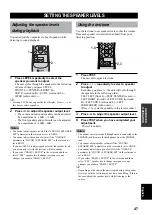
Страница 49: ... levels set with the test tone may not be to your liking If this is the case adjust the speaker levels while listening to the source SETTING THE SPEAKER LEVELS Adjusting the speaker levels during playback You can adjust the output level of each speaker while listening to sound playback 1 Press LEVEL repeatedly to select the speaker you want to adjust The unit cycles through the speakers in the fol...

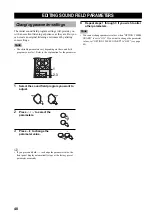
Страница 50: ...meter 1 Select the sound field program you want to adjust 2 Press u d to select the parameters 3 Press to change the parameter value y If you press and hold to change the parameter value the front panel display automatically stops at the factory preset parameter momently TEST PROG PROG STEREO LEVEL SET MENU MUTE VOLUME VOLUME 1 2 3 PROG PROG 4 Repeat steps 1 through 3 if you wish to alter other pa...

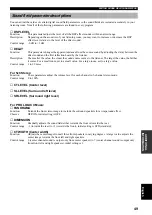
Страница 51: ...seems For a small room set to a small value For a large room set to a large value Control range 1 to 99 msec For 5ch Stereo Function These parameters adjust the volume level for each channel in 5 channel stereo mode Control range 0 to 100 CT LEVEL Center level SL LEVEL Surround left level SR LEVEL Surround right level For PRO LOGIC II Music PANORAMA Function Extends the front stereo image to inclu...

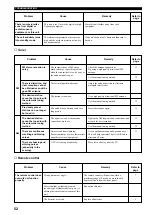
Страница 52: ... The sound is muted Incorrect cable connections The sound effect is switched off A Dolby Surround Dolby Digital or DTS decoding program is being used with material not encoded with Dolby Surround Dolby Digital or DTS A digital signal with a sampling frequency of greater than 48 kHz is input to this unit Remedy Connect the power cord firmly Make sure all speaker wire connections on this unit and on...

Страница 53: ... menu is set to SWFR or BOTH and your system does not include a subwoofer The speaker mode settings front center or surround on the set menu does not match your speaker configuration Incorrect cable connections The component connected to the OUT REC jacks of this unit is turned off It is not possible to record the sound effect with a recording component OPTION 2 MEM GUARD in the SET MENU is set to...

Страница 54: ...th the automatic tuning method Previously preset stations can no longer be tuned in The desired station cannot be tuned in with the automatic tuning method There are continuous crackling and hissing noises There are buzzing and whining noises especially in the evening Problem FM AM Cause The characteristics of FM stereo broadcasts may cause this problem when the transmitter is too far away or the ...

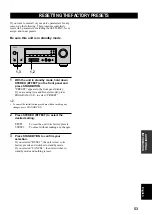
Страница 55: ...gn and tuner presets Be sure this unit is in standby mode 1 With the unit in standby mode hold down STEREO EFFECT on the front panel and press STANDBY ON PRESET appears in the front panel display If you are using Asia and General model press PROGRAM l h to select PRESET y To cancel the initialization procedure without making any changes press STANDBY ON 2 Press STEREO EFFECT to select the desired ...

Страница 56: ...effects monaural The surround channel reproduces sound within a narrow frequency range Dolby Surround is widely used with nearly all video tapes and laser discs and in many TV and cable broadcasts as well The Dolby Pro Logic decoder built into this unit employs a digital signal processing system that automatically stabilizes the volume on each channel to enhance moving sound effects and directiona...

Страница 57: ...her the sampling frequency the wider the range of frequencies that can be played back and the higher the number of quantized bits the more finely the sound level can be reproduced SILENT CINEMA YAMAHA has developed a natural realistic sound effect DSP algorithm for headphones Parameters for headphones have been set for each sound field so that accurate representations of all the sound field progra...

Страница 58: ...s 1 kHz 10 THD 6 Ω 110 W Dynamic Power IHF 6 4 2 Ω 105 135 165 W Frequency Response CD etc to Front L R 10 Hz to 100 kHz 3 dB Total Harmonic Distortion 1 kHz 50 W 6 Ω Front L R 0 06 or less Signal to Noise Ratio IHF A Network CD 250 mV shorted to Front L R Effect Off 100 dB or more Residual Noise IHF A Network Front L R 150 µV or less Channel Separation 1 kHz 10 kHz CD etc 5 1 kΩ terminated to Fro...

Страница 59: ...BURG GERMANY YAMAHA ELECTRONIQUE FRANCE S A RUE AMBROISE CROIZAT BP70 CROISSY BEAUBOURG 77312 MARNE LA VALLEE CEDEX02 FRANCE YAMAHA ELECTRONICS UK LTD YAMAHA HOUSE 200 RICKMANSWORTH ROAD WATFORD HERTS WD18 7GQ ENGLAND YAMAHA SCANDINAVIA A B J A WETTERGRENS GATA 1 BOX 30053 400 43 VÄSTRA FRÖLUNDA SWEDEN YAMAHA MUSIC AUSTRALIA PTY LTD 17 33 MARKET ST SOUTH MELBOURNE 3205 VIC AUSTRALIA Printed in Chi...

Отзывы: