■
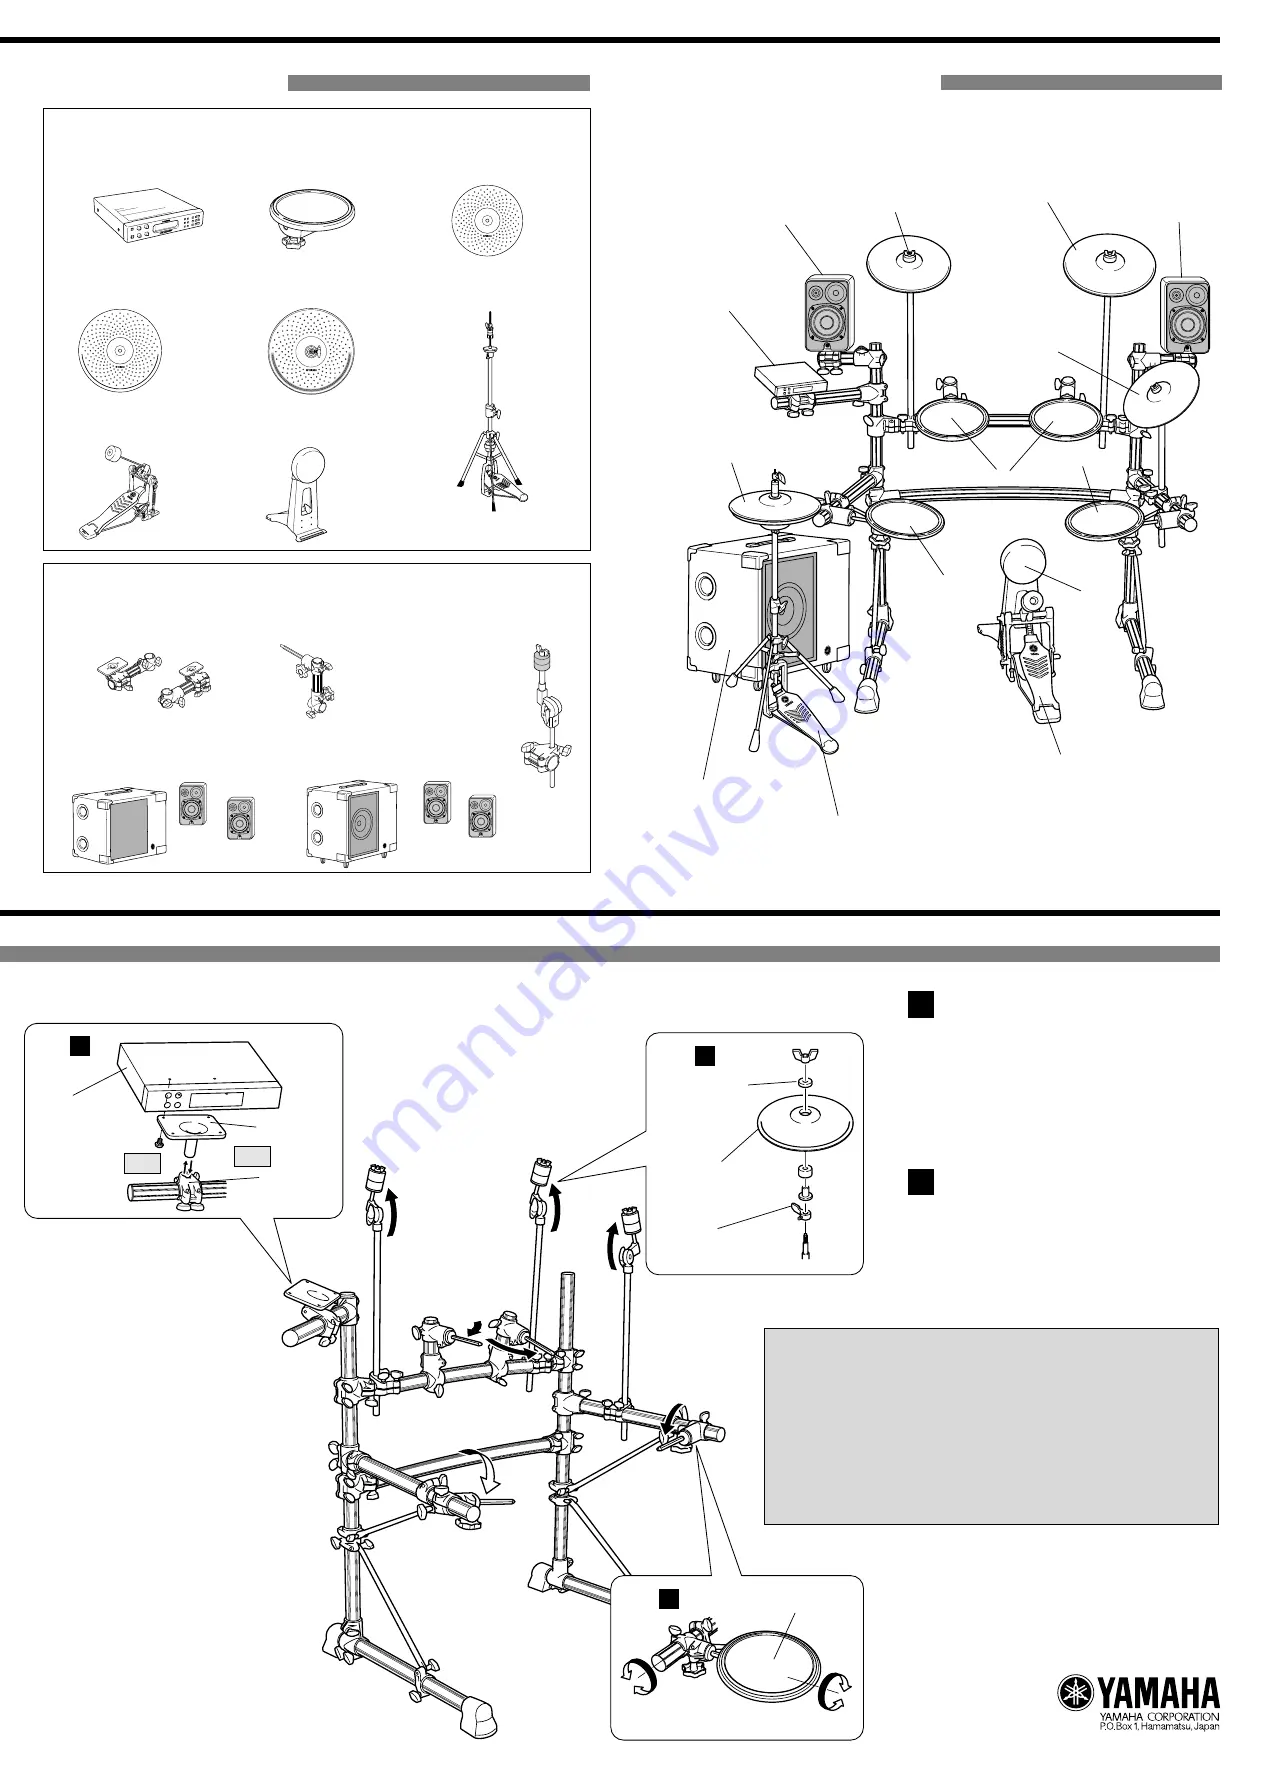
Set up example
Attaching the cymbal pads
4
Make sure all bolts on clamps, pads, etc., are firmly tightened.
Loose or over-tightened bolts may result in the part falling off and/or
damage. Please use caution.
After assembly is complete, setup the kick pad, real hi-hat pad, etc.,
and connect the cables. Use the supplied cable bands to secure the
cables to the frame pipes to keep cables out of the way during per-
formance.
If the rack is moved even after setup is complete, make sure the
bolts are loosened before moving the rack.
Attach the cymbal pads to the cymbal hold-
ers and adjust their position, then secure in
place.
(Please refer to the Owner's Manual that
came with the cymbal pads on attaching the
cymbal pads.)
Attaching the drum pads
5
Attach drum pads to the hexagonal rod cyl-
inder and adjust their position, the secure
in place.
Drum Trigger
Module
Holder Clamp
Module Holder
Step
3-1
Step
3-2
Drum Pad
Step
5
Step
4
Printed in Indonesia
WG24080
■
Optional Parts
Step
3
e
q
w
w
w
y
u
i
r
Satellite Speaker
Satellite Speaker
PCY130S
TP65S
Sub Woofer amp unit
PCY150S
t
RHH130
e
PCY130
●
Pad and Drum Trigger Grouping
q
DTX Series
Drum Trigger Module
w
TP65/65S
Drum Pad
e
PCY130/130S
Cymbal Pad
r
PCY150S
Cymbal Pad
t
RHH130
Real Hi-hat Pad
y
Hi-hat stand
*HS740 etc.
• SPAT1
Speaker Attachment
• TPCL65
Tom Holder
• CYAT65
Cymbal Attachment
●
Monitor System and Attachment Grouping
• MS50DR
•
Sub Woofer
amp unit
• MS100DR
•
Sub Woofer
amp unit
u
Foot Pedal
FP-7210 etc.
i
KP65
Kick Pad
•
Satellite
Speakers
•
Satellite
Speakers
Cymbal Pad
(PCY130/130S/150S)
Anti-swivel brace
(supplied with the
(PCY130/130S/150S)
Felt


