4.
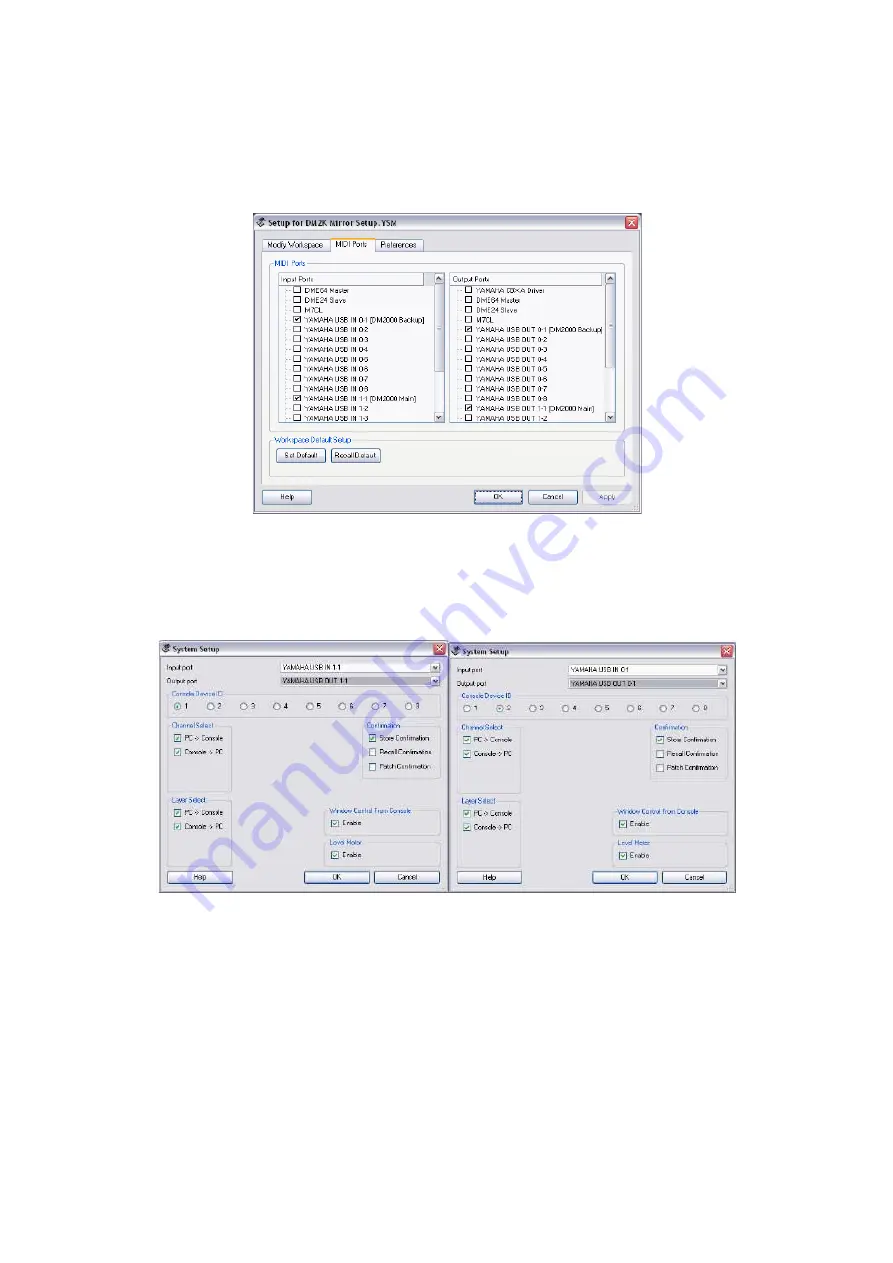
Then in the MIDI Ports tab of the Setup Window, select the USB
ports to use for communicating with the Consoles:
i. YAMAHA USB IN 0-1 and 1-1
ii. YAMAHA USB OUT 0-1 and 1-1
5.
In the System Setup window of each Console Editor, select the
correct In Port, Out Port and ID for each Console, as shown below.
(The ID here must correspond with the ID selected in the
MIDI/HOST page of the Console).
6.
When synchronising with the consoles, remember to check the “All
Libs” option to save/load all the Scene Memories and Libraries.
7.
To transfer the data from Console #1 to #2, first sync from Console
#1 to PC, then save the session onto the PC. Next, open this
session into the Editor for Console #2 and sync from PC to Console
#2.
8.
Now you are ready to enjoy “Mirroring” redundancy with Yamaha
Digital Mixers!
7
YAMAHA Digital Mixers: A Redundancy Guide


